Set up new POP3 e-mail account in Microsoft Outlook 2013
Bellow you find a detailed description of how you set up a new POP3 e-mail account in Microsoft Outlook 2013.
Step 1
First of all start Microsoft Outlook 2013.
You can do so by typing "Outlook 2013" into your Windows searchbar or with a desktop or taskbar icon.

Step 2
Click on the blue tab "File" at the upper left corner of the window.

Step 3
Next click on "+Add Acount".

Step 4
Select the last point in this list "Manual setup or additional server types".
Hit the "Next >" button to continue.

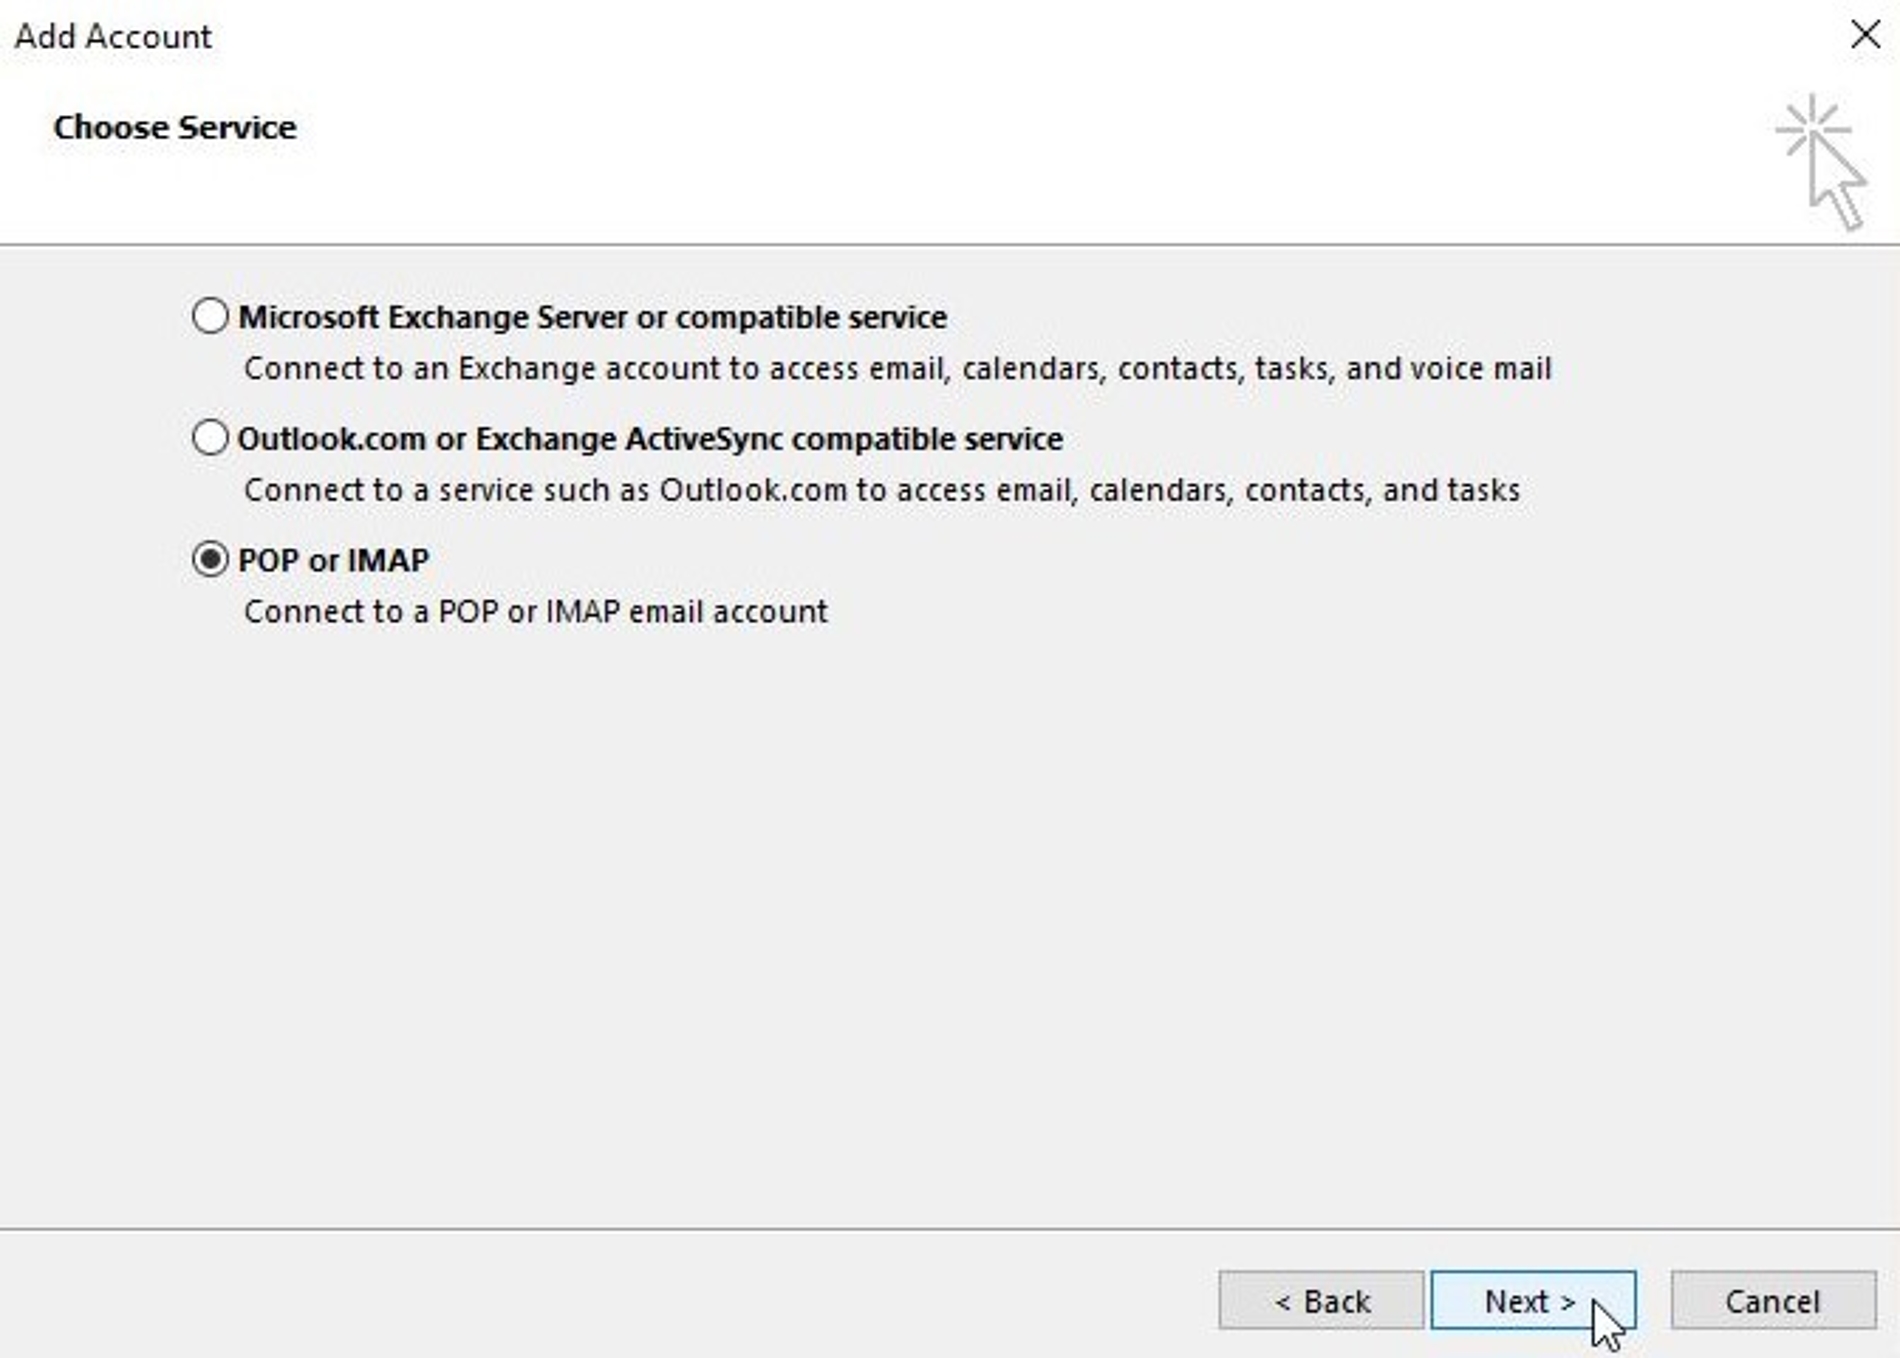
Step 5
In this window you select again the last option "POP or IMAP".
Click "Next >" to continue.
Step 6
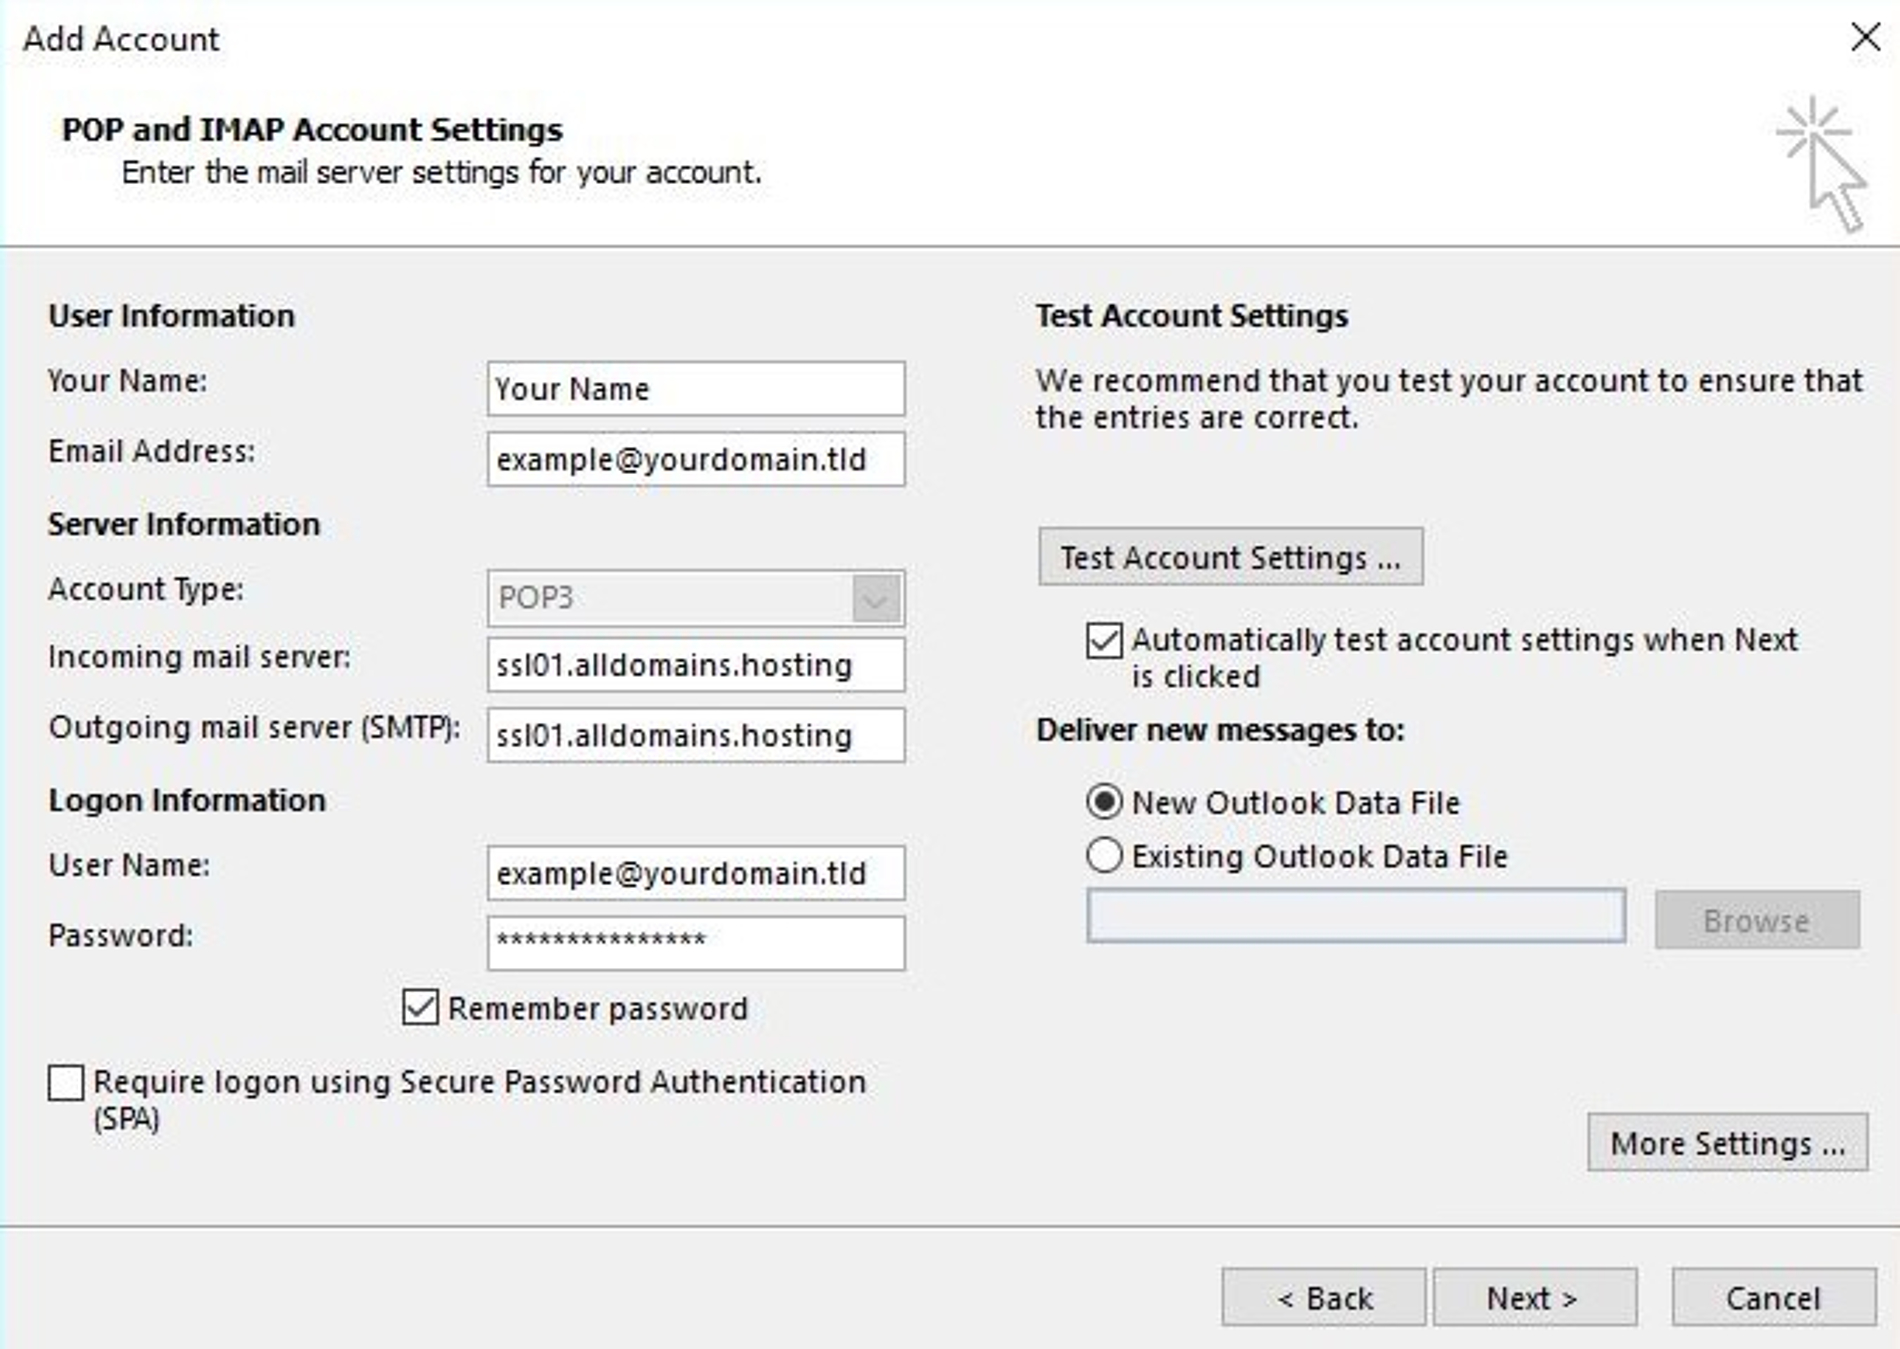
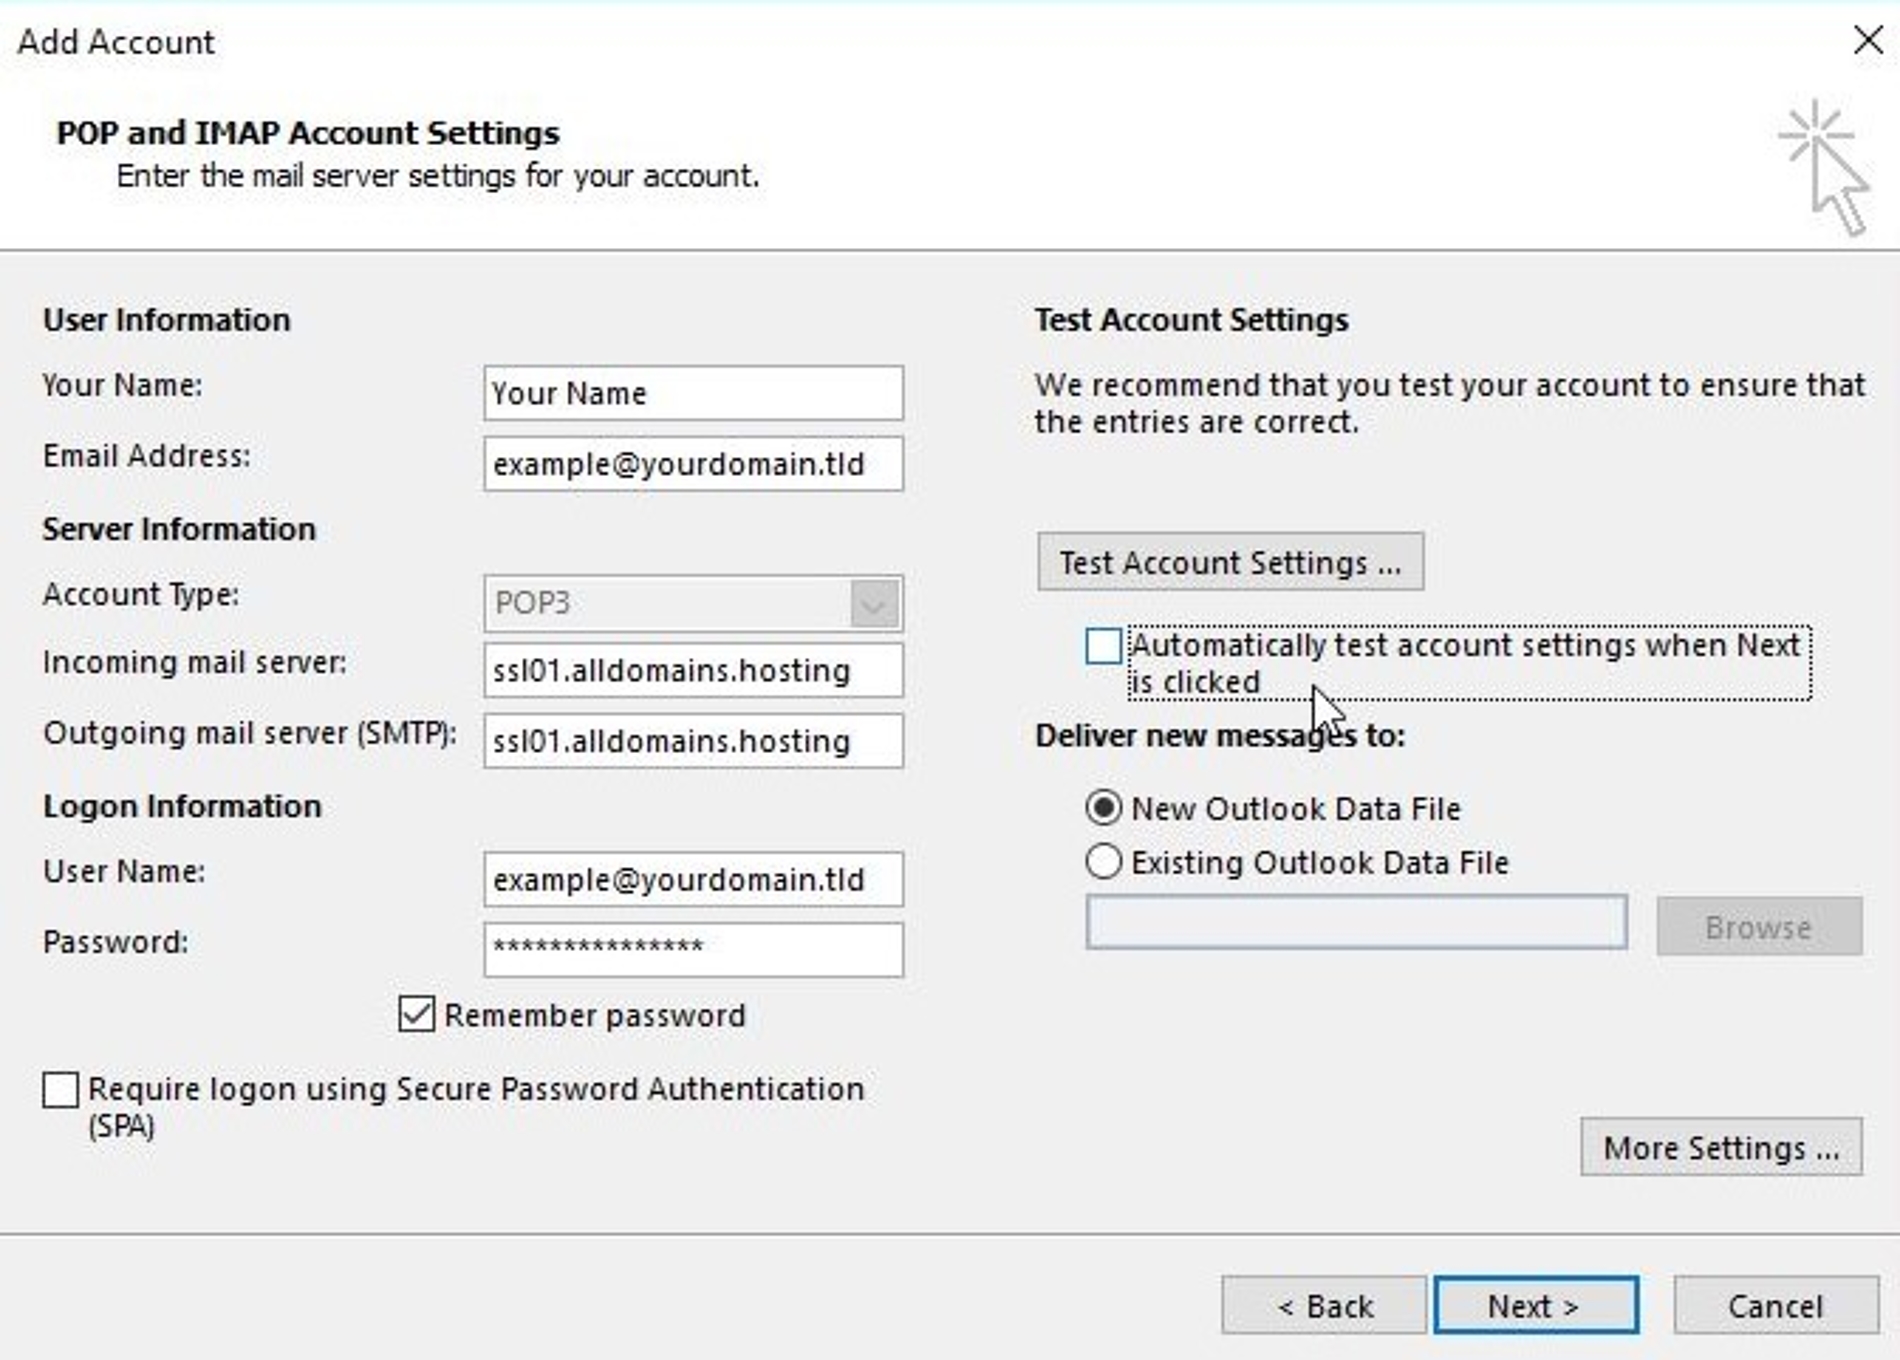
Now you have to enter the "User", "Server" and "Logon Information" of your e-mail account.
At the point "User Information" you type in your name and the e-mail address which you want to set up.
Important:
The "Server Information" should be set as shown in the screenshot to ensure you are using a SSL secured connection.
The "Account Type" is POP3.
"Incoming mail server" and "Outgoing mail server (SMTP)" are both ssl01.alldomains.hosting.
At the point "Logon Information" type in your e-mail address as "User Name" and the associated password which you set for this e-mail account in your Control Panel at the module Email Manger.
All needed settings for this step you can look up at the Email Manager module of your Control Panel. Click at the "Action >" button besides your e-mail address and open "Mail Client Settings".
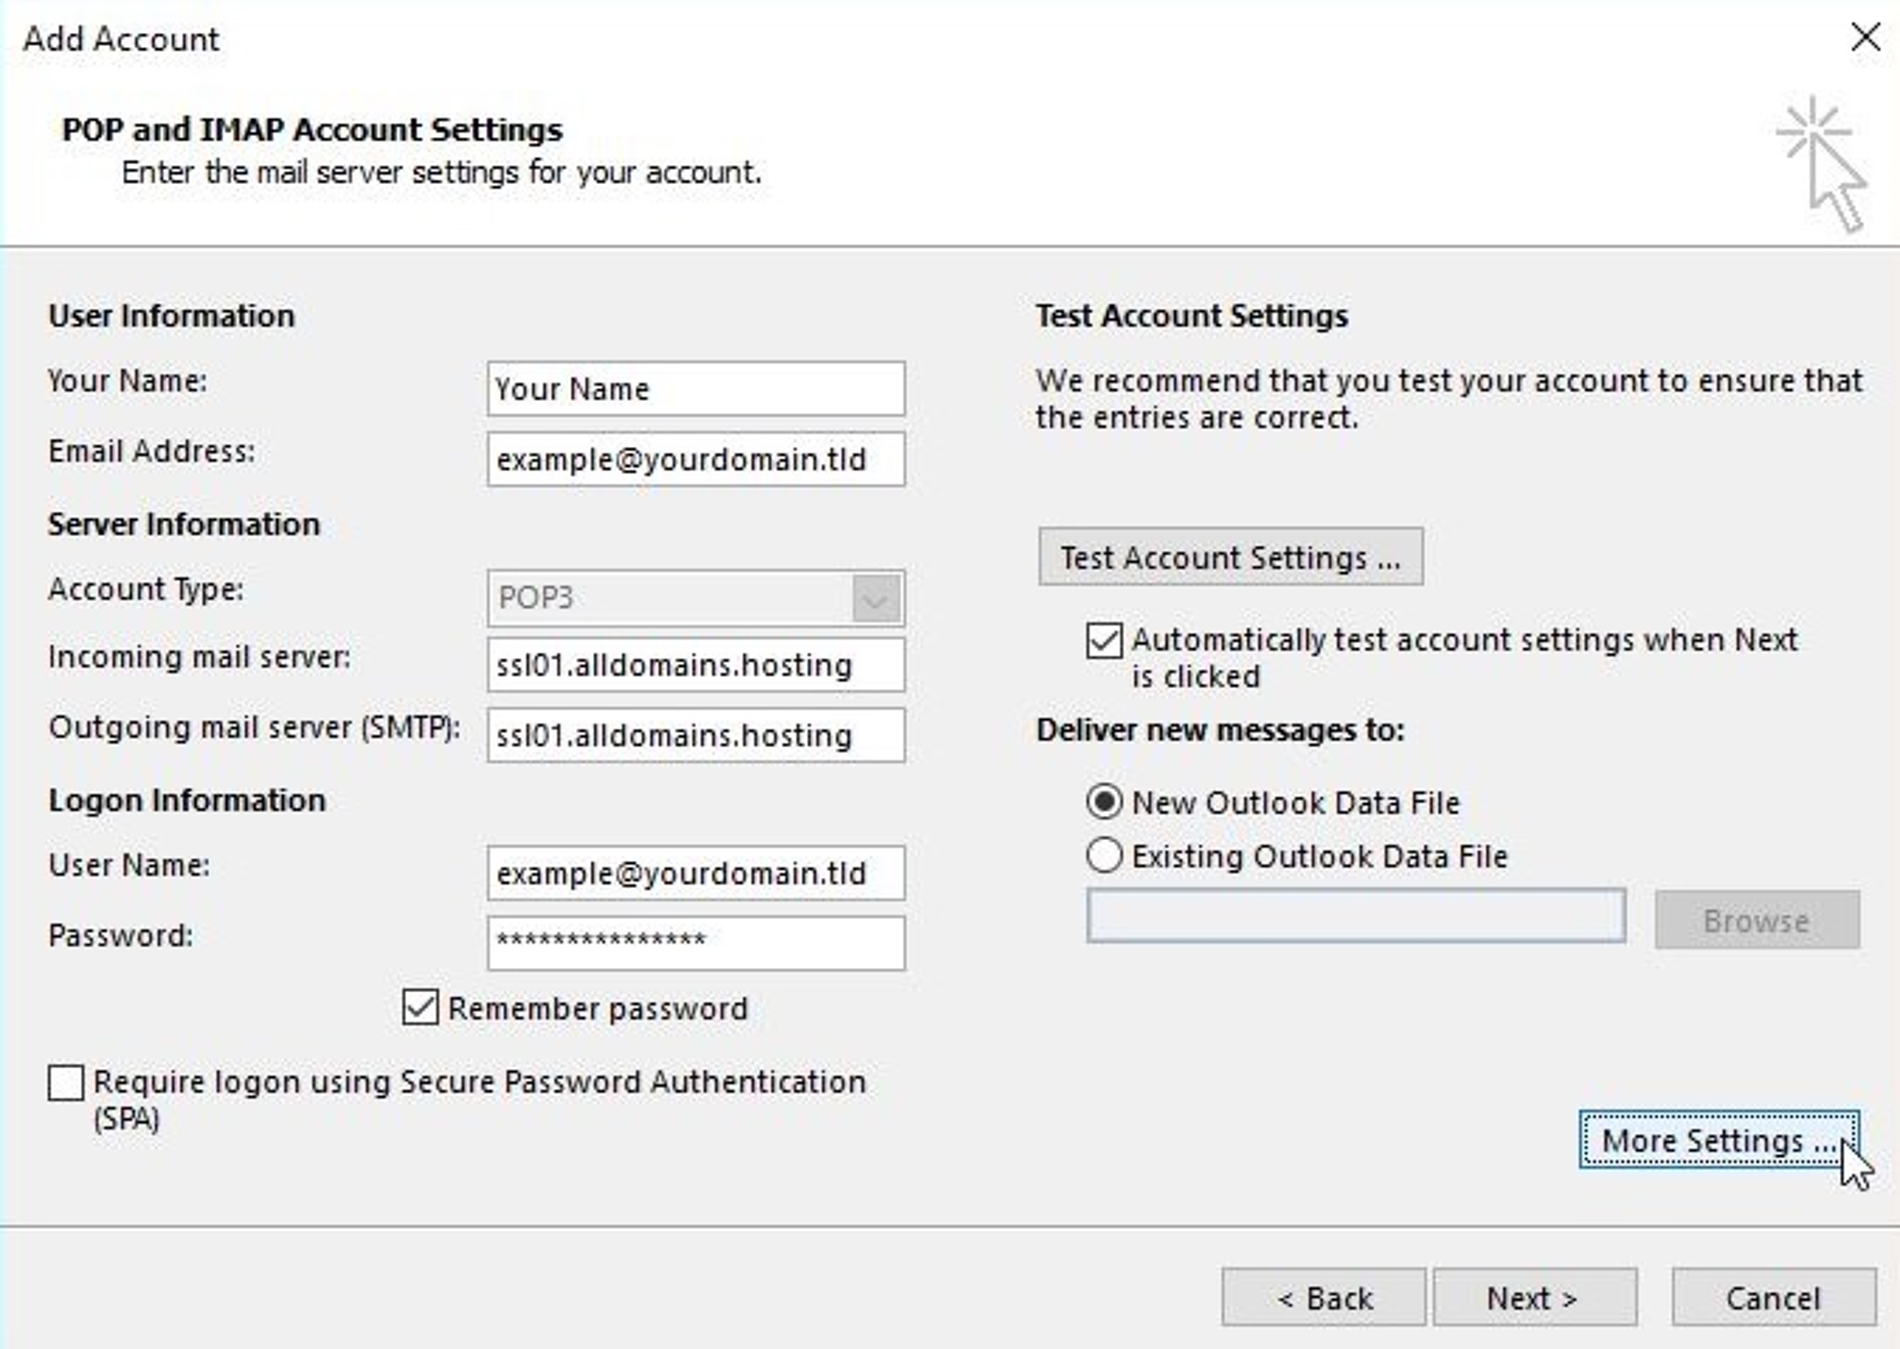
Step 7
Please click on "More Settings …" on the right hand side.
Step 8
In the tab "General" you can set a name for your e-mail account but this is not necessary. If you don’t choose a name the e-mail address will be set as name.

Step 9
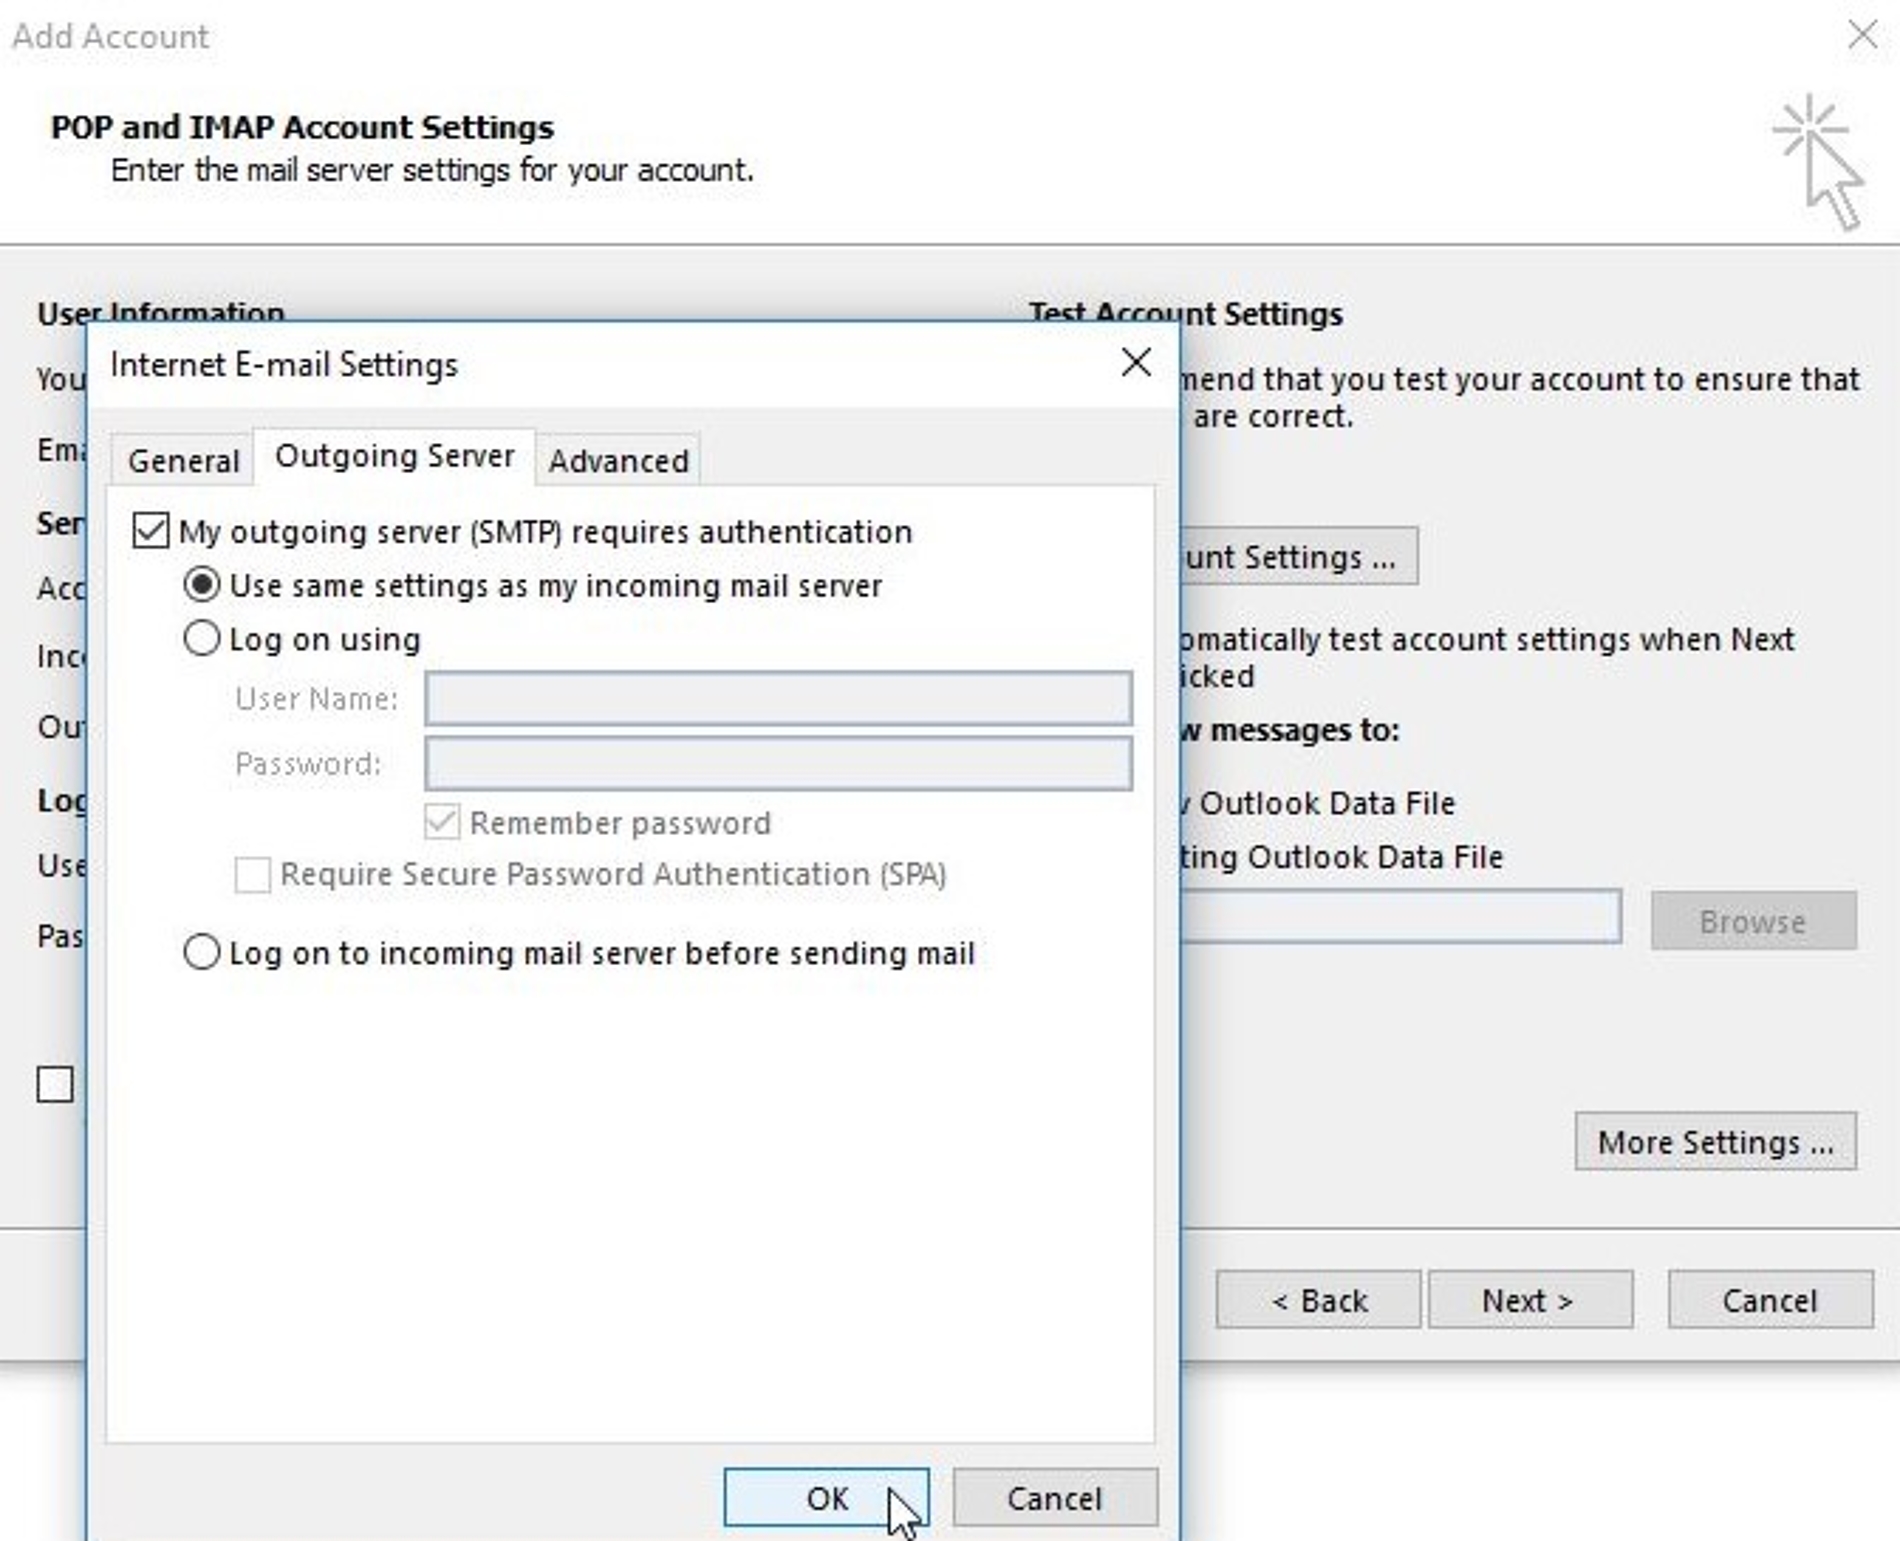
Switch to the tab "Outgoing Server" and make sure the first two points "My outgoing Server (SMTP) requires authentication" and "Use same setting as my incoming mail server" are selected.
Now switch to the tab "Advanced".
Step 10
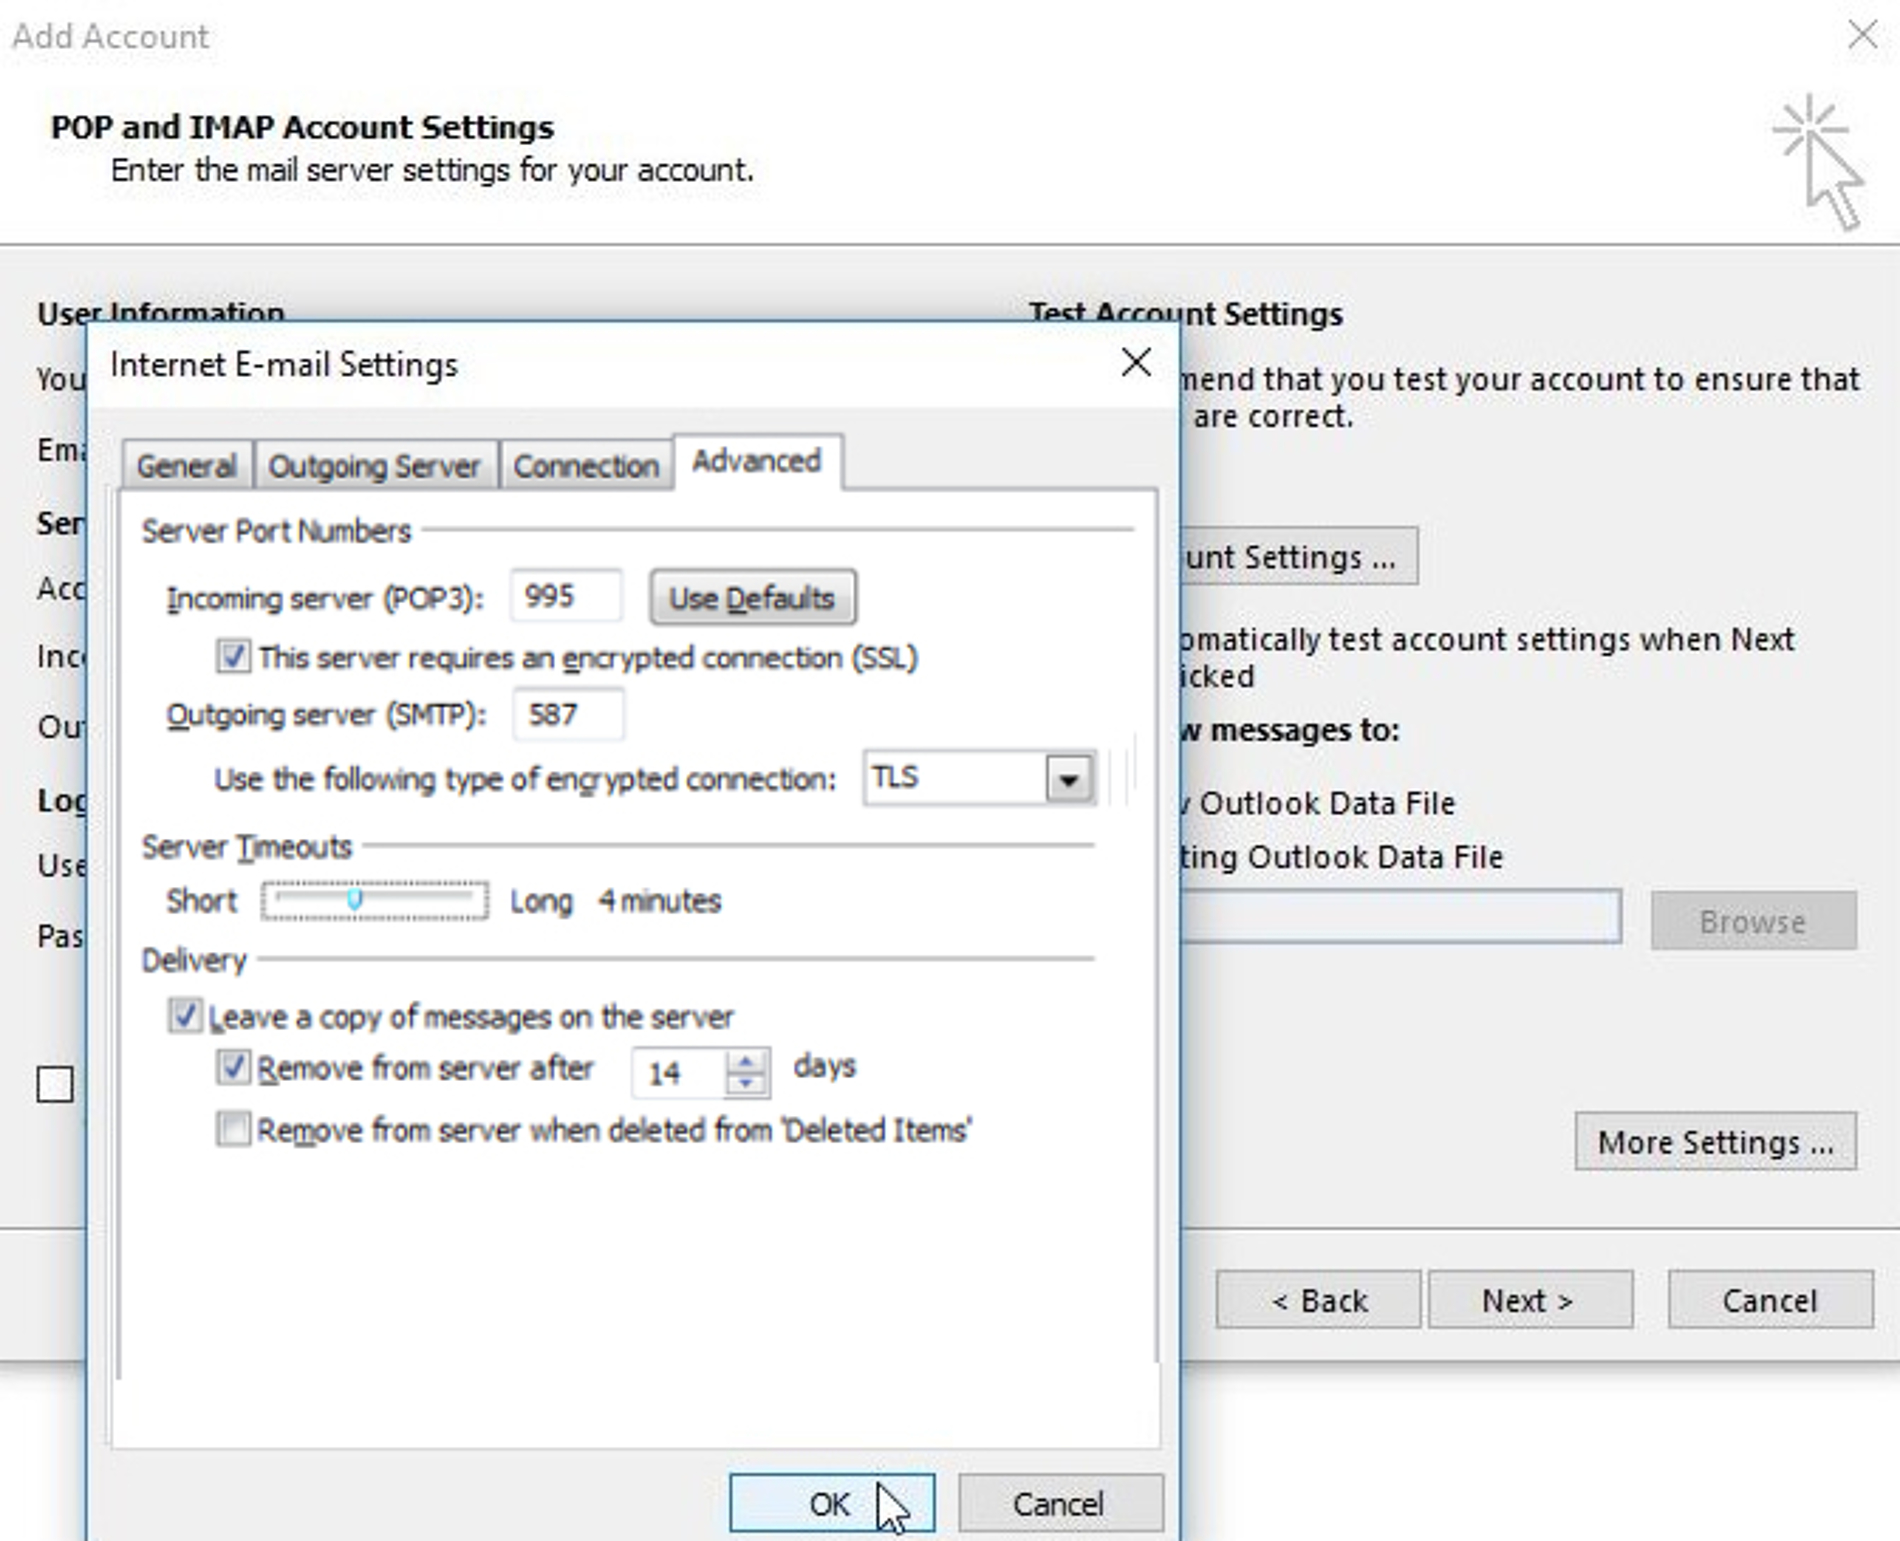
In the tab "Advanced" you can set the ports and encryption method of your incoming server and your outgoing server.
Incoming server (POP3):
Port: 995
Set the tick at "This server requires an encrypted connection (SSL)"
Outgoing server (SMTP) (choose one of the two following possibilities): Port 587 with the encryption method "TLS"
- or -
Port 464 with the encryption method "SSL"
Click "OK" to save your settings and close this window.
Port: 995
Set the tick at "This server requires an encrypted connection (SSL)"
Outgoing server (SMTP) (choose one of the two following possibilities): Port 587 with the encryption method "TLS"
- or -
Port 464 with the encryption method "SSL"
Click "OK" to save your settings and close this window.
Step 11
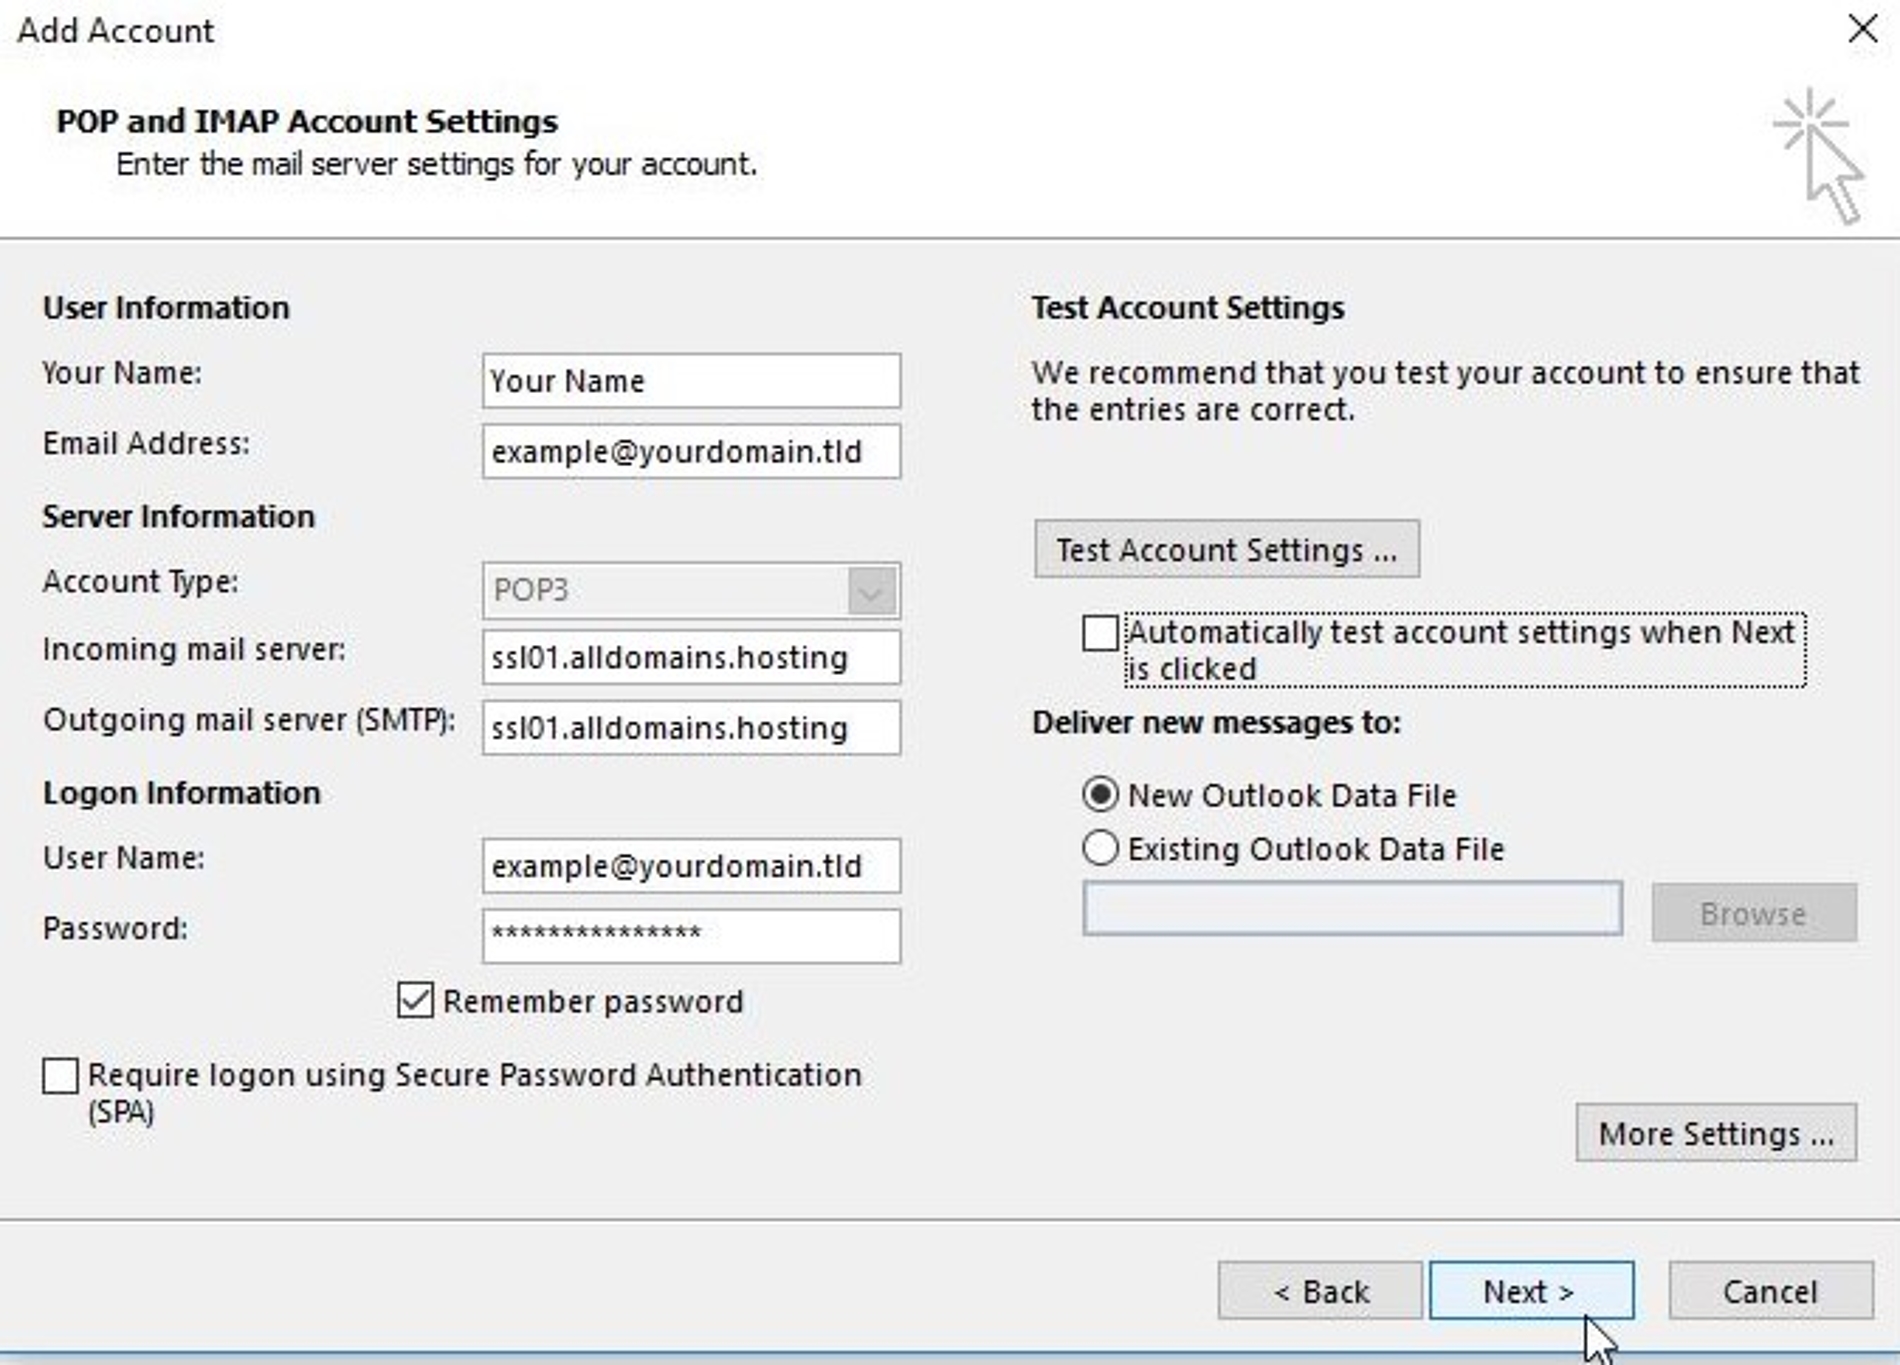
Back at the previous window you have to uncheck the box at "Automatically test account settings when Next is clicked".
Click "Next >" to continue.
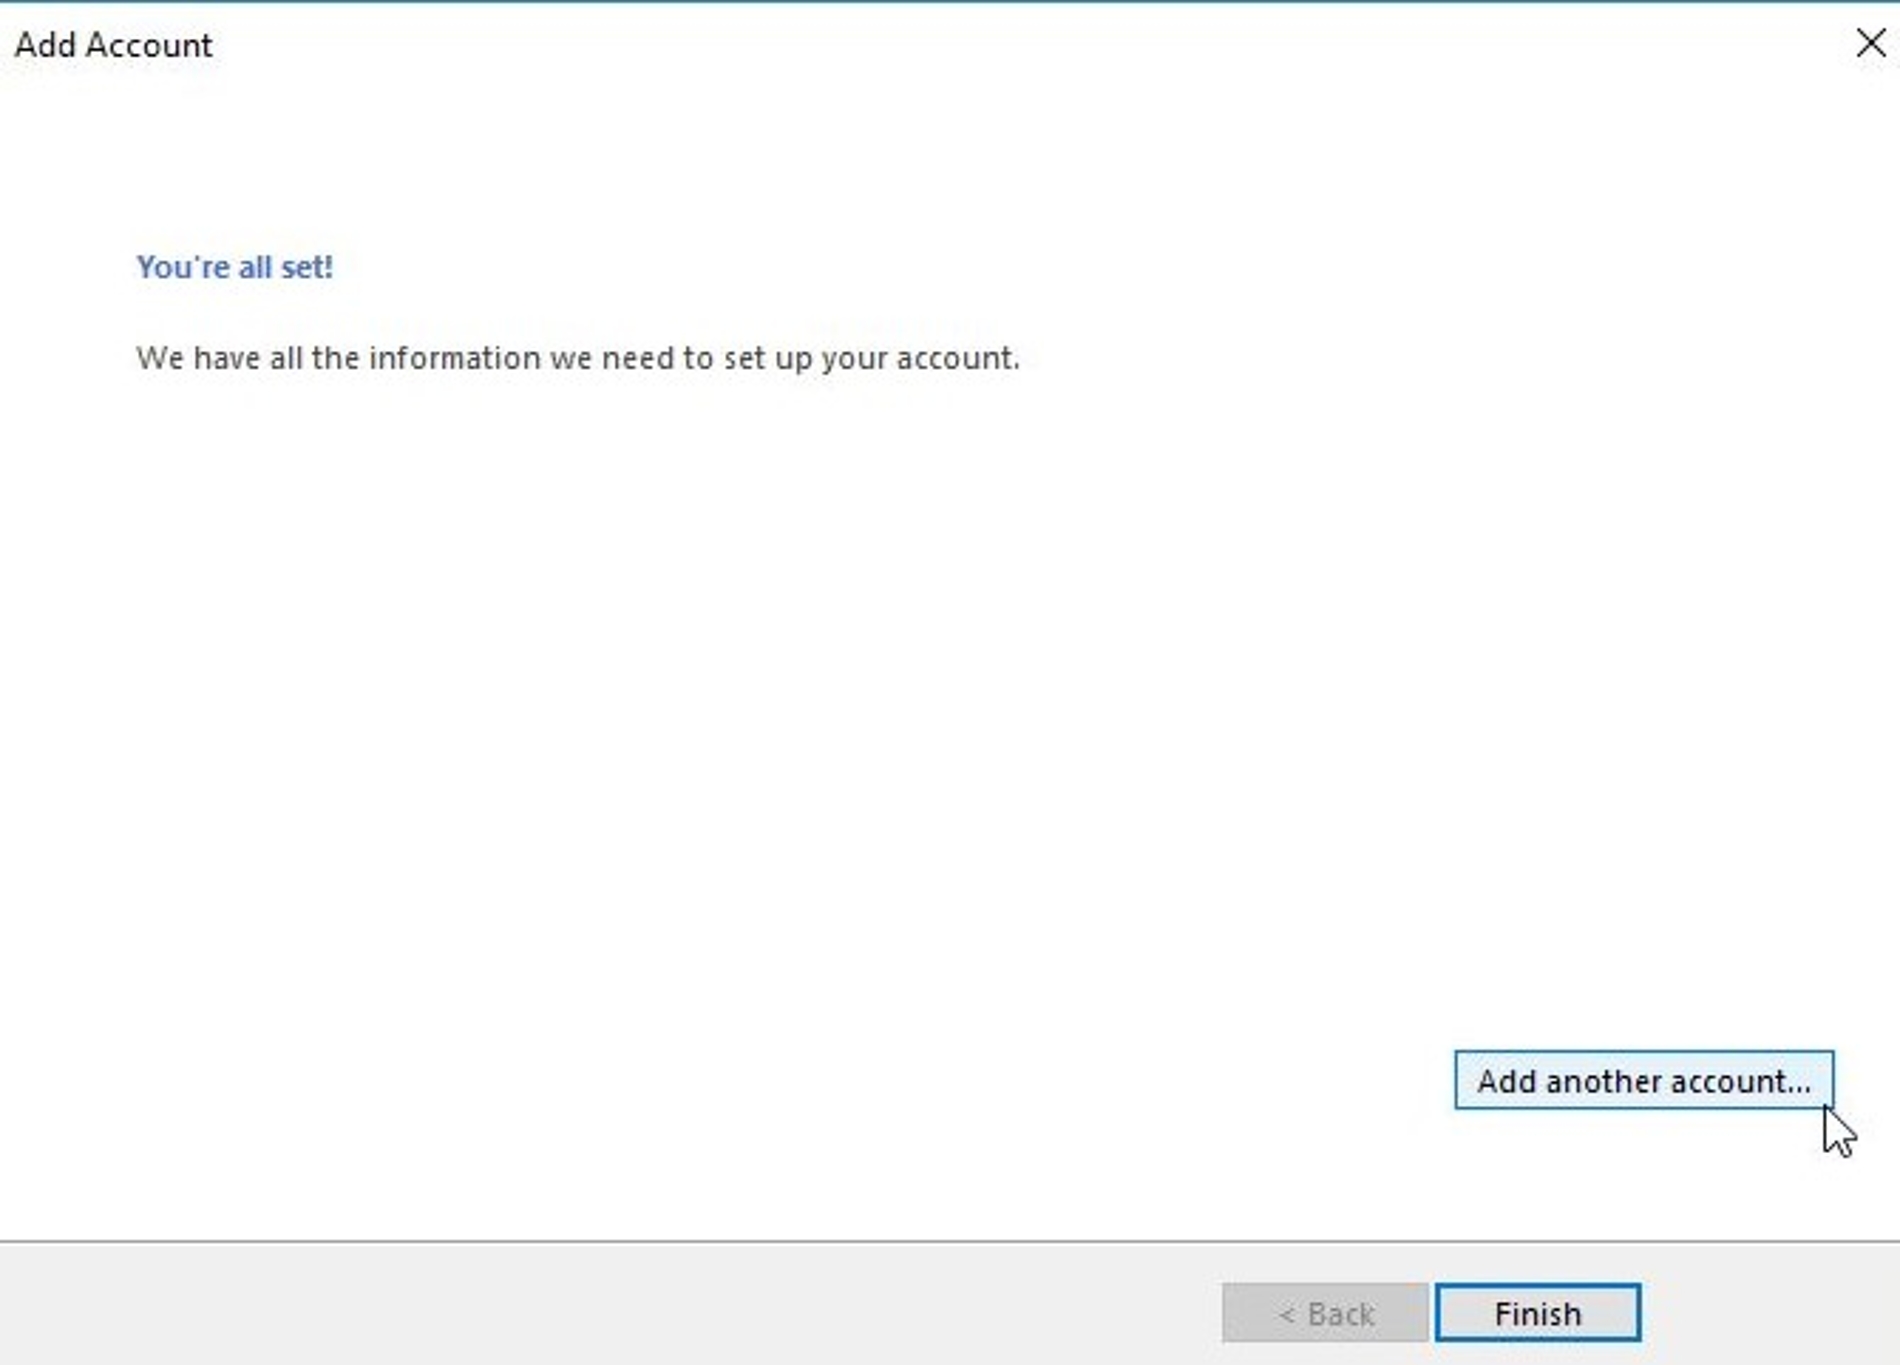
Step 12
You are now finished with the setup of your e-mail account.
Now you can hit "Add another account…"
or
you close the installer by clicking "Finish".

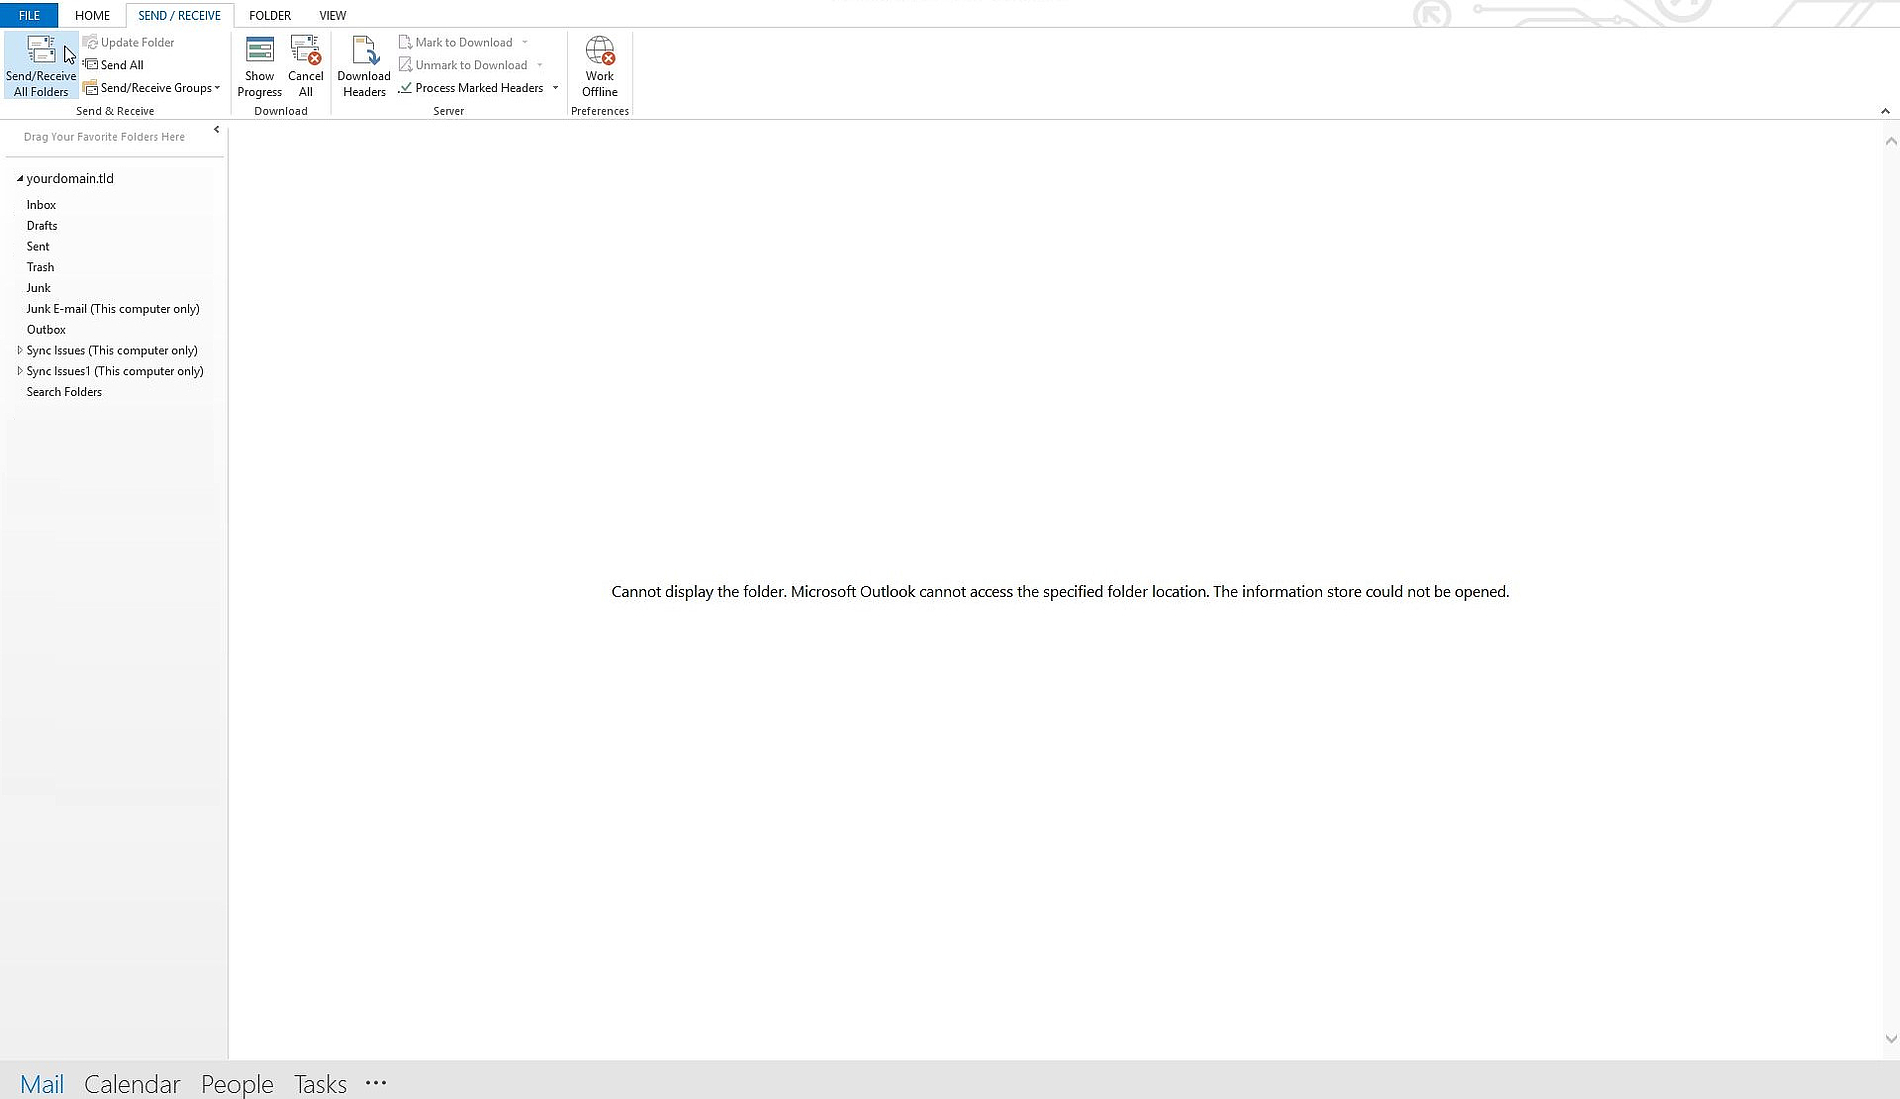
Step 13
For the last step open the main window of Microsoft Outlook 2013 and switch to the tab "SEND / RECEIVE" then click on "Send / Receive All Folders".
Now all the e-mails of the set up account are being synchronised.