Set up a new e-mail account at the default mail client of Android™
![[Translate to English:] android_robot](/fileadmin/_processed_/f/5/csm_Android_Robot_200_01_844c3466fe.png)
The Android robot is reproduced from work created and shared by Google and used according to terms described in the Creative Commons 3.0 Attribution License.
Bellow you find a detailed step by step description of how to set up a new e-mail account at the default mail client of Android™.
Bellow you find a detailed step by step description of how to set up a new e-mail account at the default mail client of Android™.
Step 1
Start the default mail client of your Android™ device.

Step 2
In the first window that opens please select the last option in the list named "Others".

Step 3
Now you have to enter the e-mail address and the password which was set for this e-mail address at the Email Manager module of your Control Panel.
Continue with "SIGN IN".

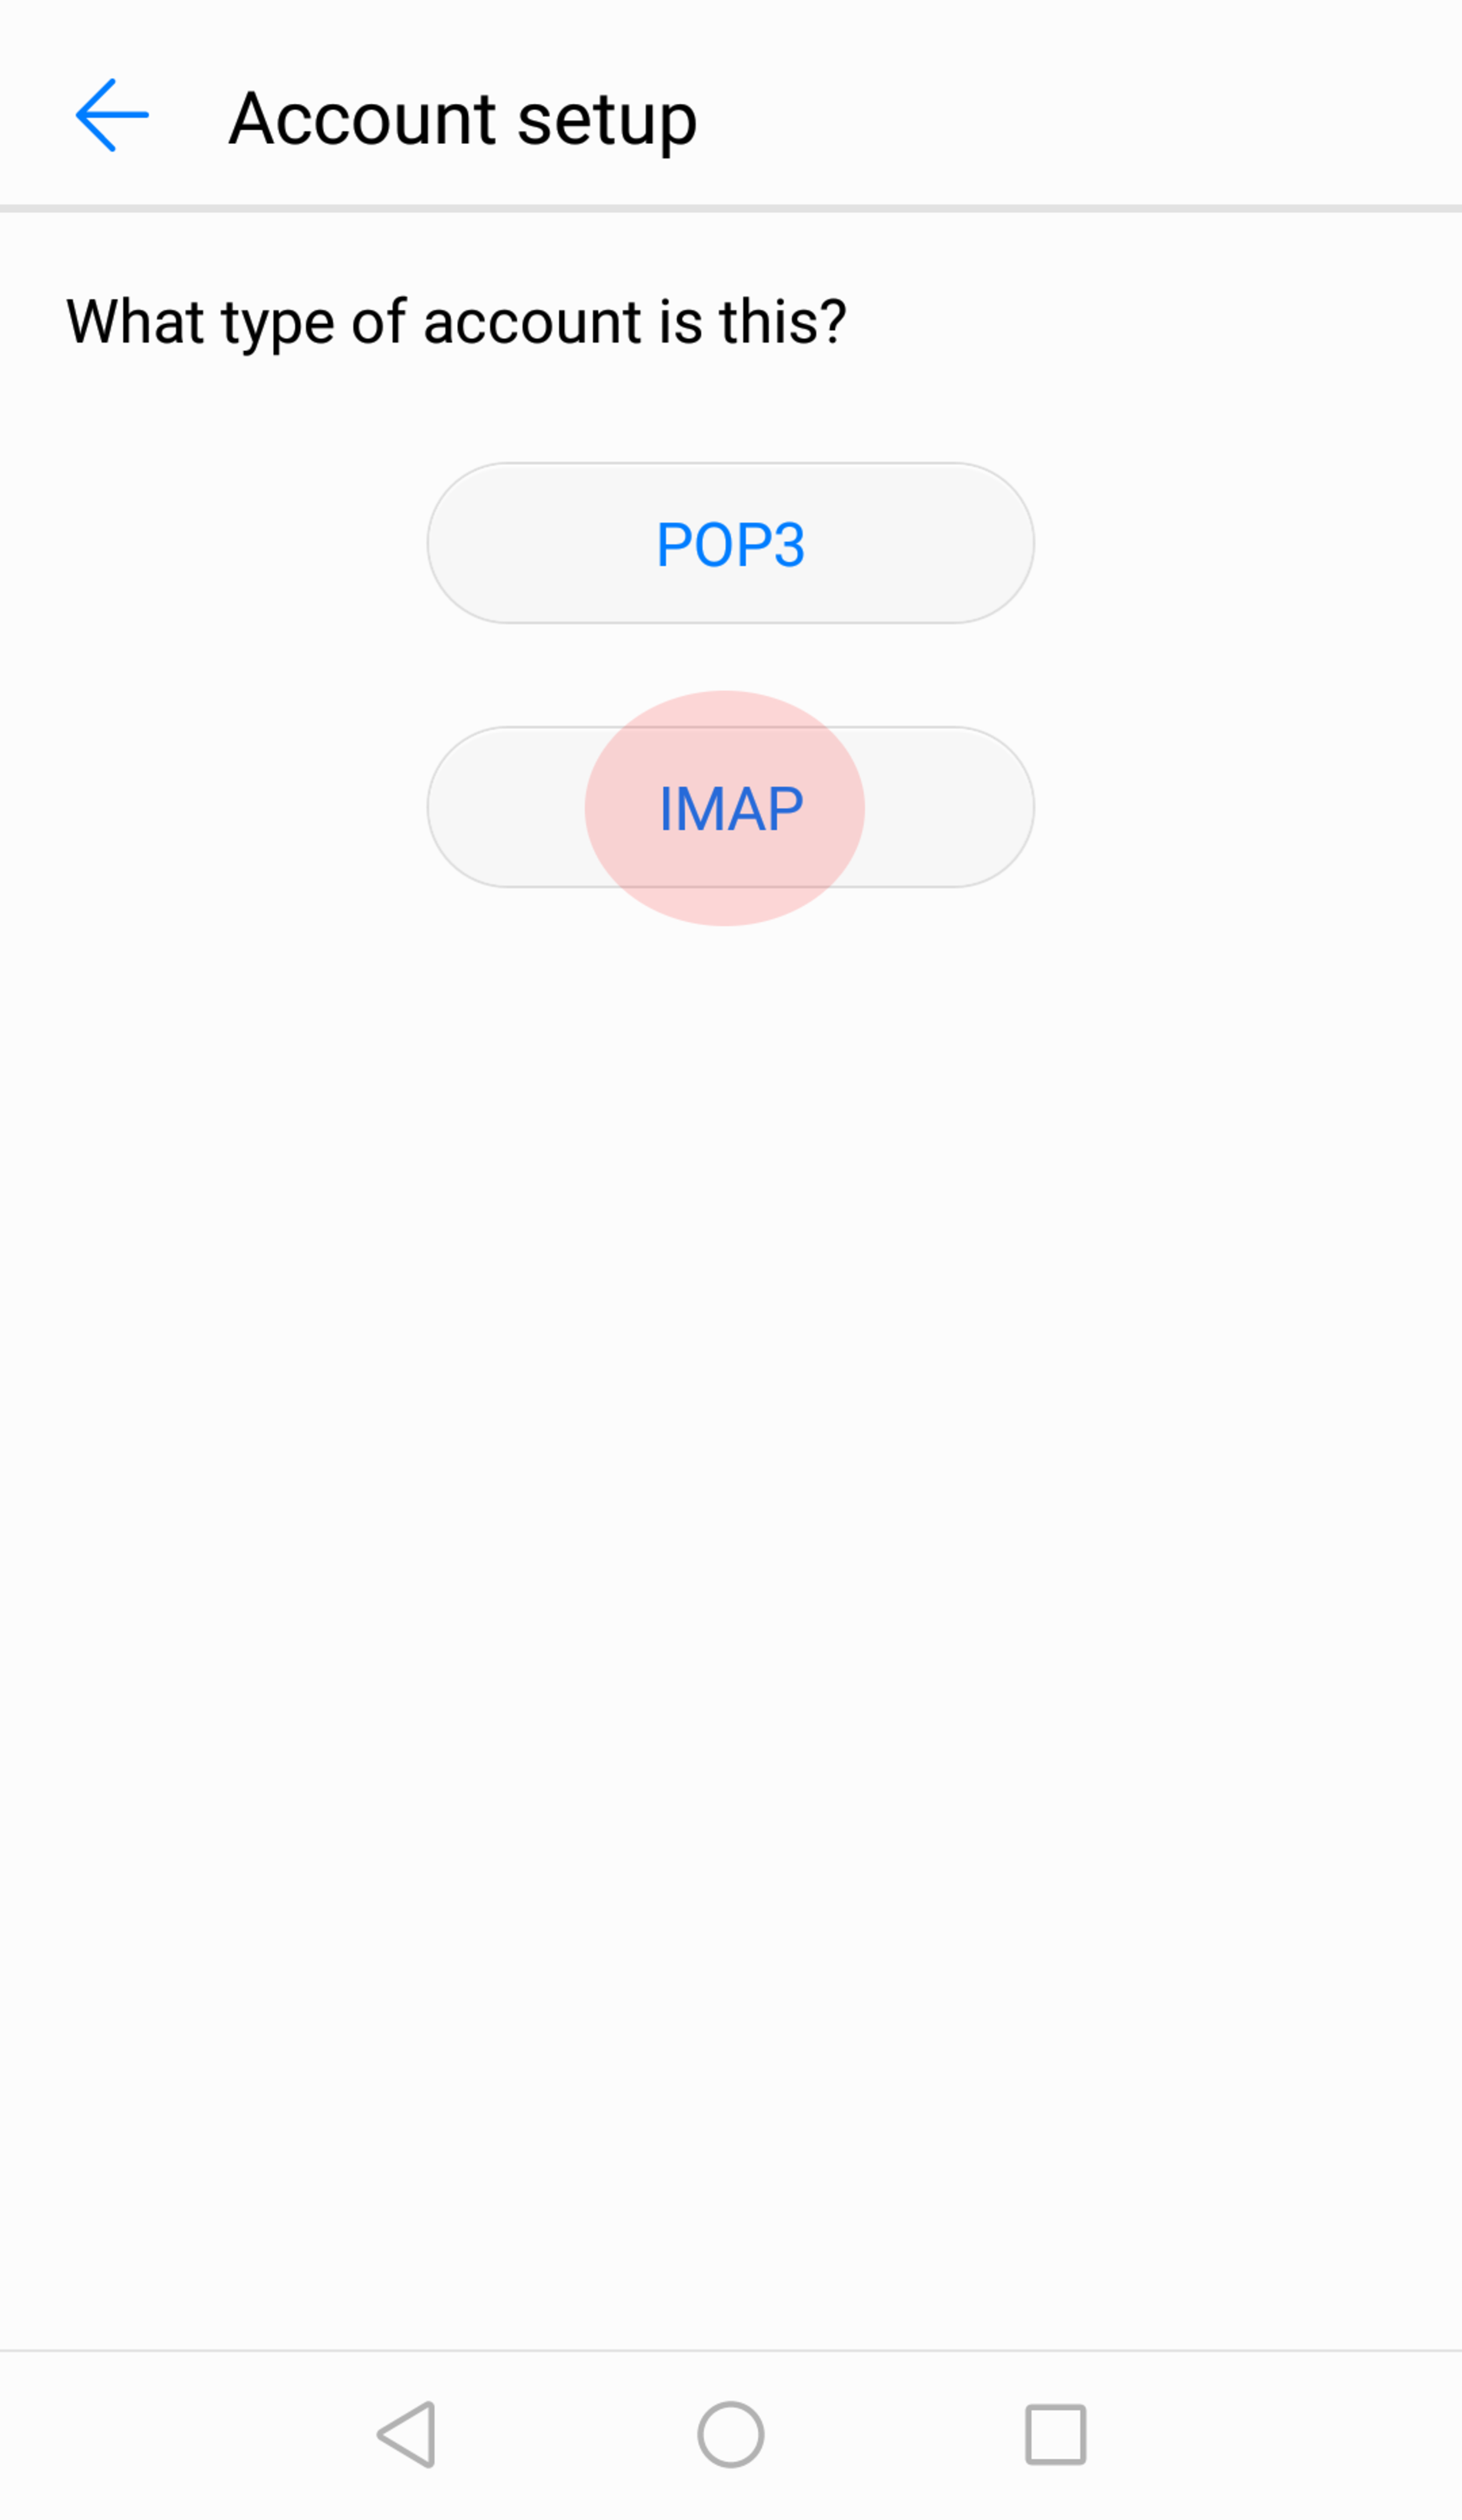
Step 4
Please choose the account type called "IMAP".
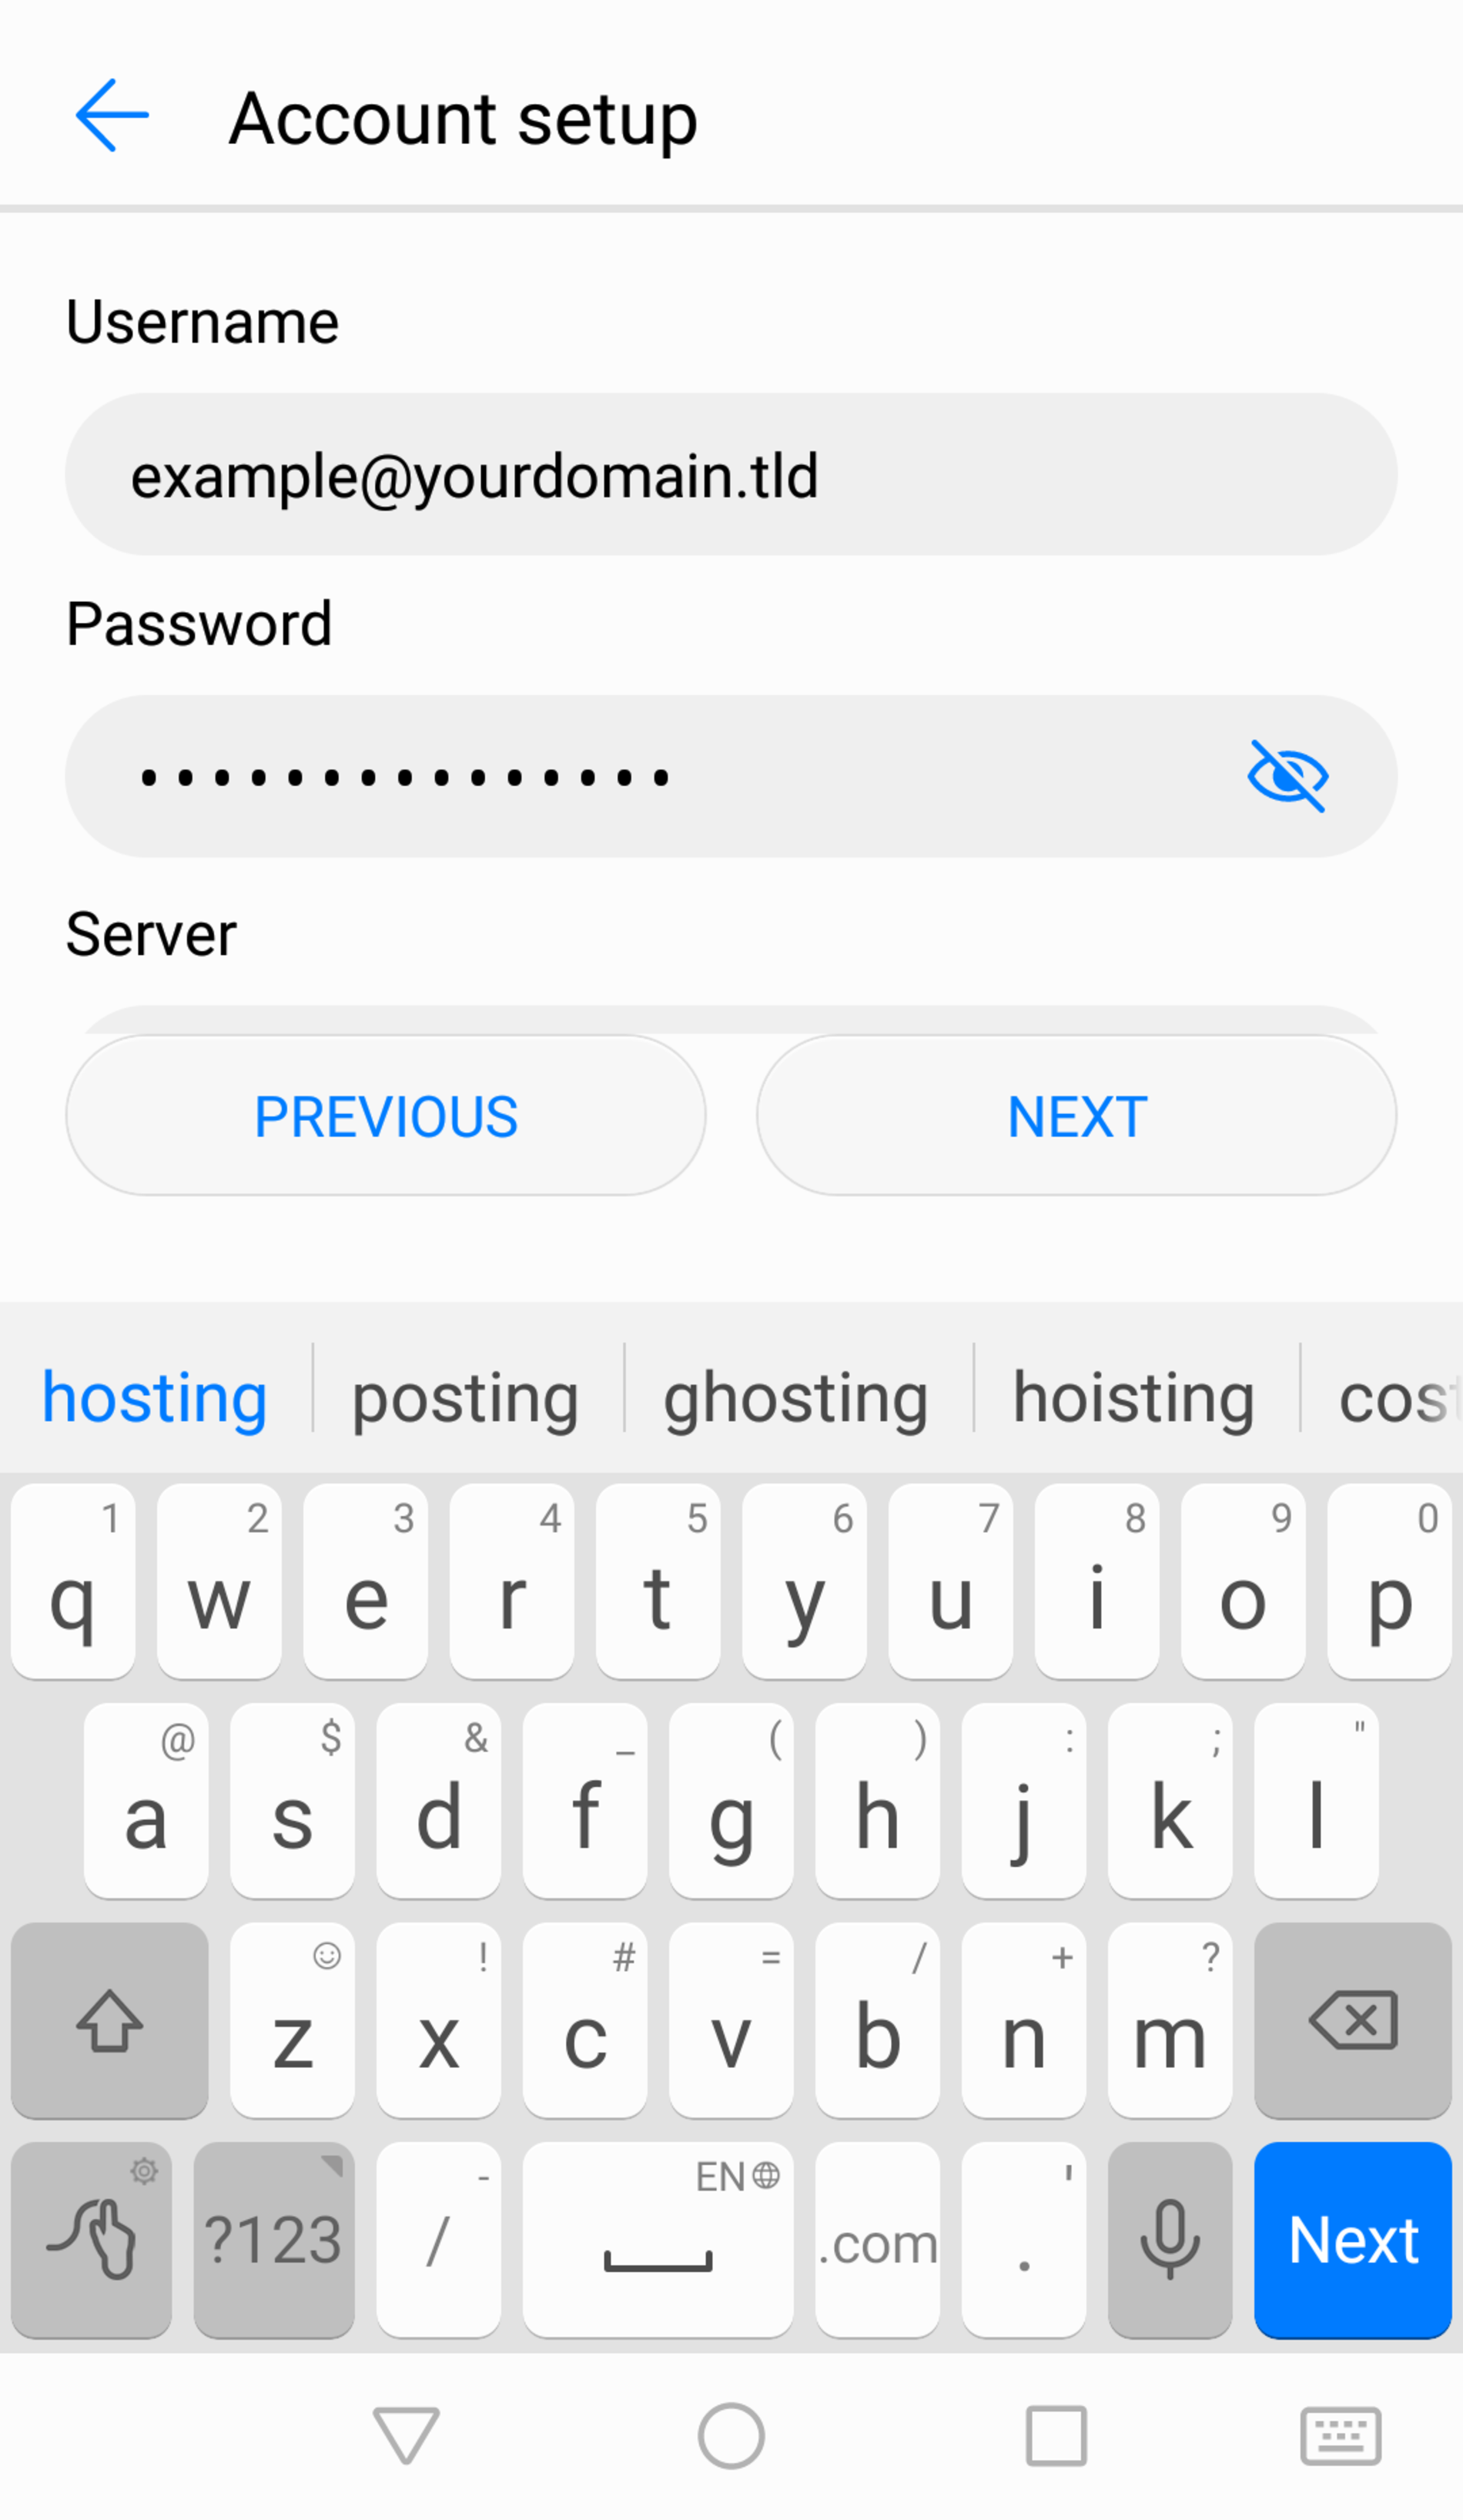
Step 5
The "Username" is your e-mail address which you want to set up and bellow you enter the associated password.
Step 6
Hint:
These settings should be entered as shown in the screenshots to ensure you are using a SSL secured connection. Into the field "Server" you enter ssl01.alldomains.hosting. The "Port" is 993. For the "Security type" please select SSL/TLS.
These settings should be entered as shown in the screenshots to ensure you are using a SSL secured connection. Into the field "Server" you enter ssl01.alldomains.hosting. The "Port" is 993. For the "Security type" please select SSL/TLS.

Step 7
Please type INBOX (uppercase letters are required) into the field "IMAP path prefix".
Double check your settings and continue with "NEXT".

Step 8
Now please also enter ssl01.alldomains.hosting for "SMTP server" and use the "Port" 587.
The "Security type" is STARTTLS.
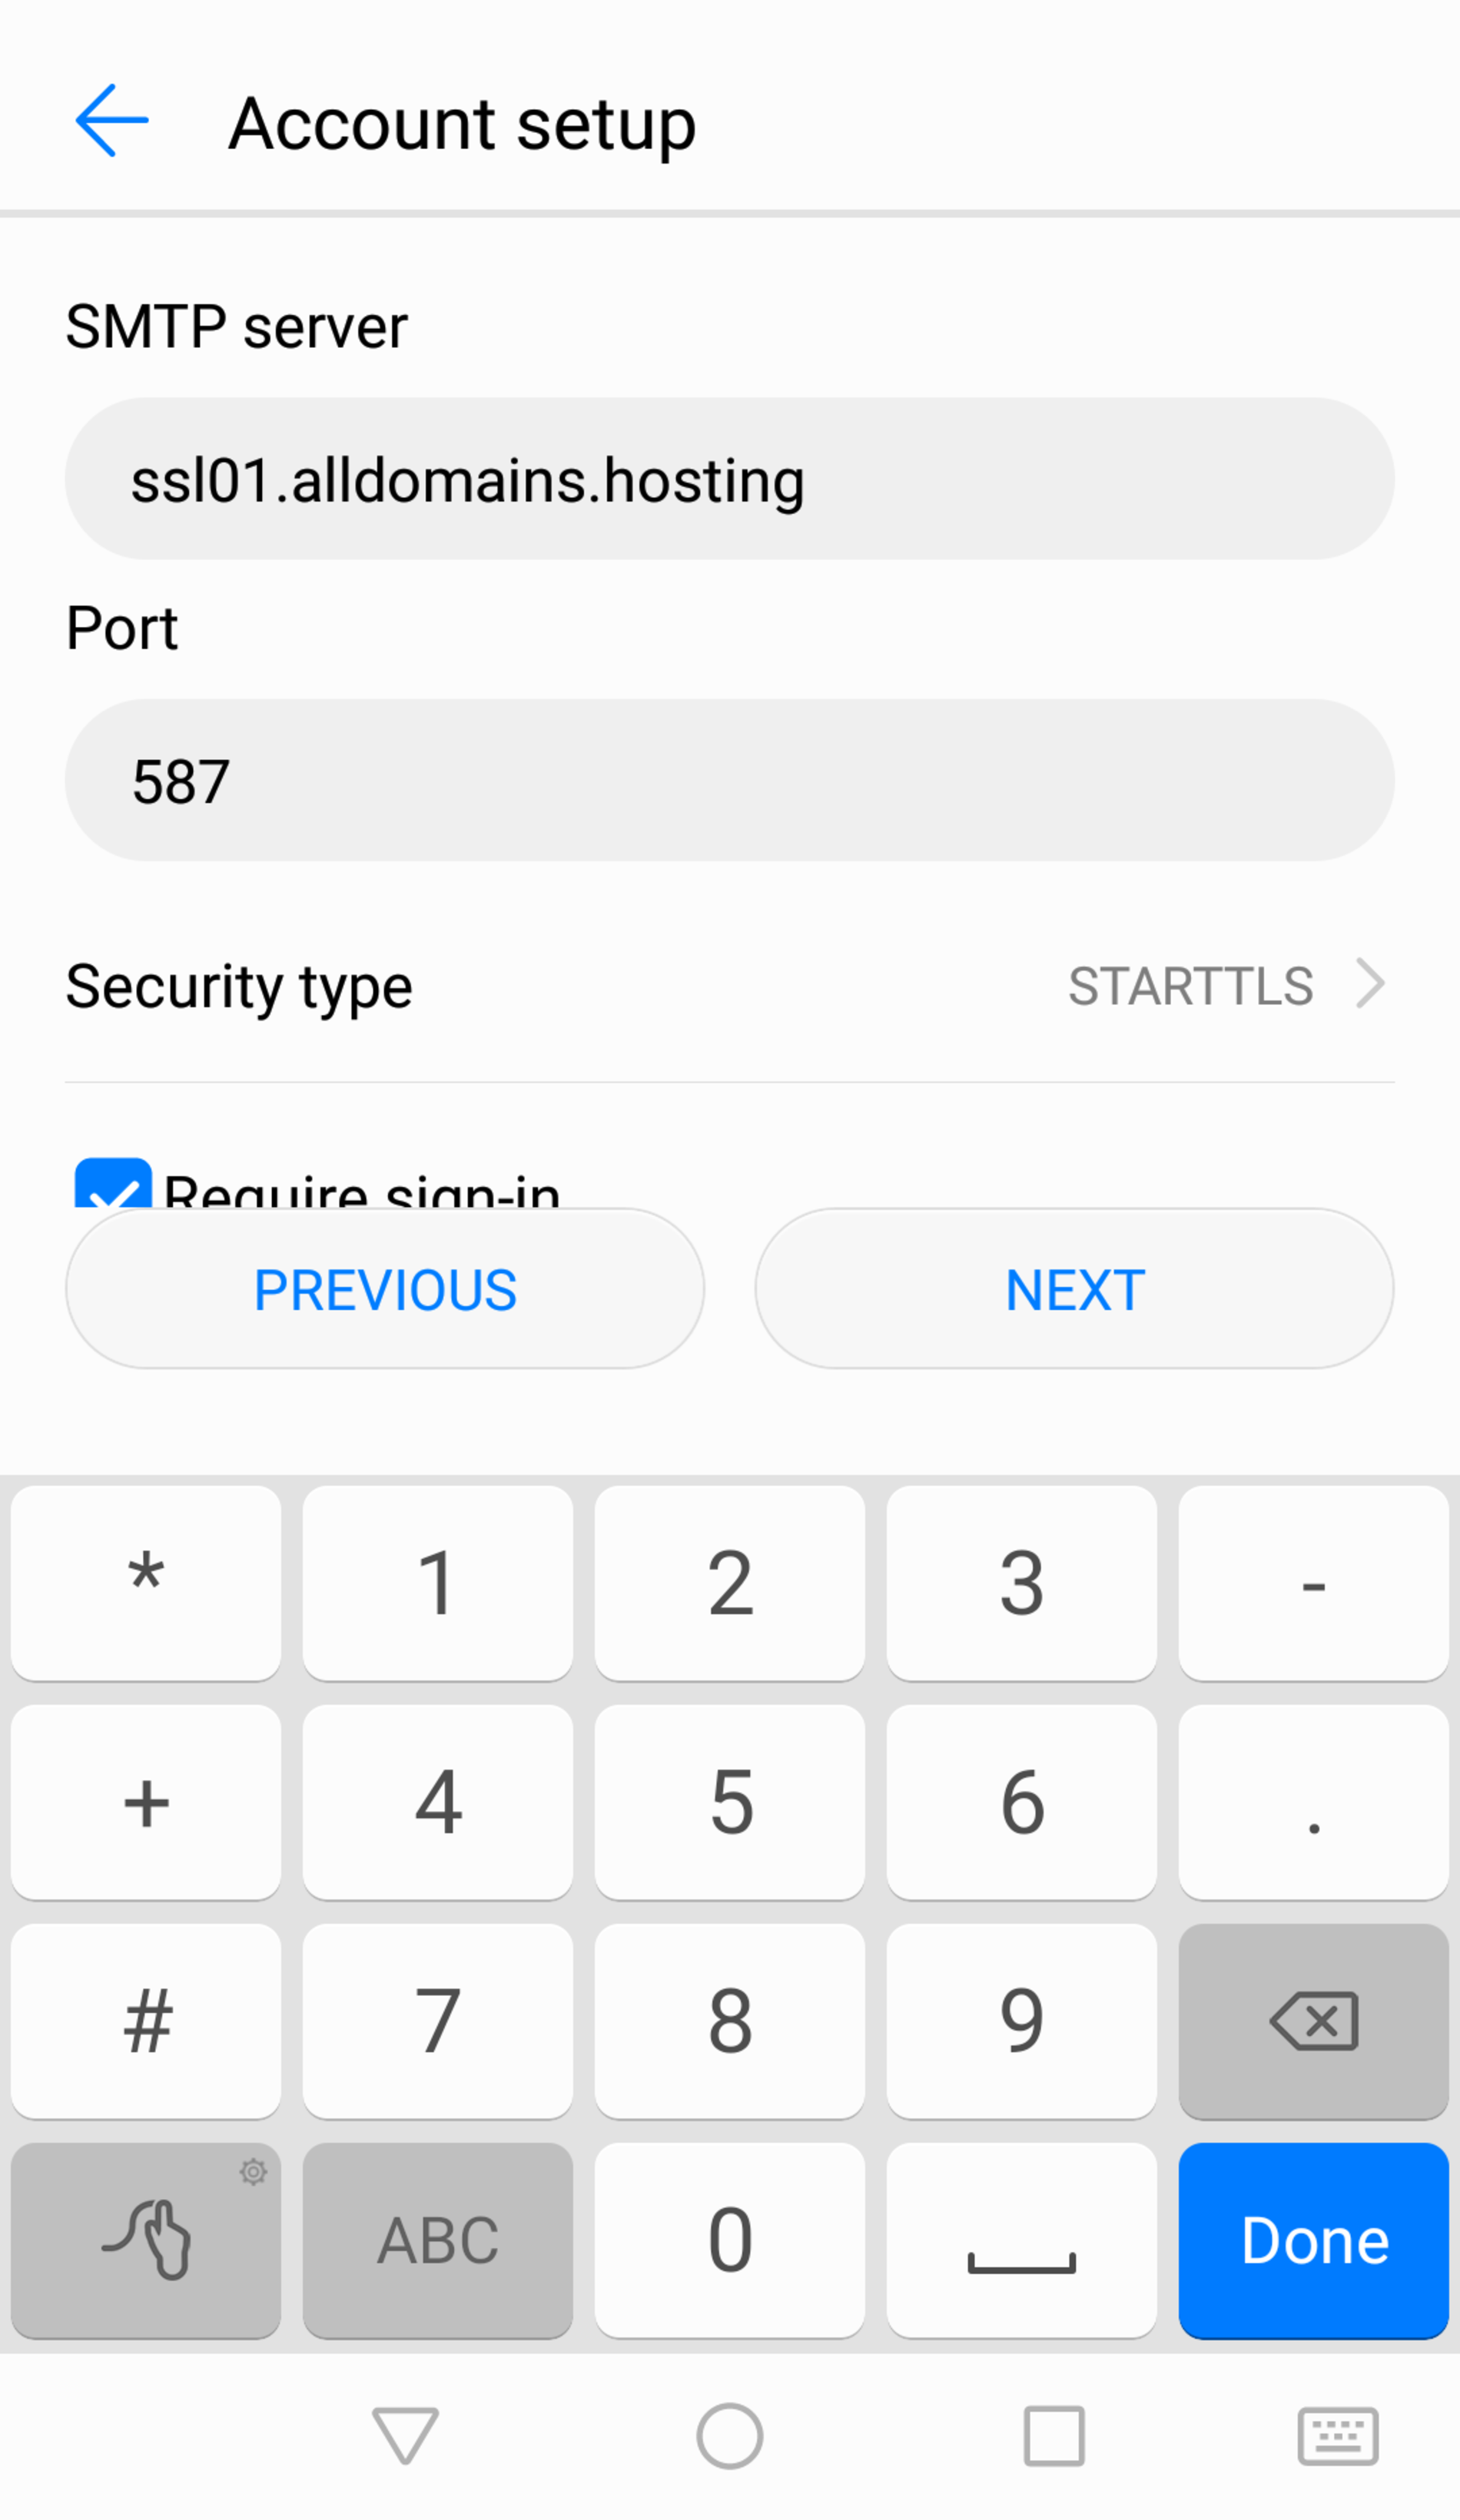
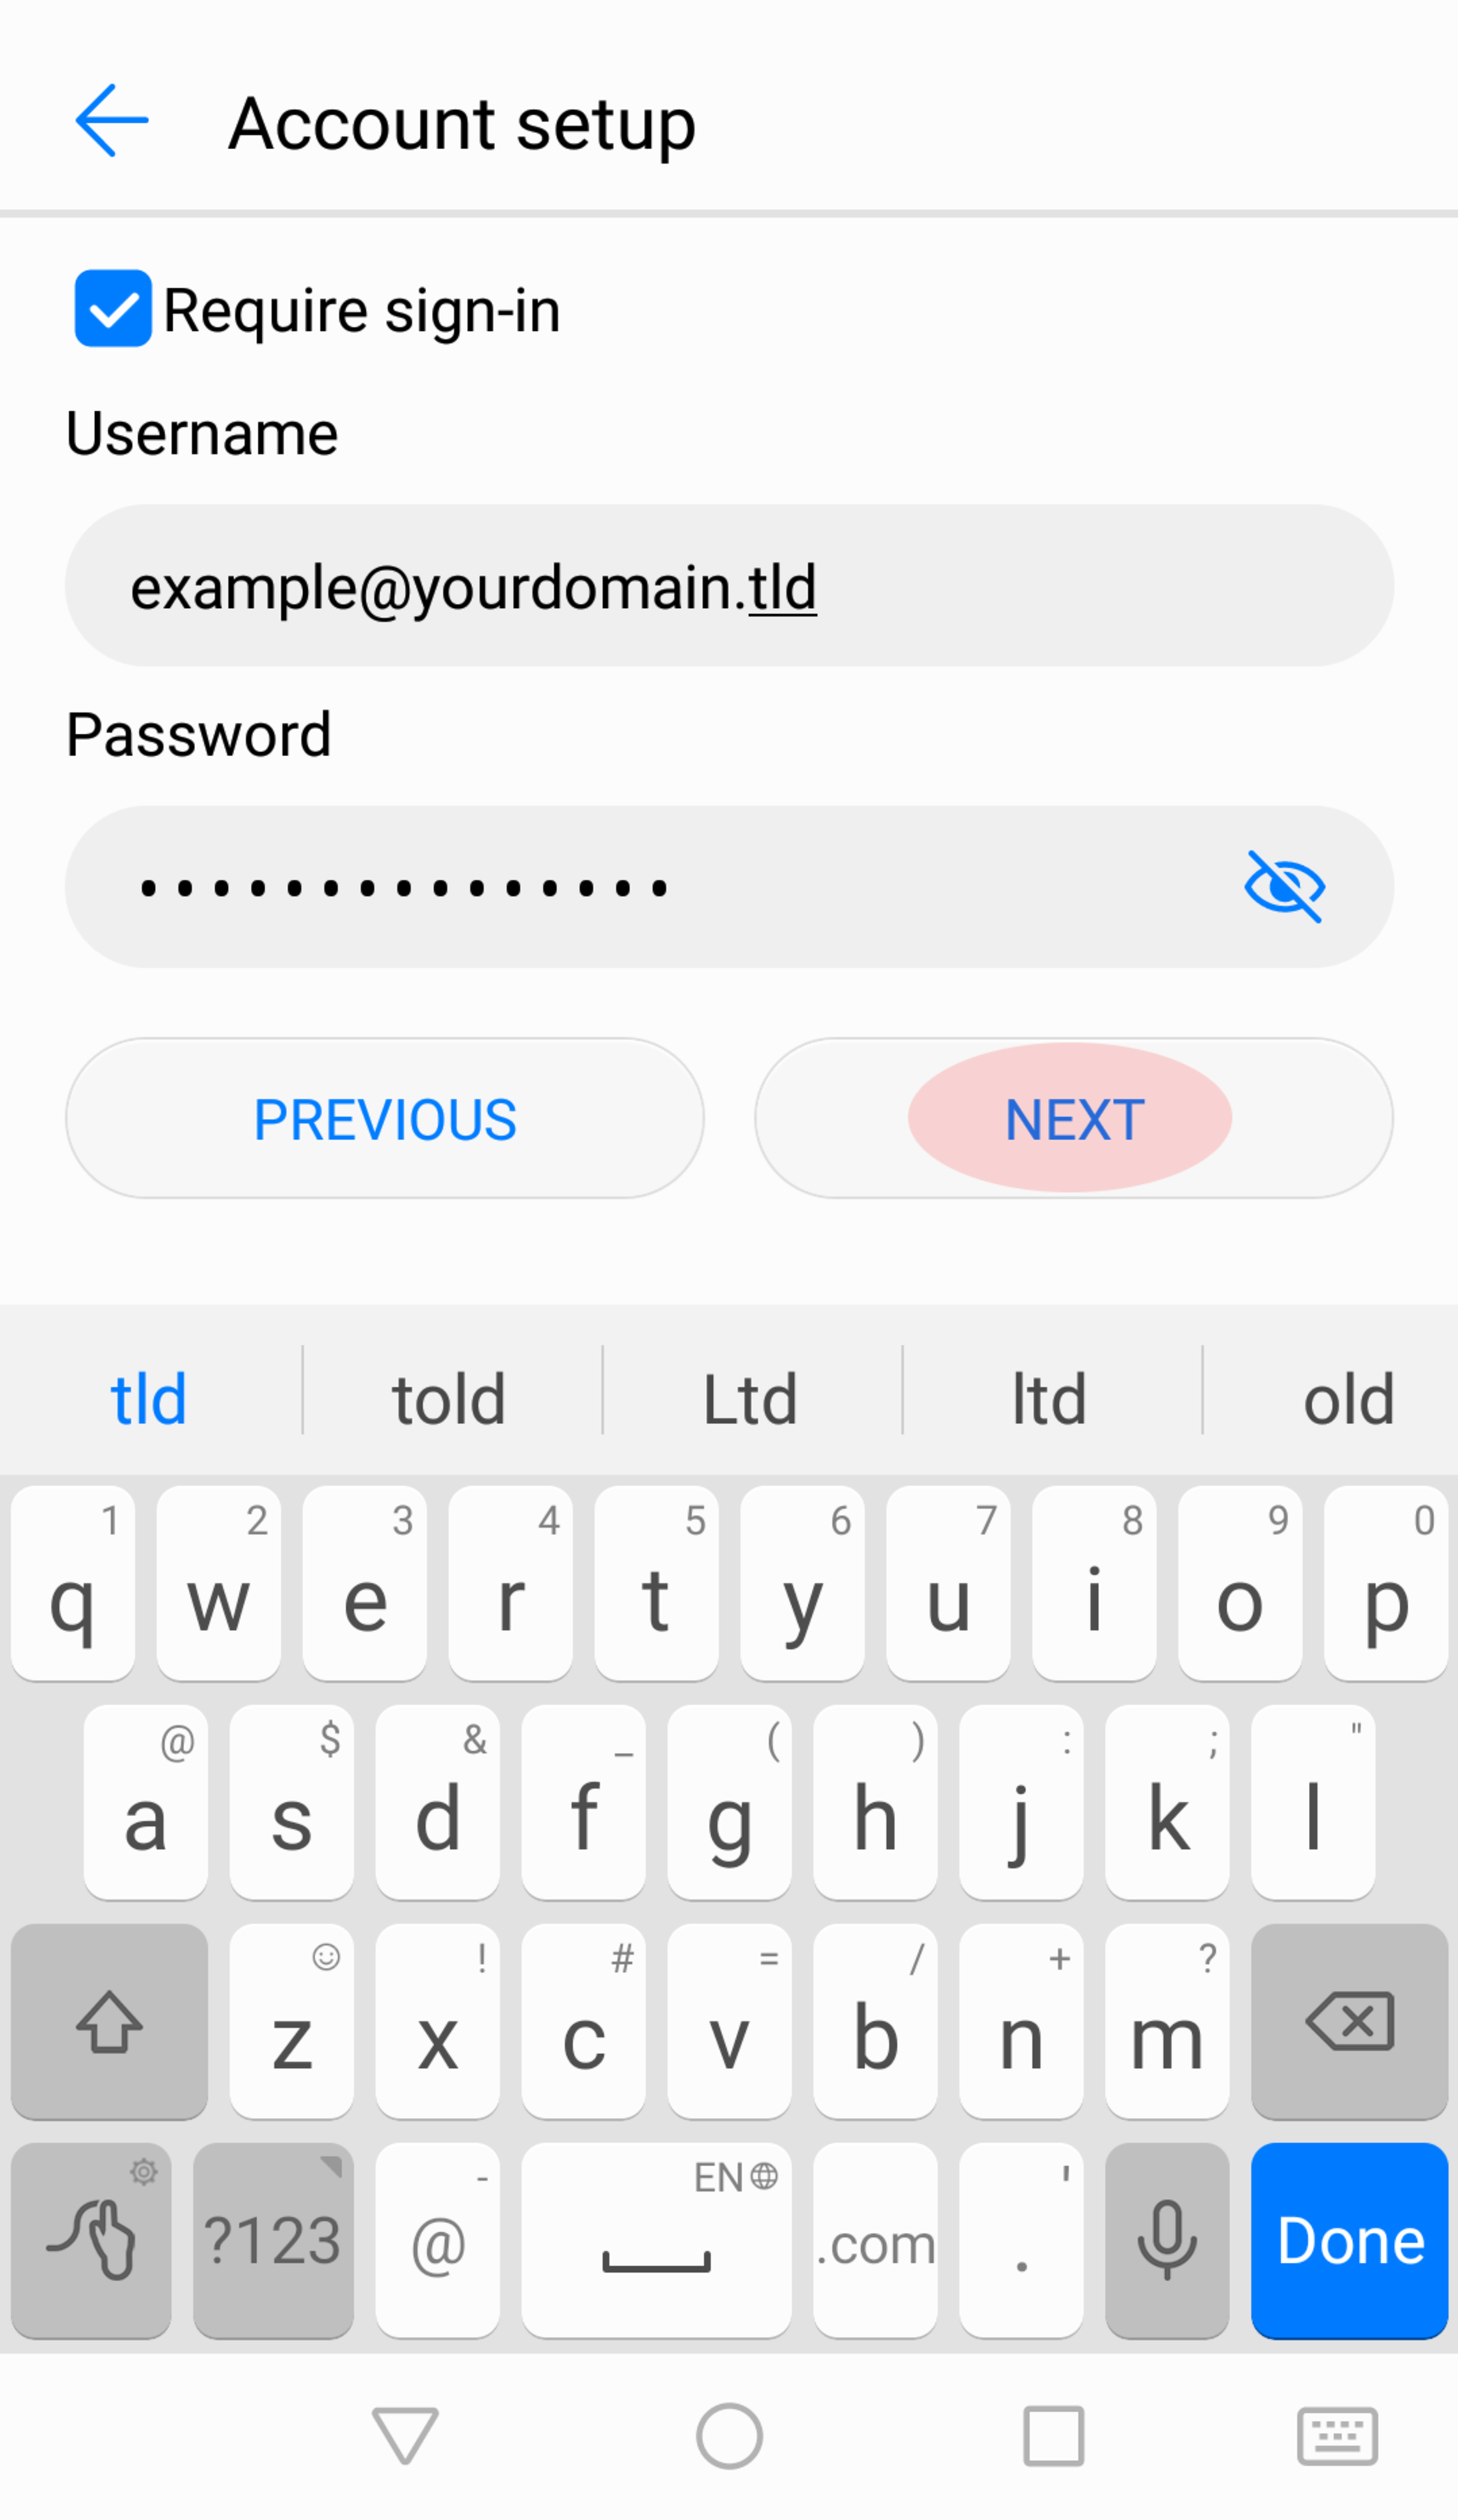
Step 9
Make sure the box "Require sign-in" is selected and your e-mail address is entered for "Username".
Enter the "Password" which is associated with the e-mail address you want to set up.
Continue by clicking "NEXT".
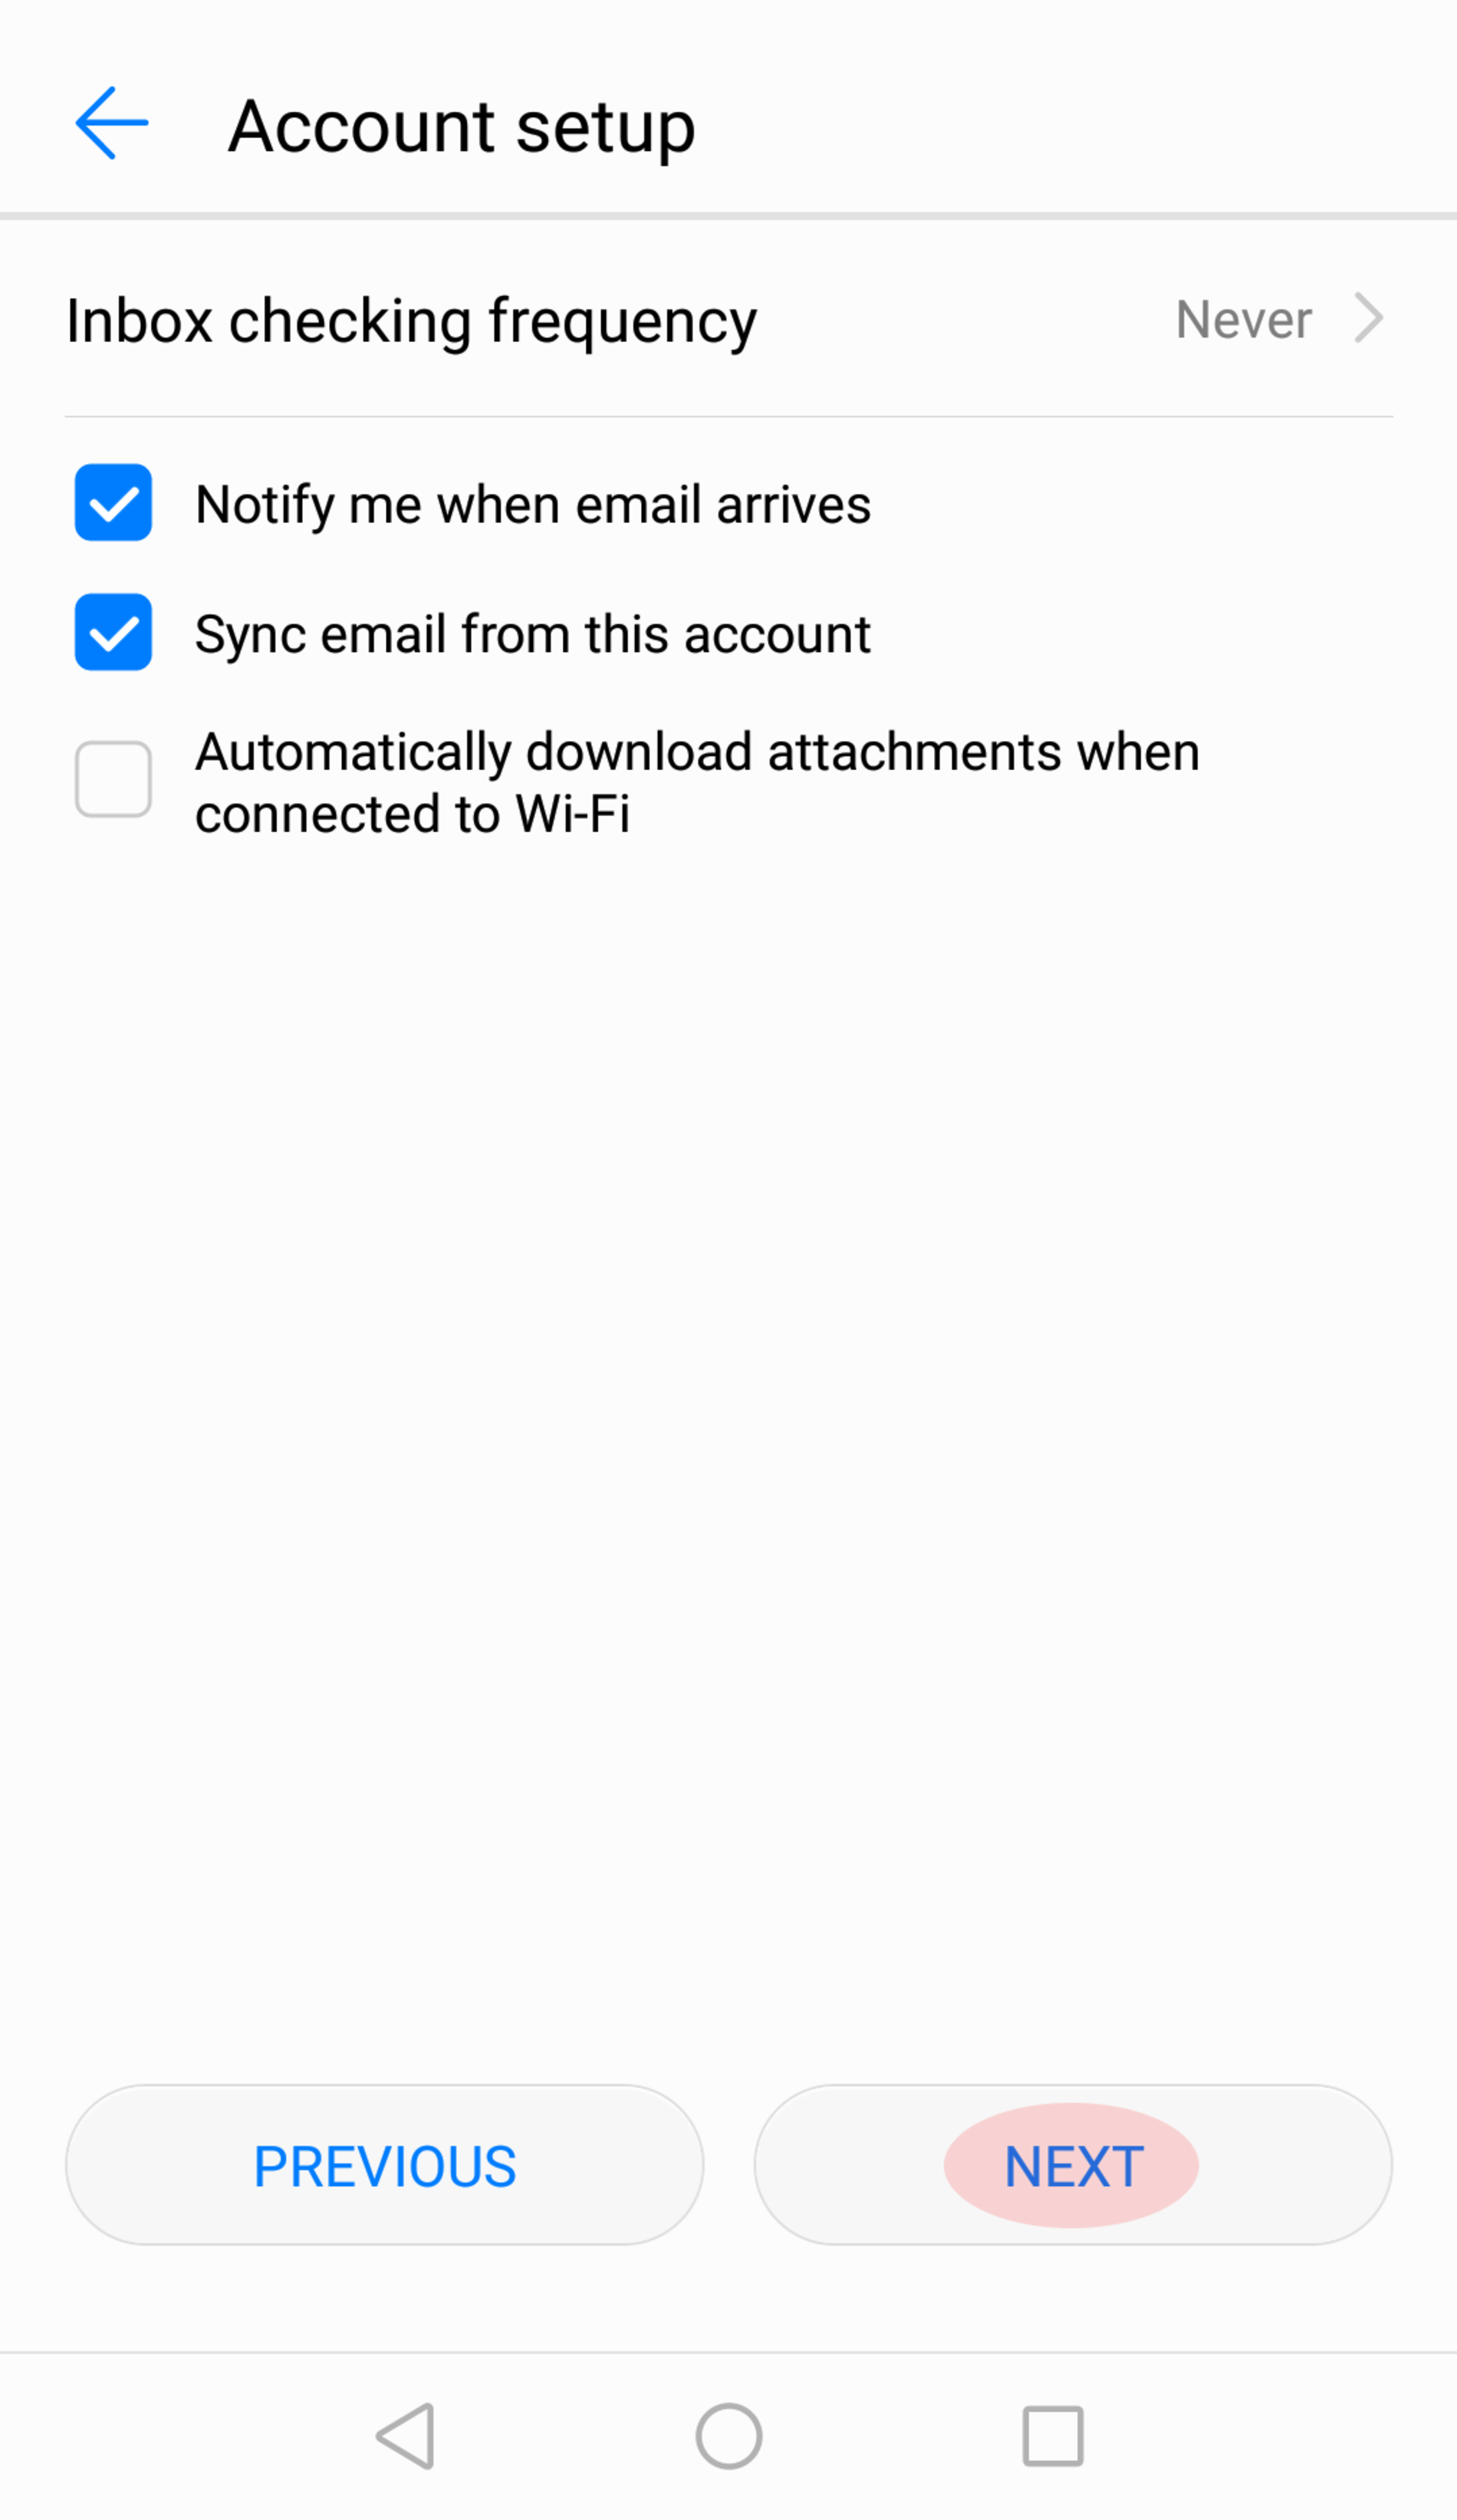
Step 10
Now you have the possibility to change some settings like "Inbox checking frequency" etc.
Configure these settings as you prefer and finish the setup with "NEXT".