Set up a new e-mail account with your iPhone
Bellow you will find a detailed description of how to set up a new e-mail account with your iPhone.
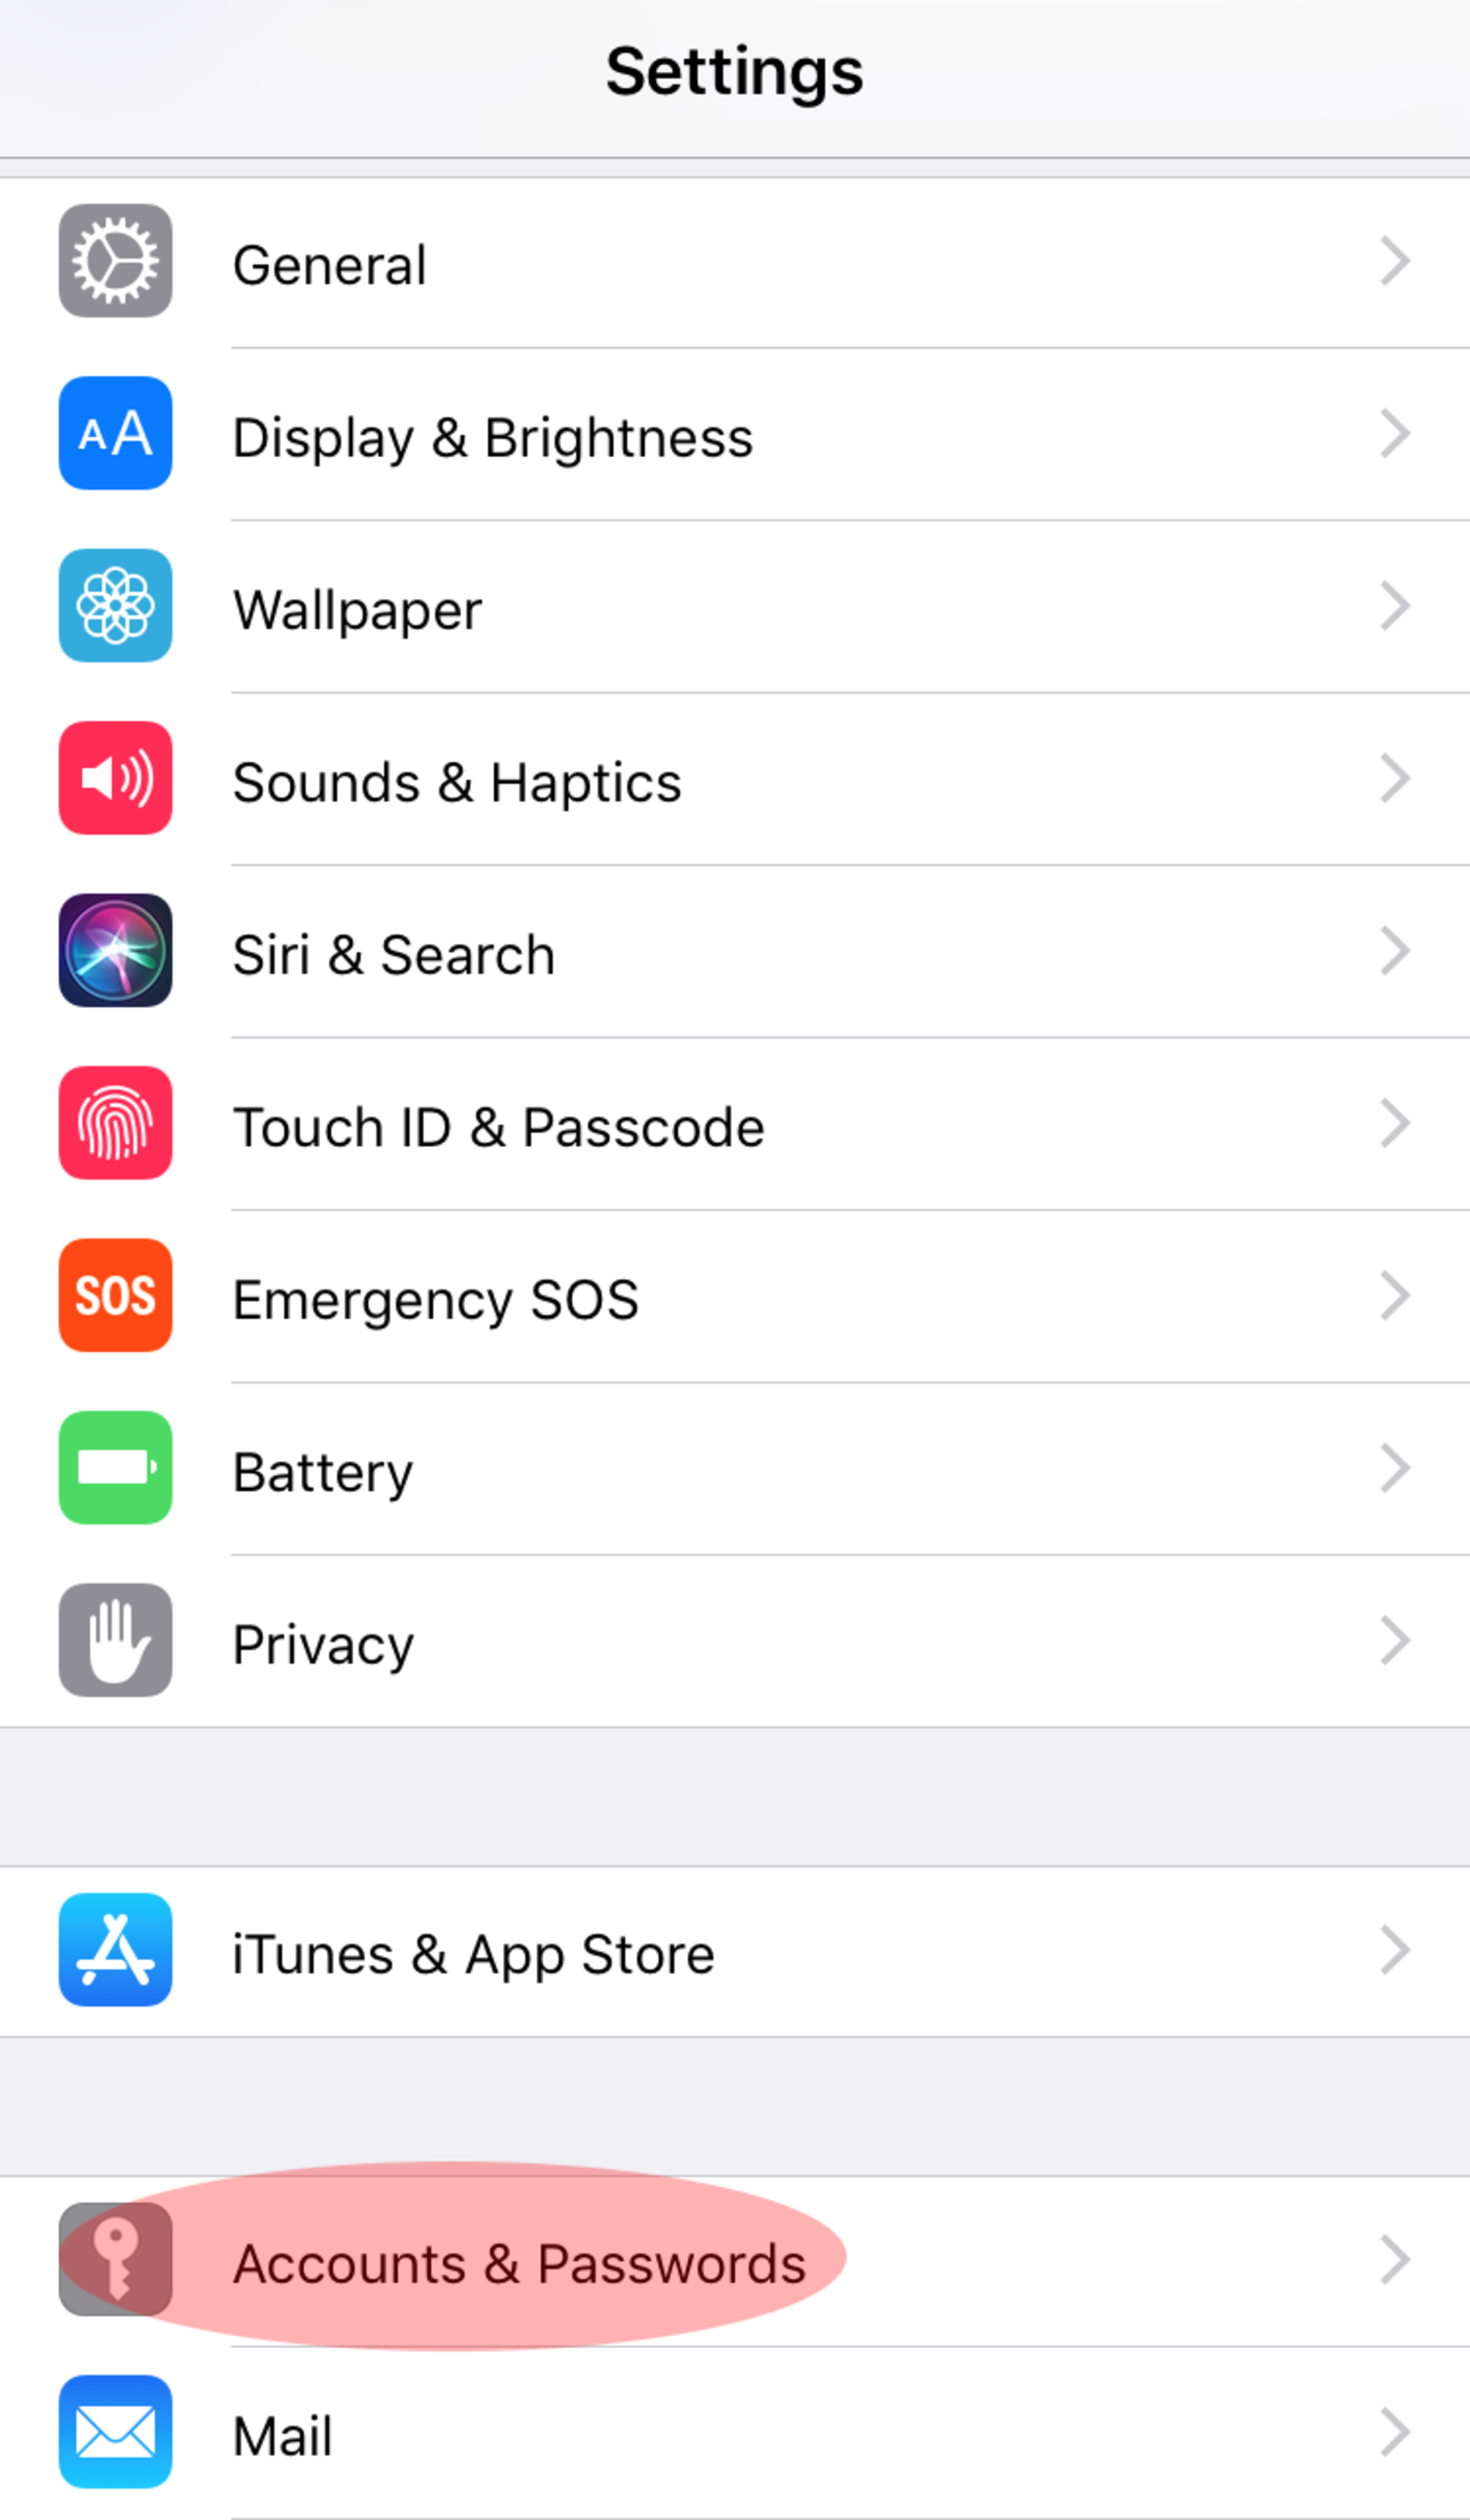
Step 1
First open the "Settings" of your iPhone.

Step 2
Scroll down a little and tap on "Accounts & Passwords" to open it.
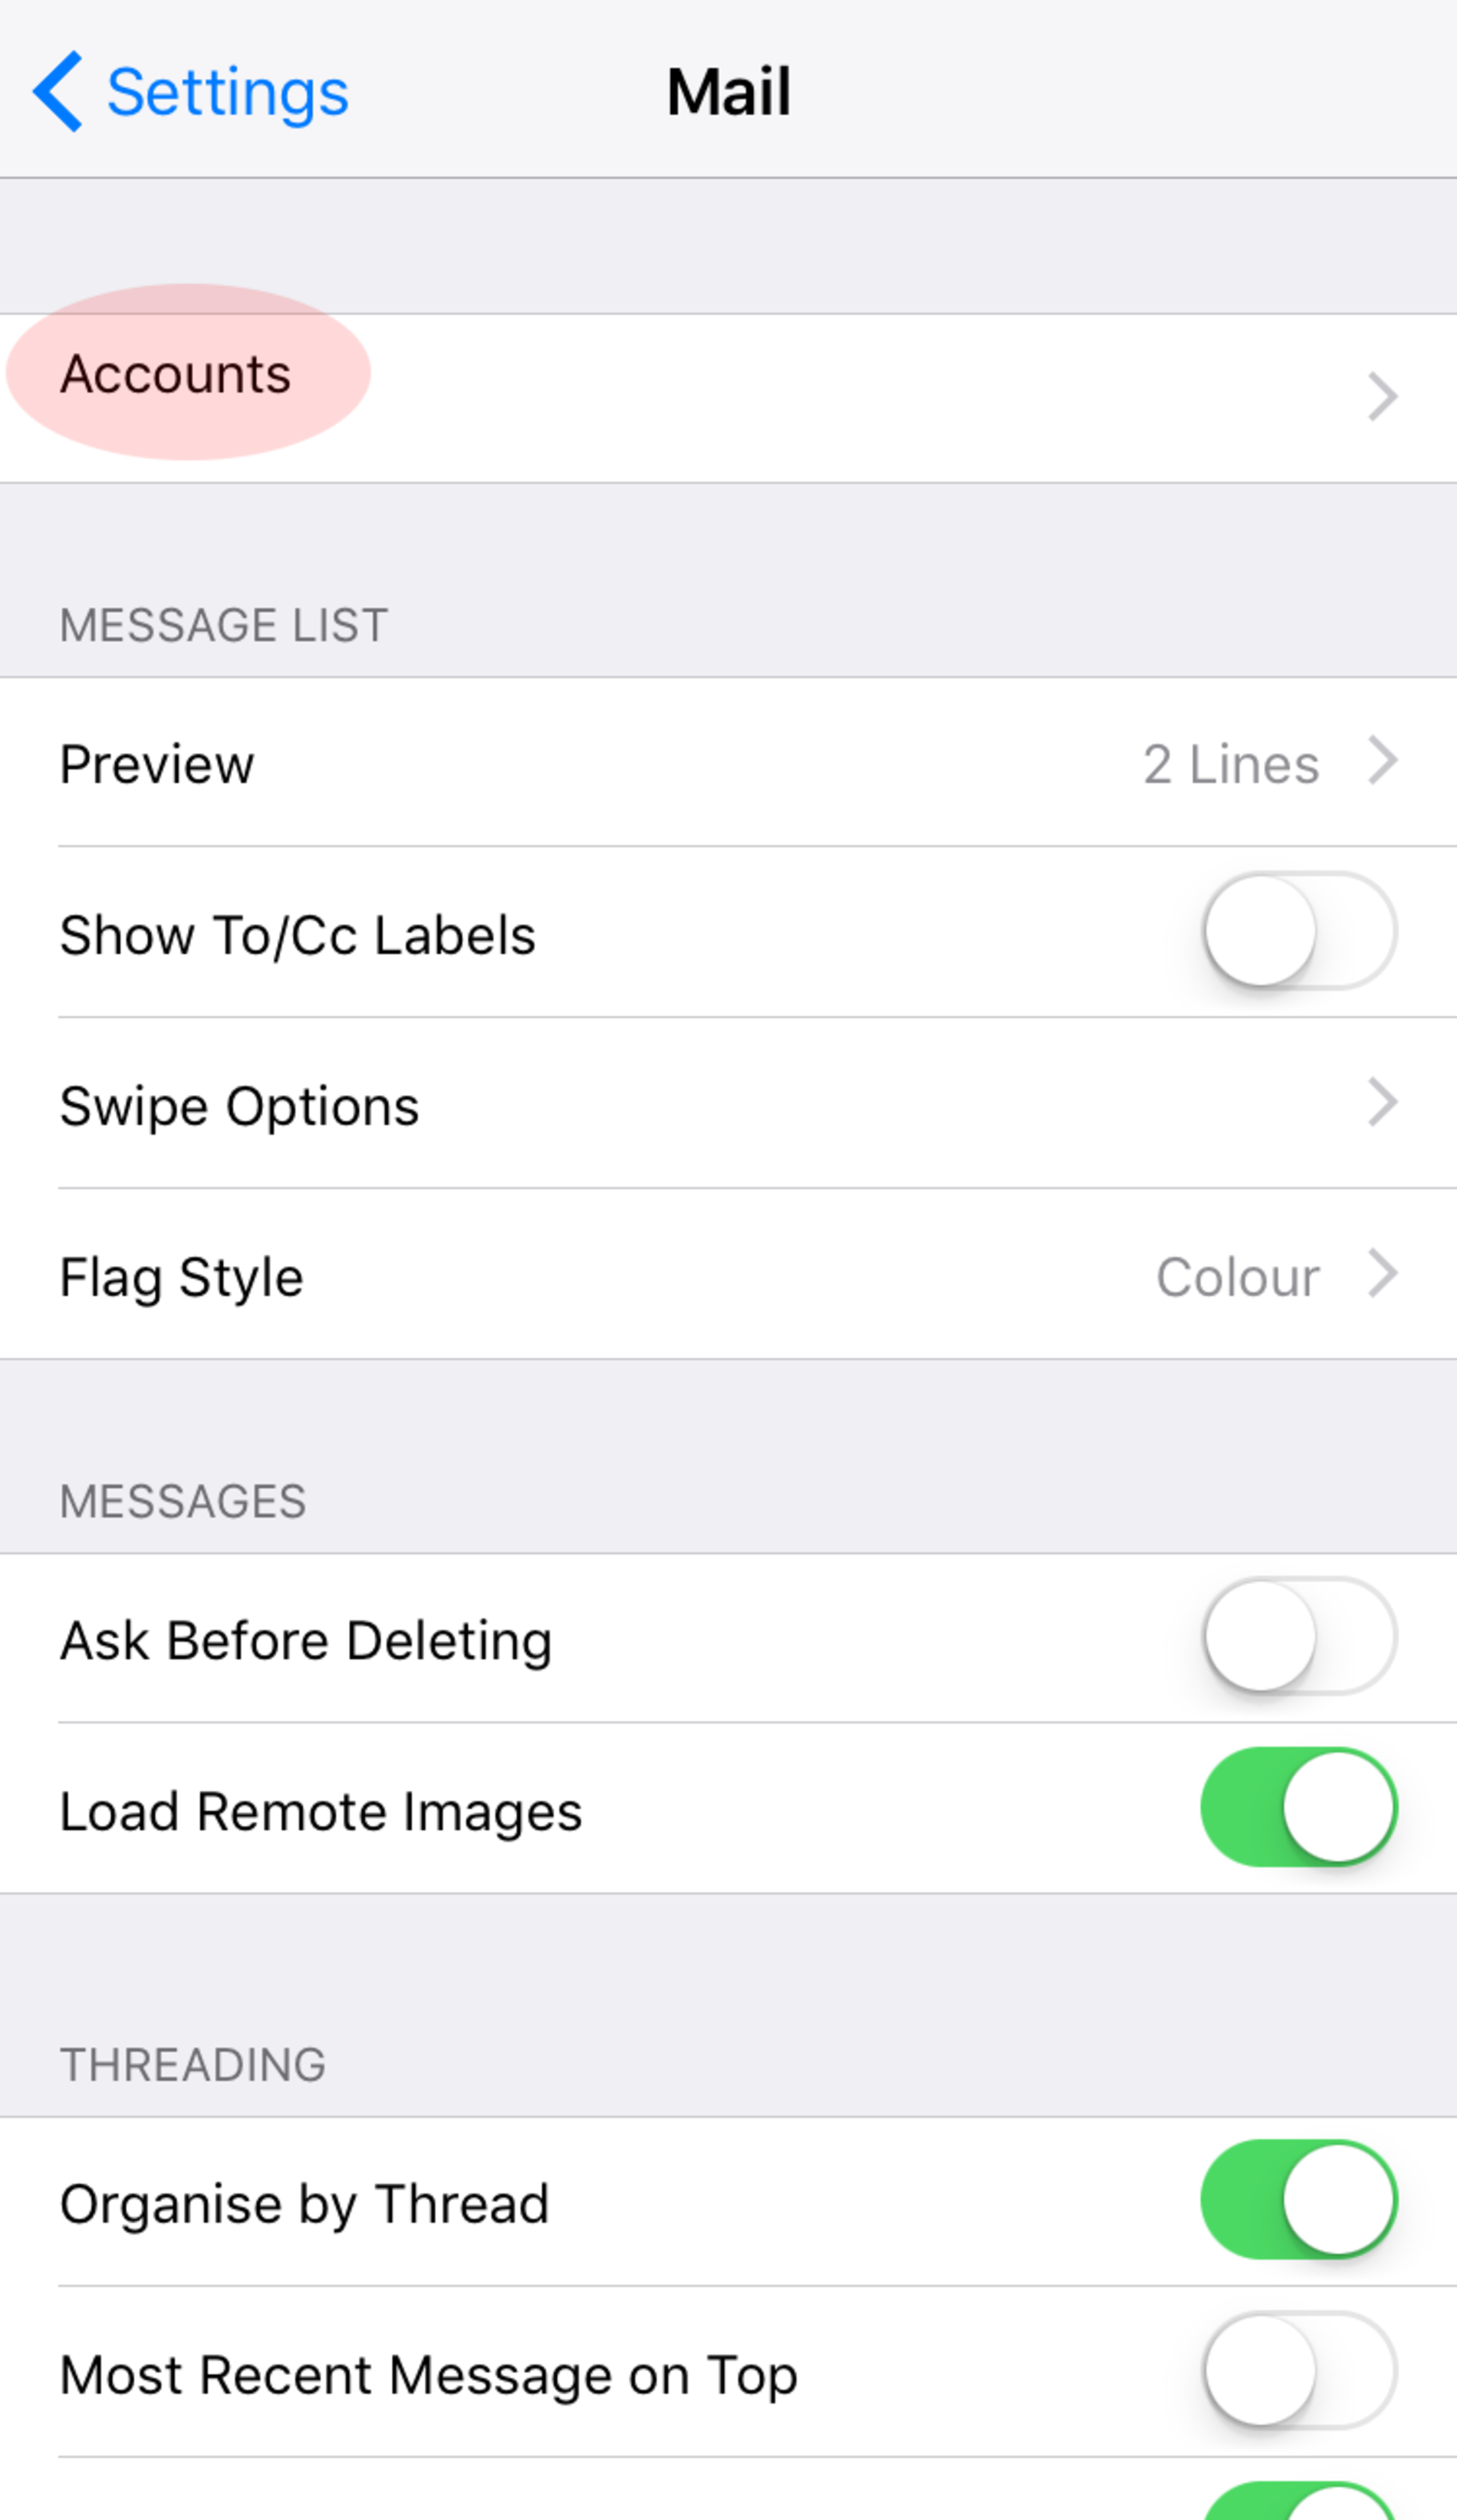
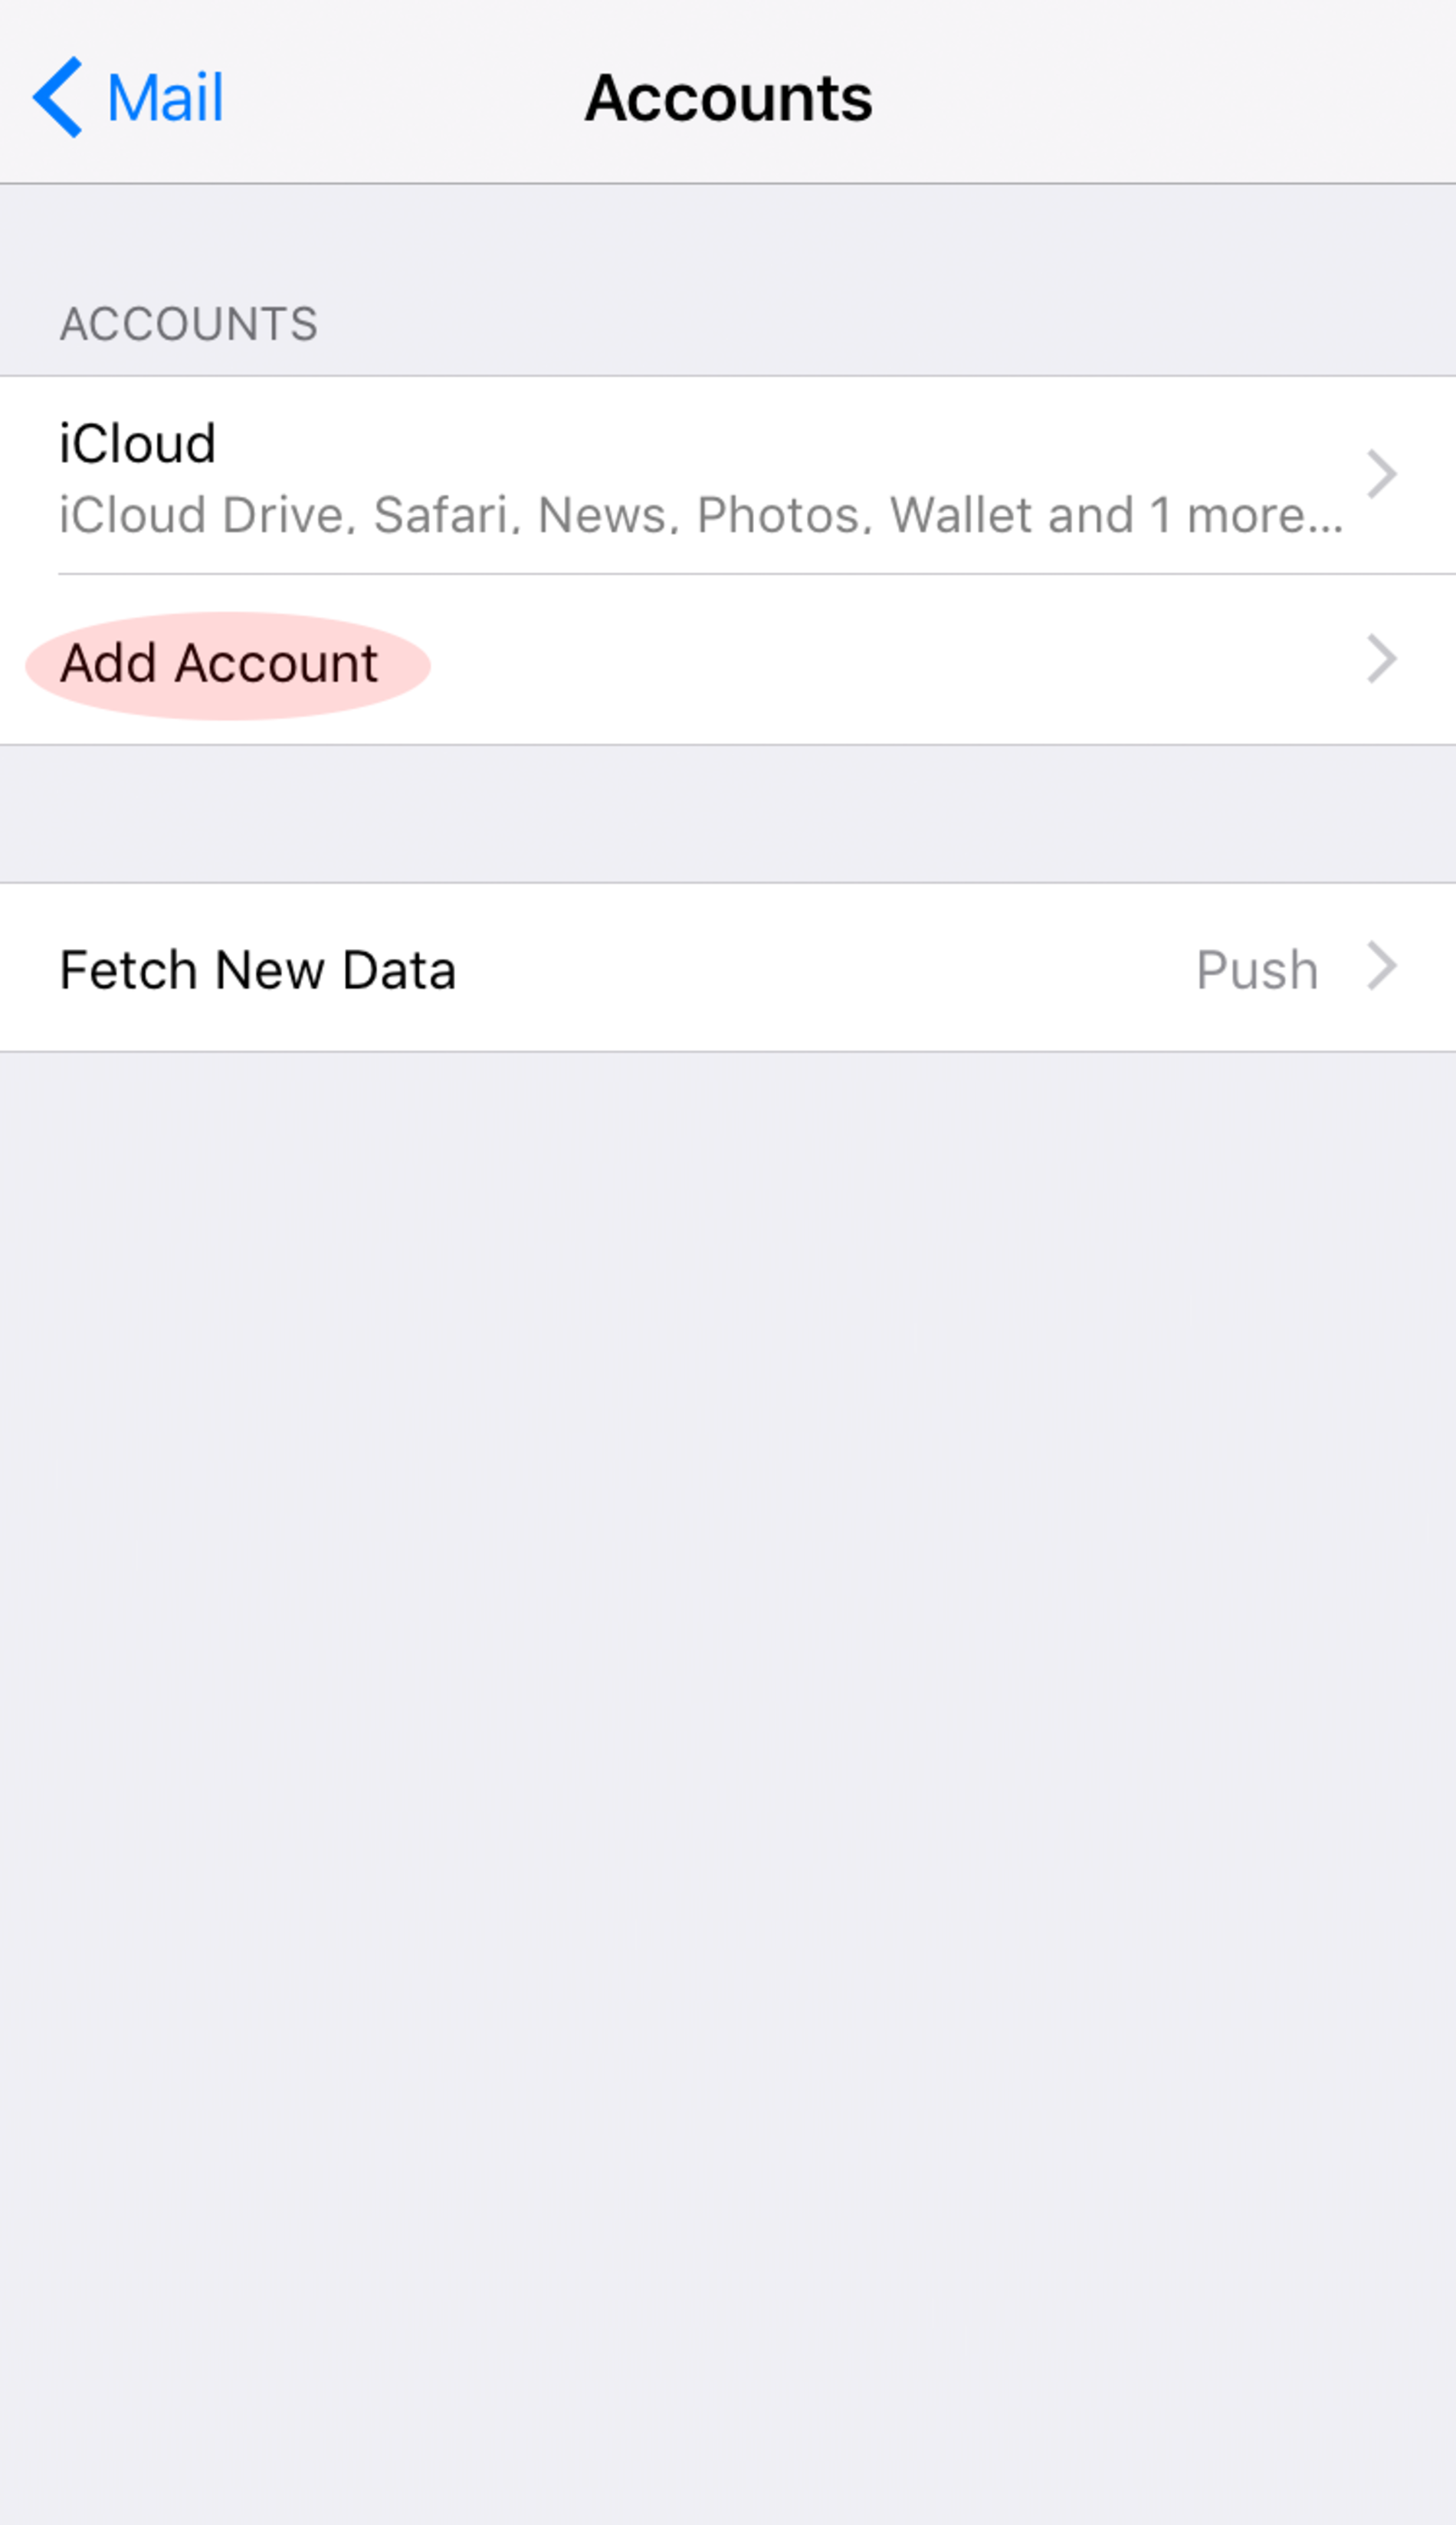
Step 3
Now tap on "Accounts" and after this tap on "Add Account" to start the setup assistant.
Step 4
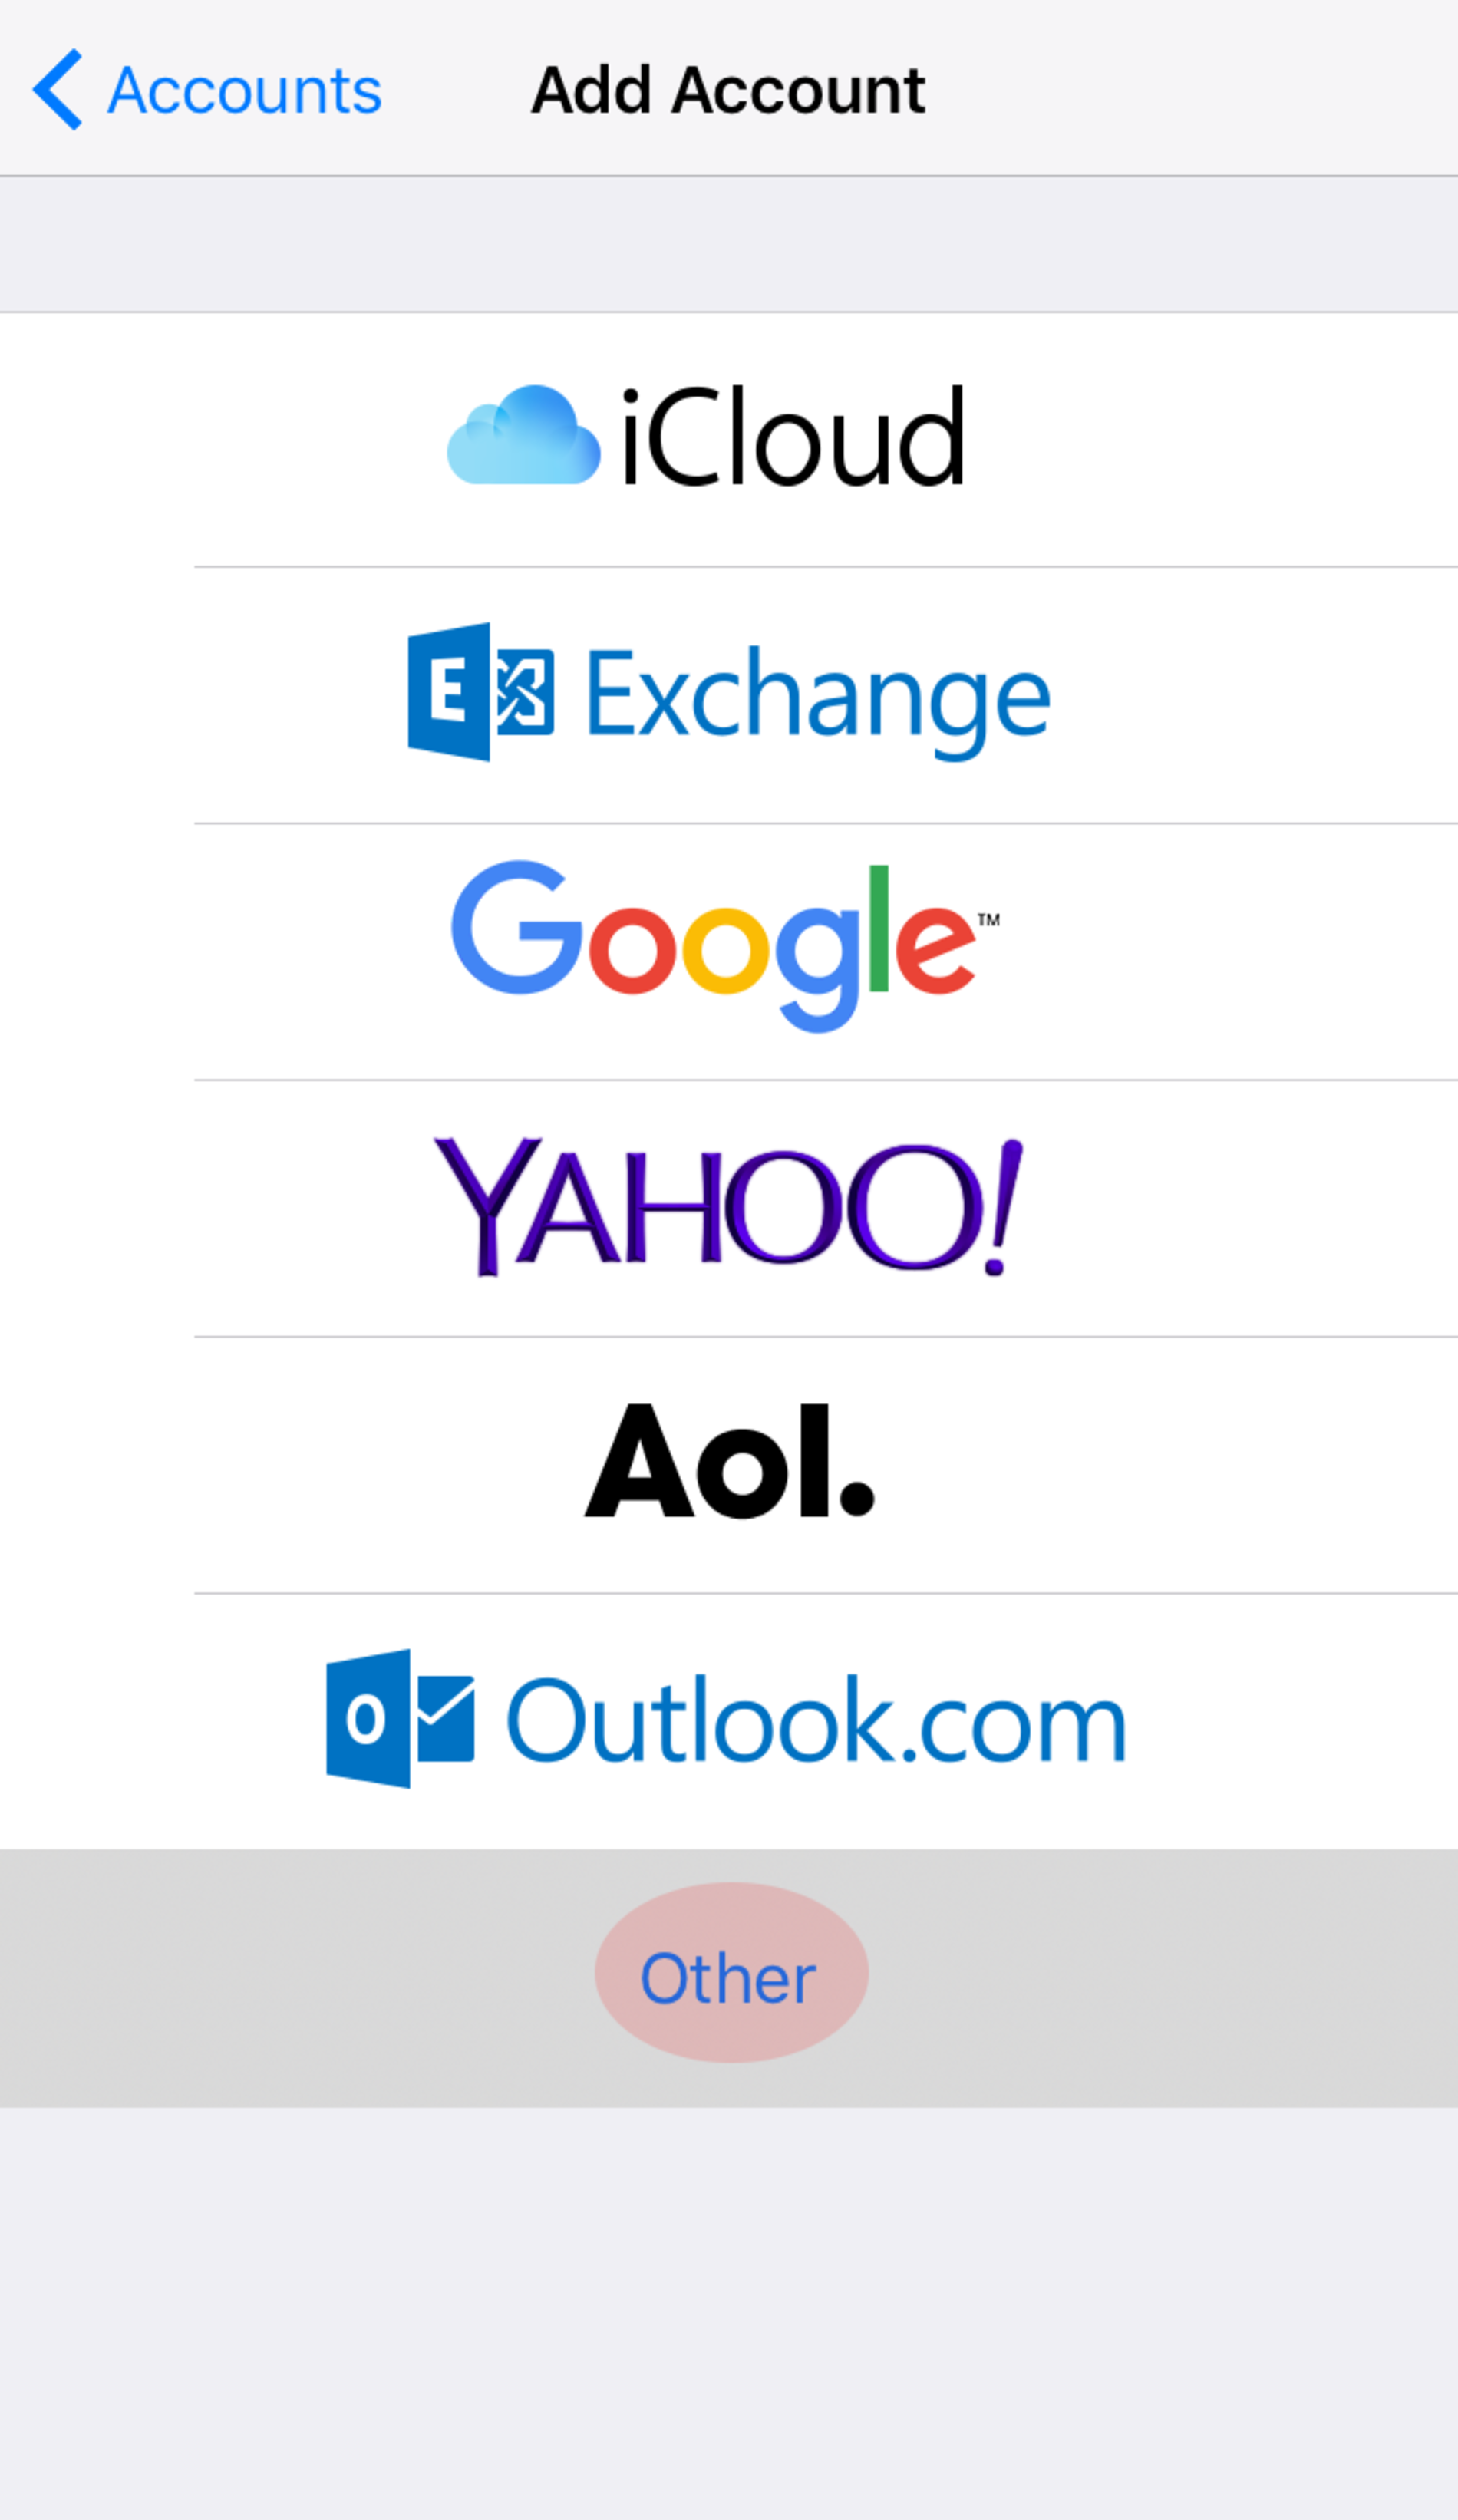
Choose the last option in the shown list called "Other".
Step 5
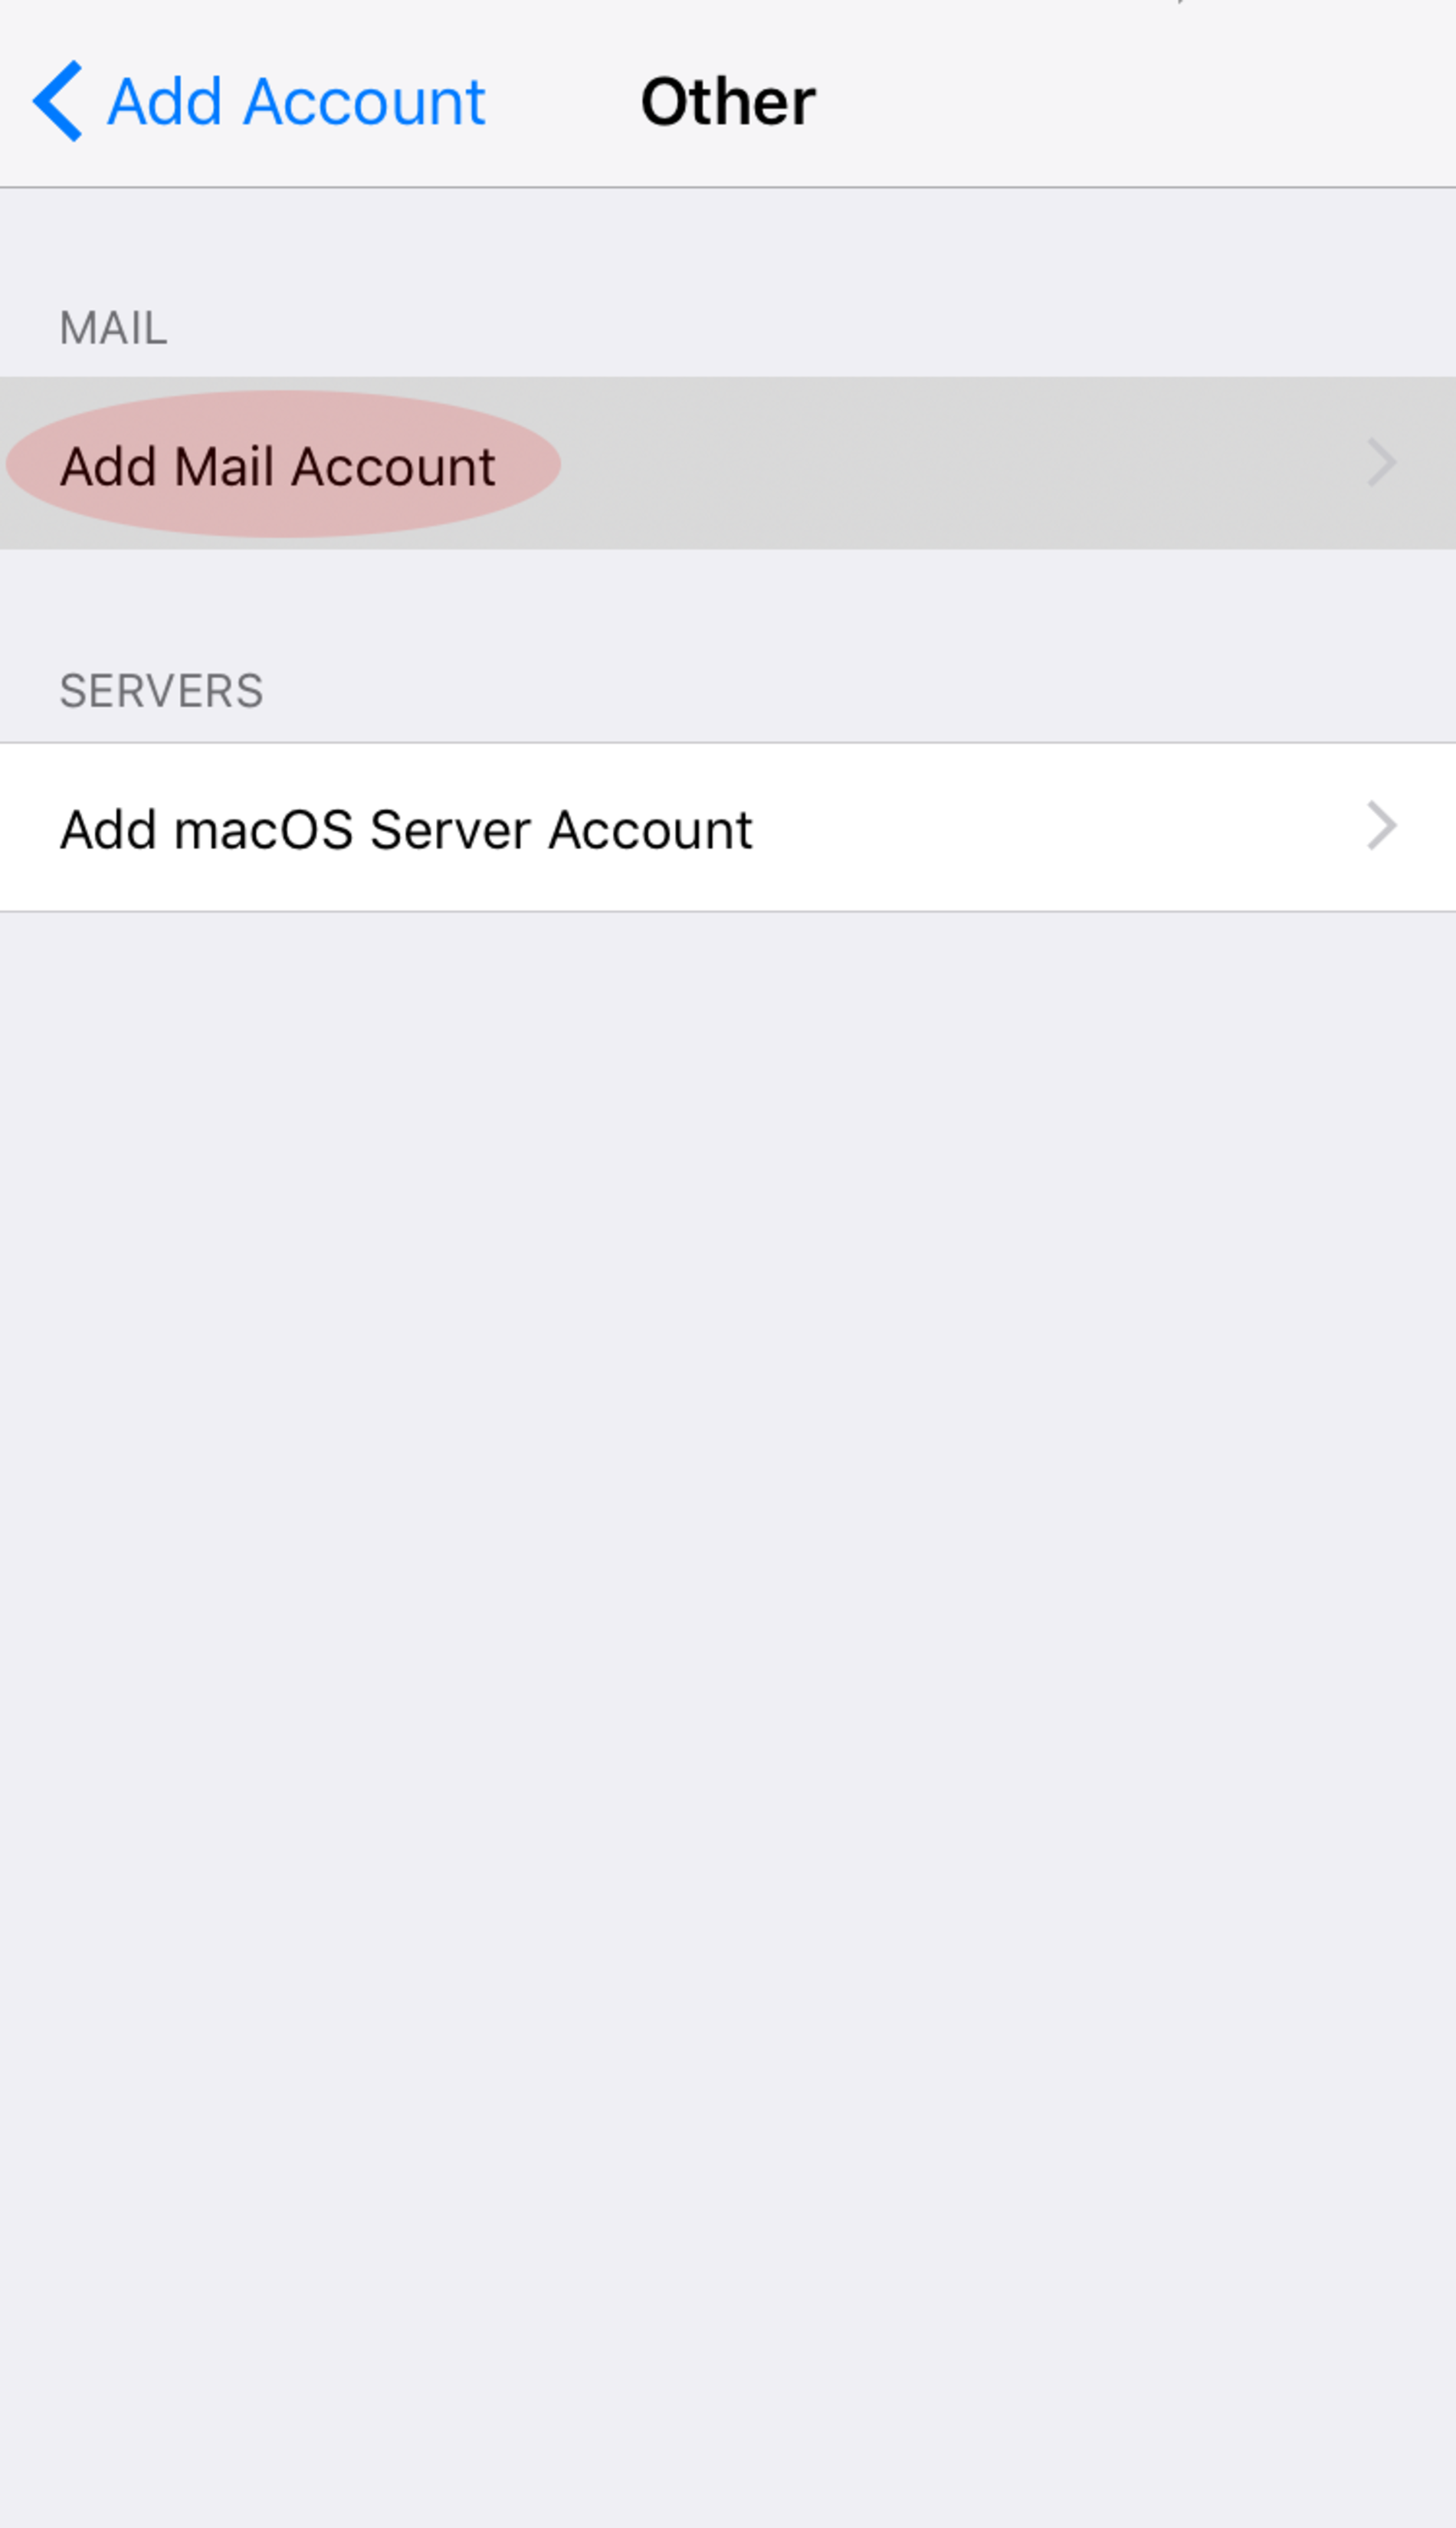
Now choose "Add Mail Account".
Step 6
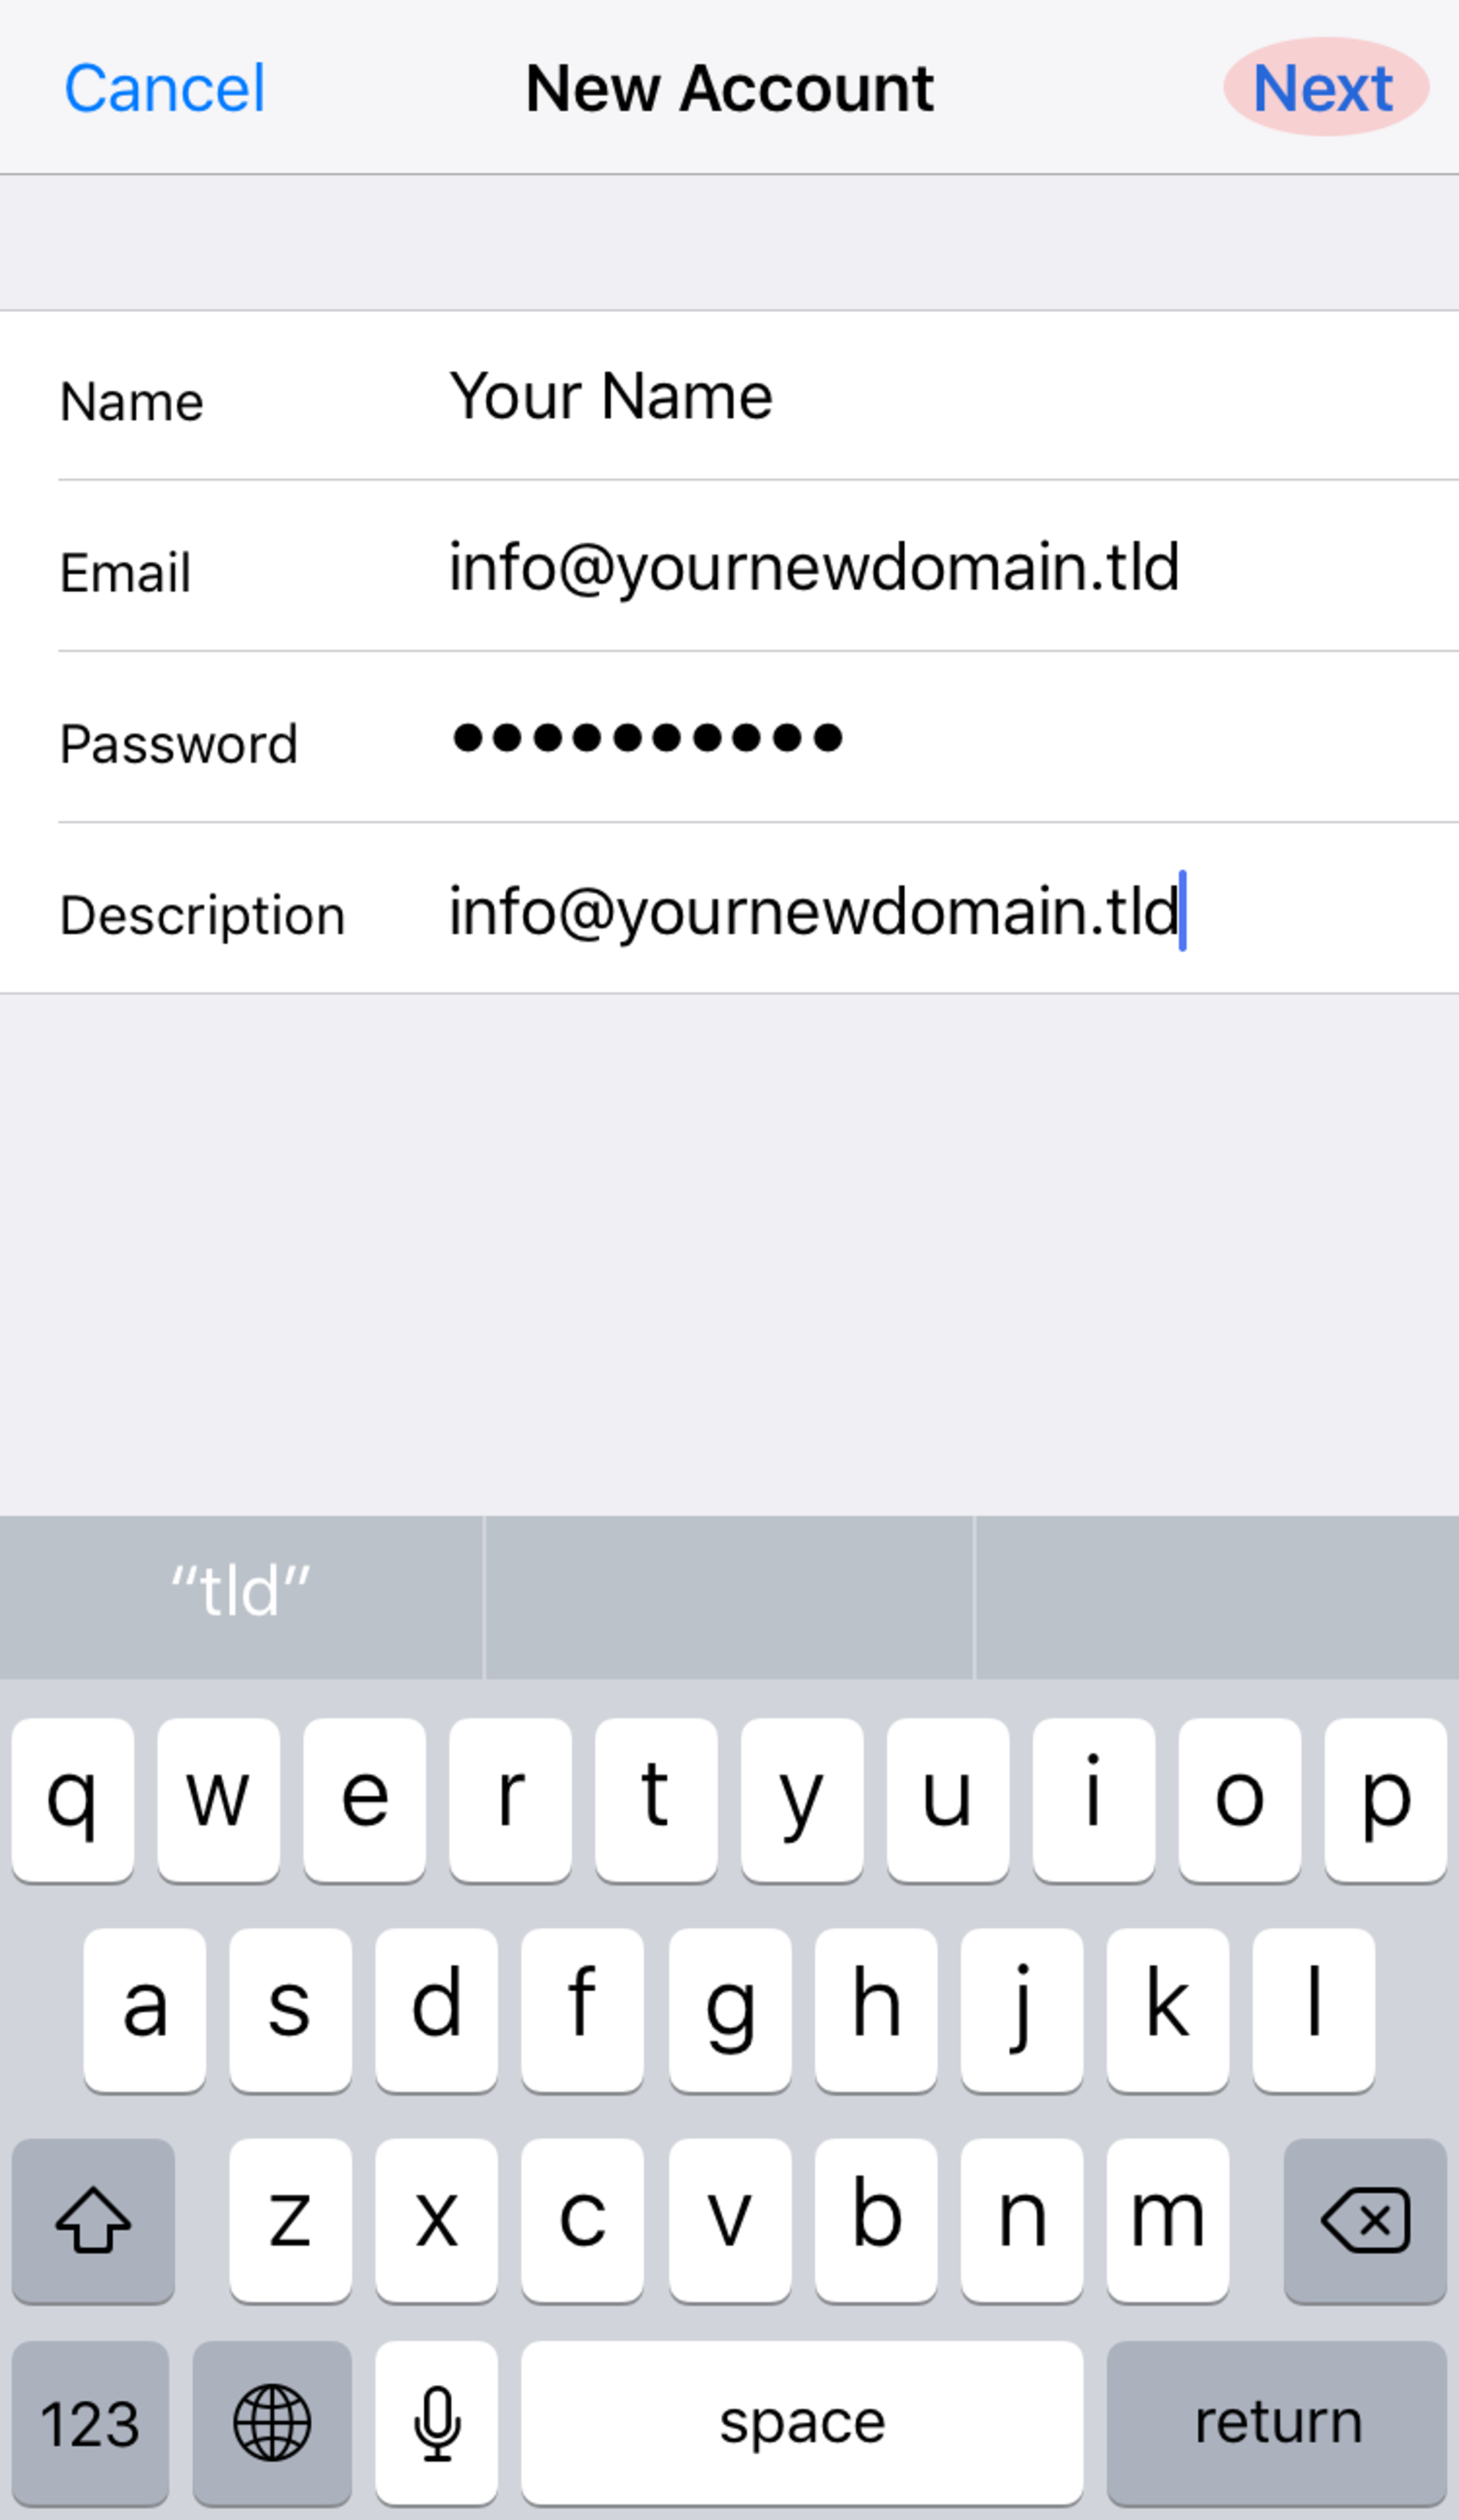
Please enter your name at the field "Name".
Type in the e-mail address you want to set up and the associated password which was set at the Email Manager module of your Control Panel.
Please type in your e-mail address at the "Description" field.
Continue with "Next".
Step 7
Now the entered e-mail address and the password are getting checked if they are correct.

Step 8
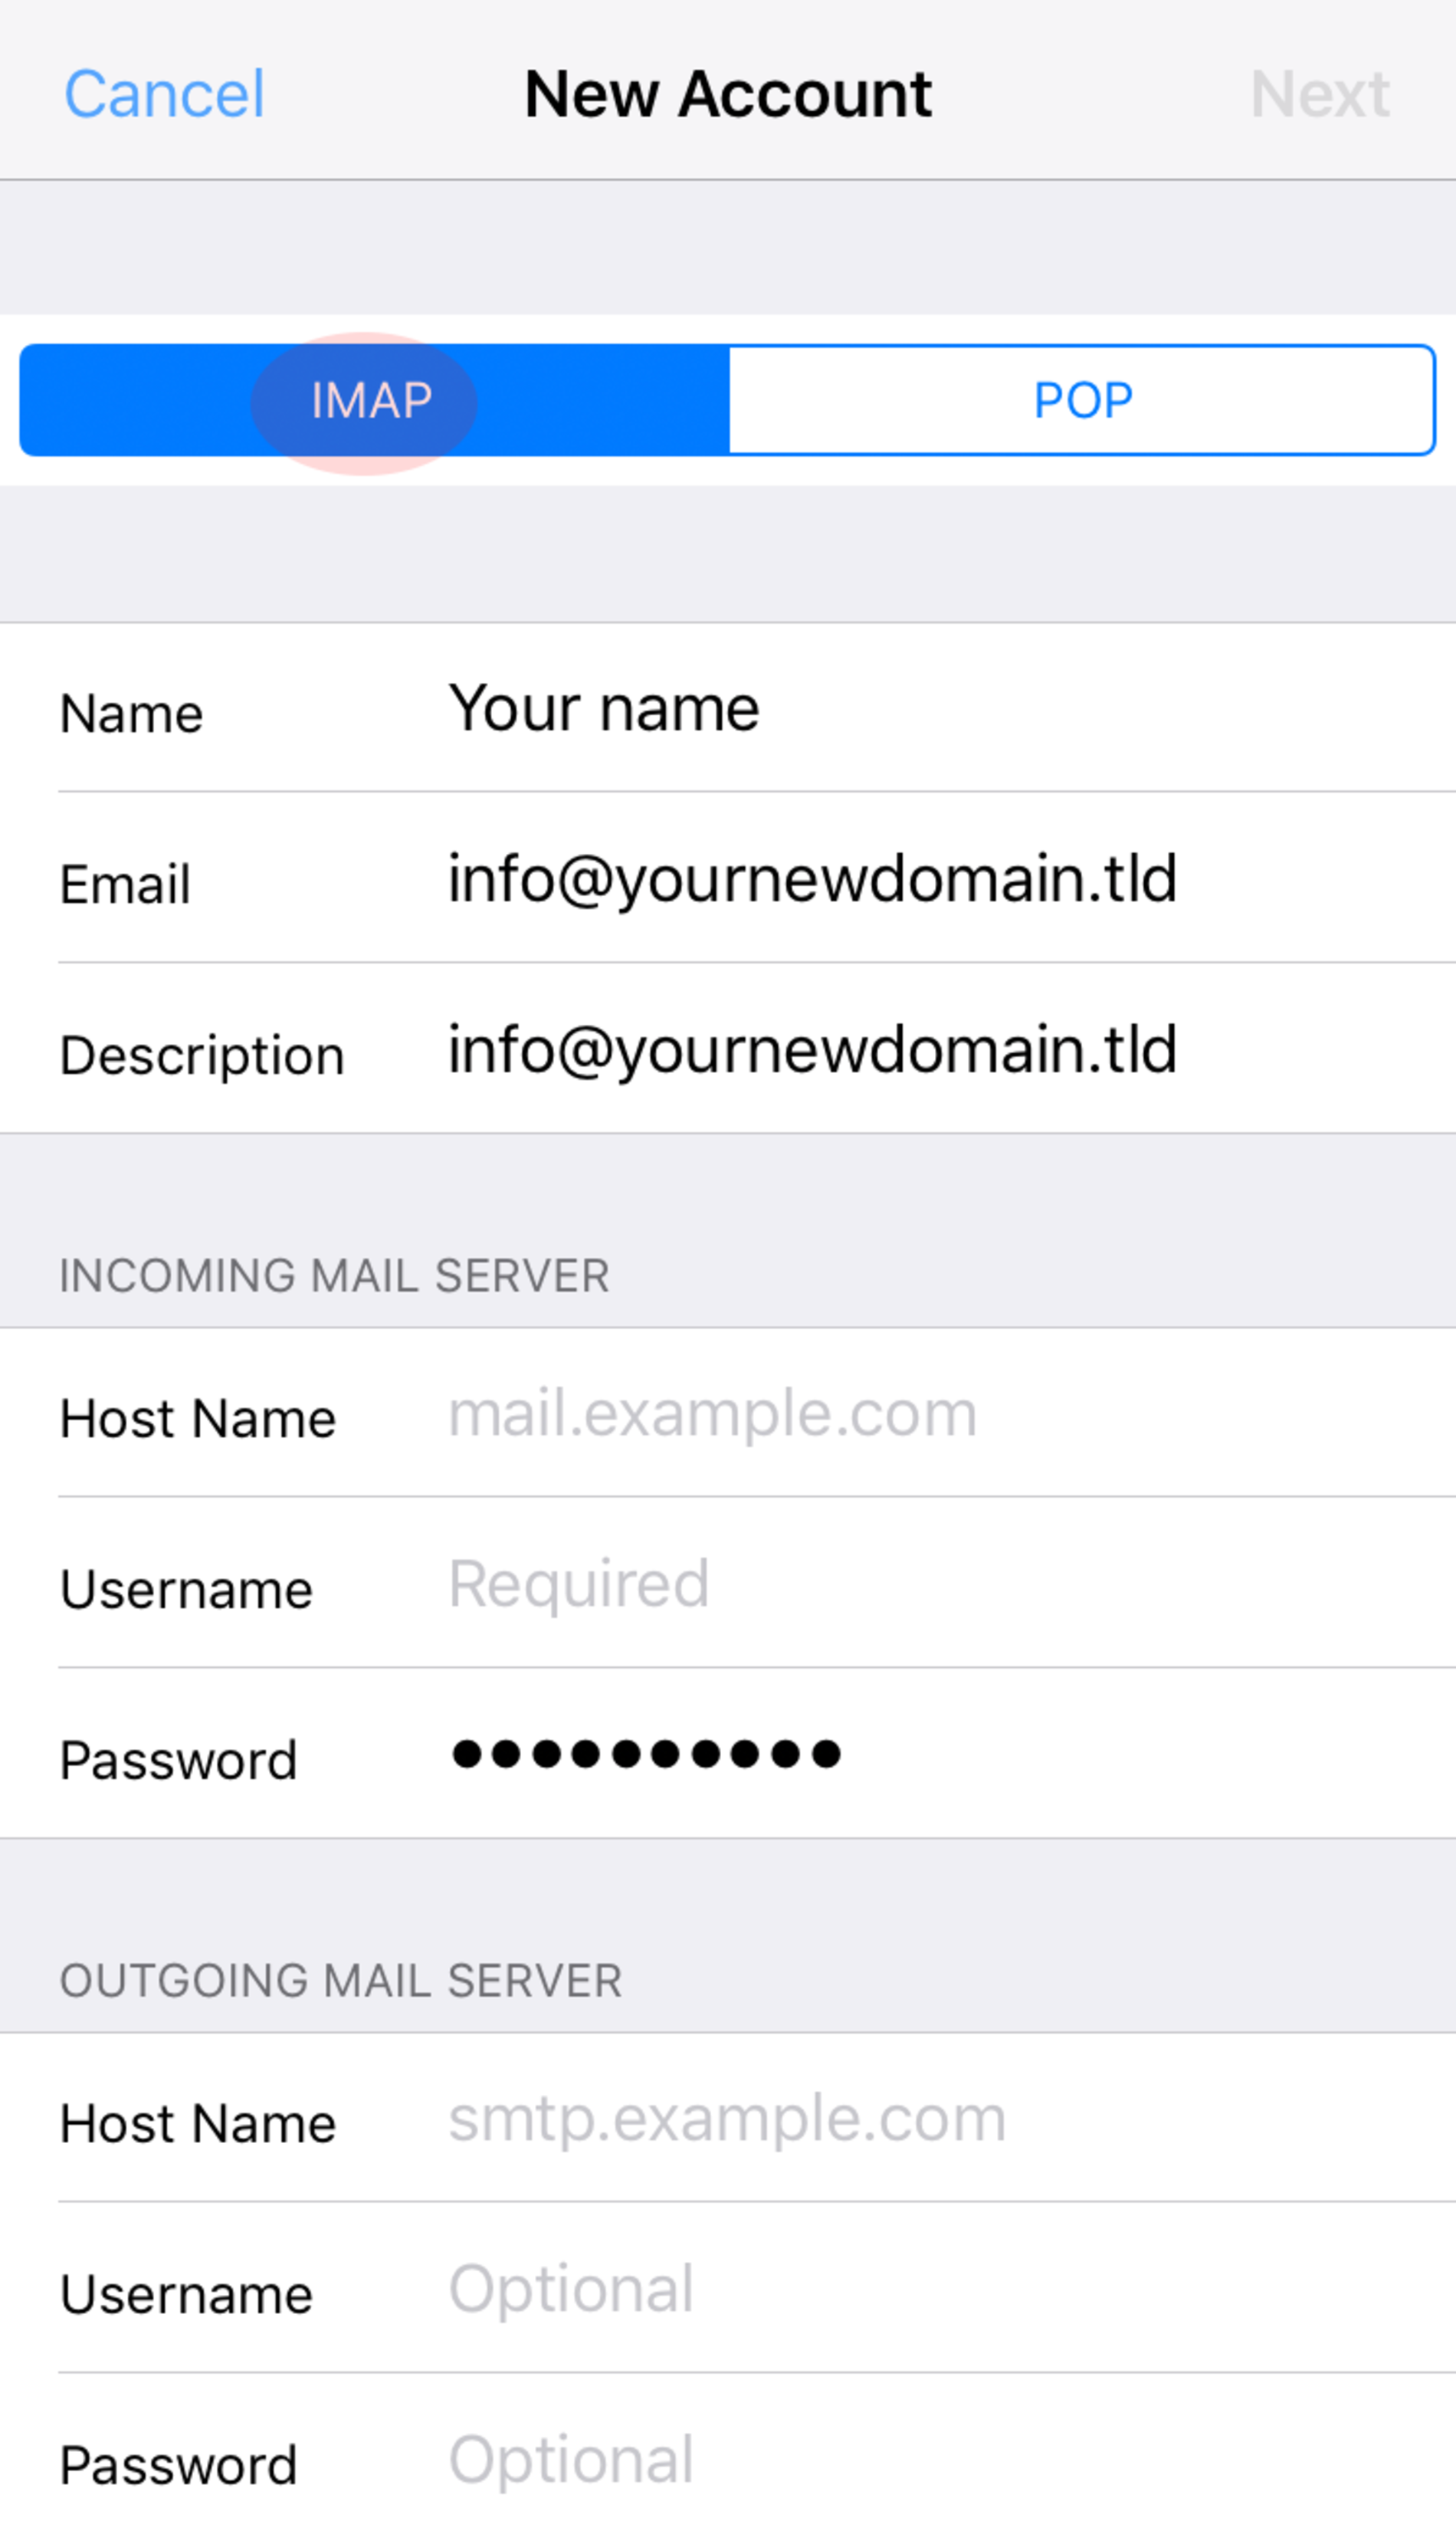
Please choose the account type "IMAP".
Enter your "Name" and type in your e-mail address twice for the fields "Email" and "Description".
Step 9
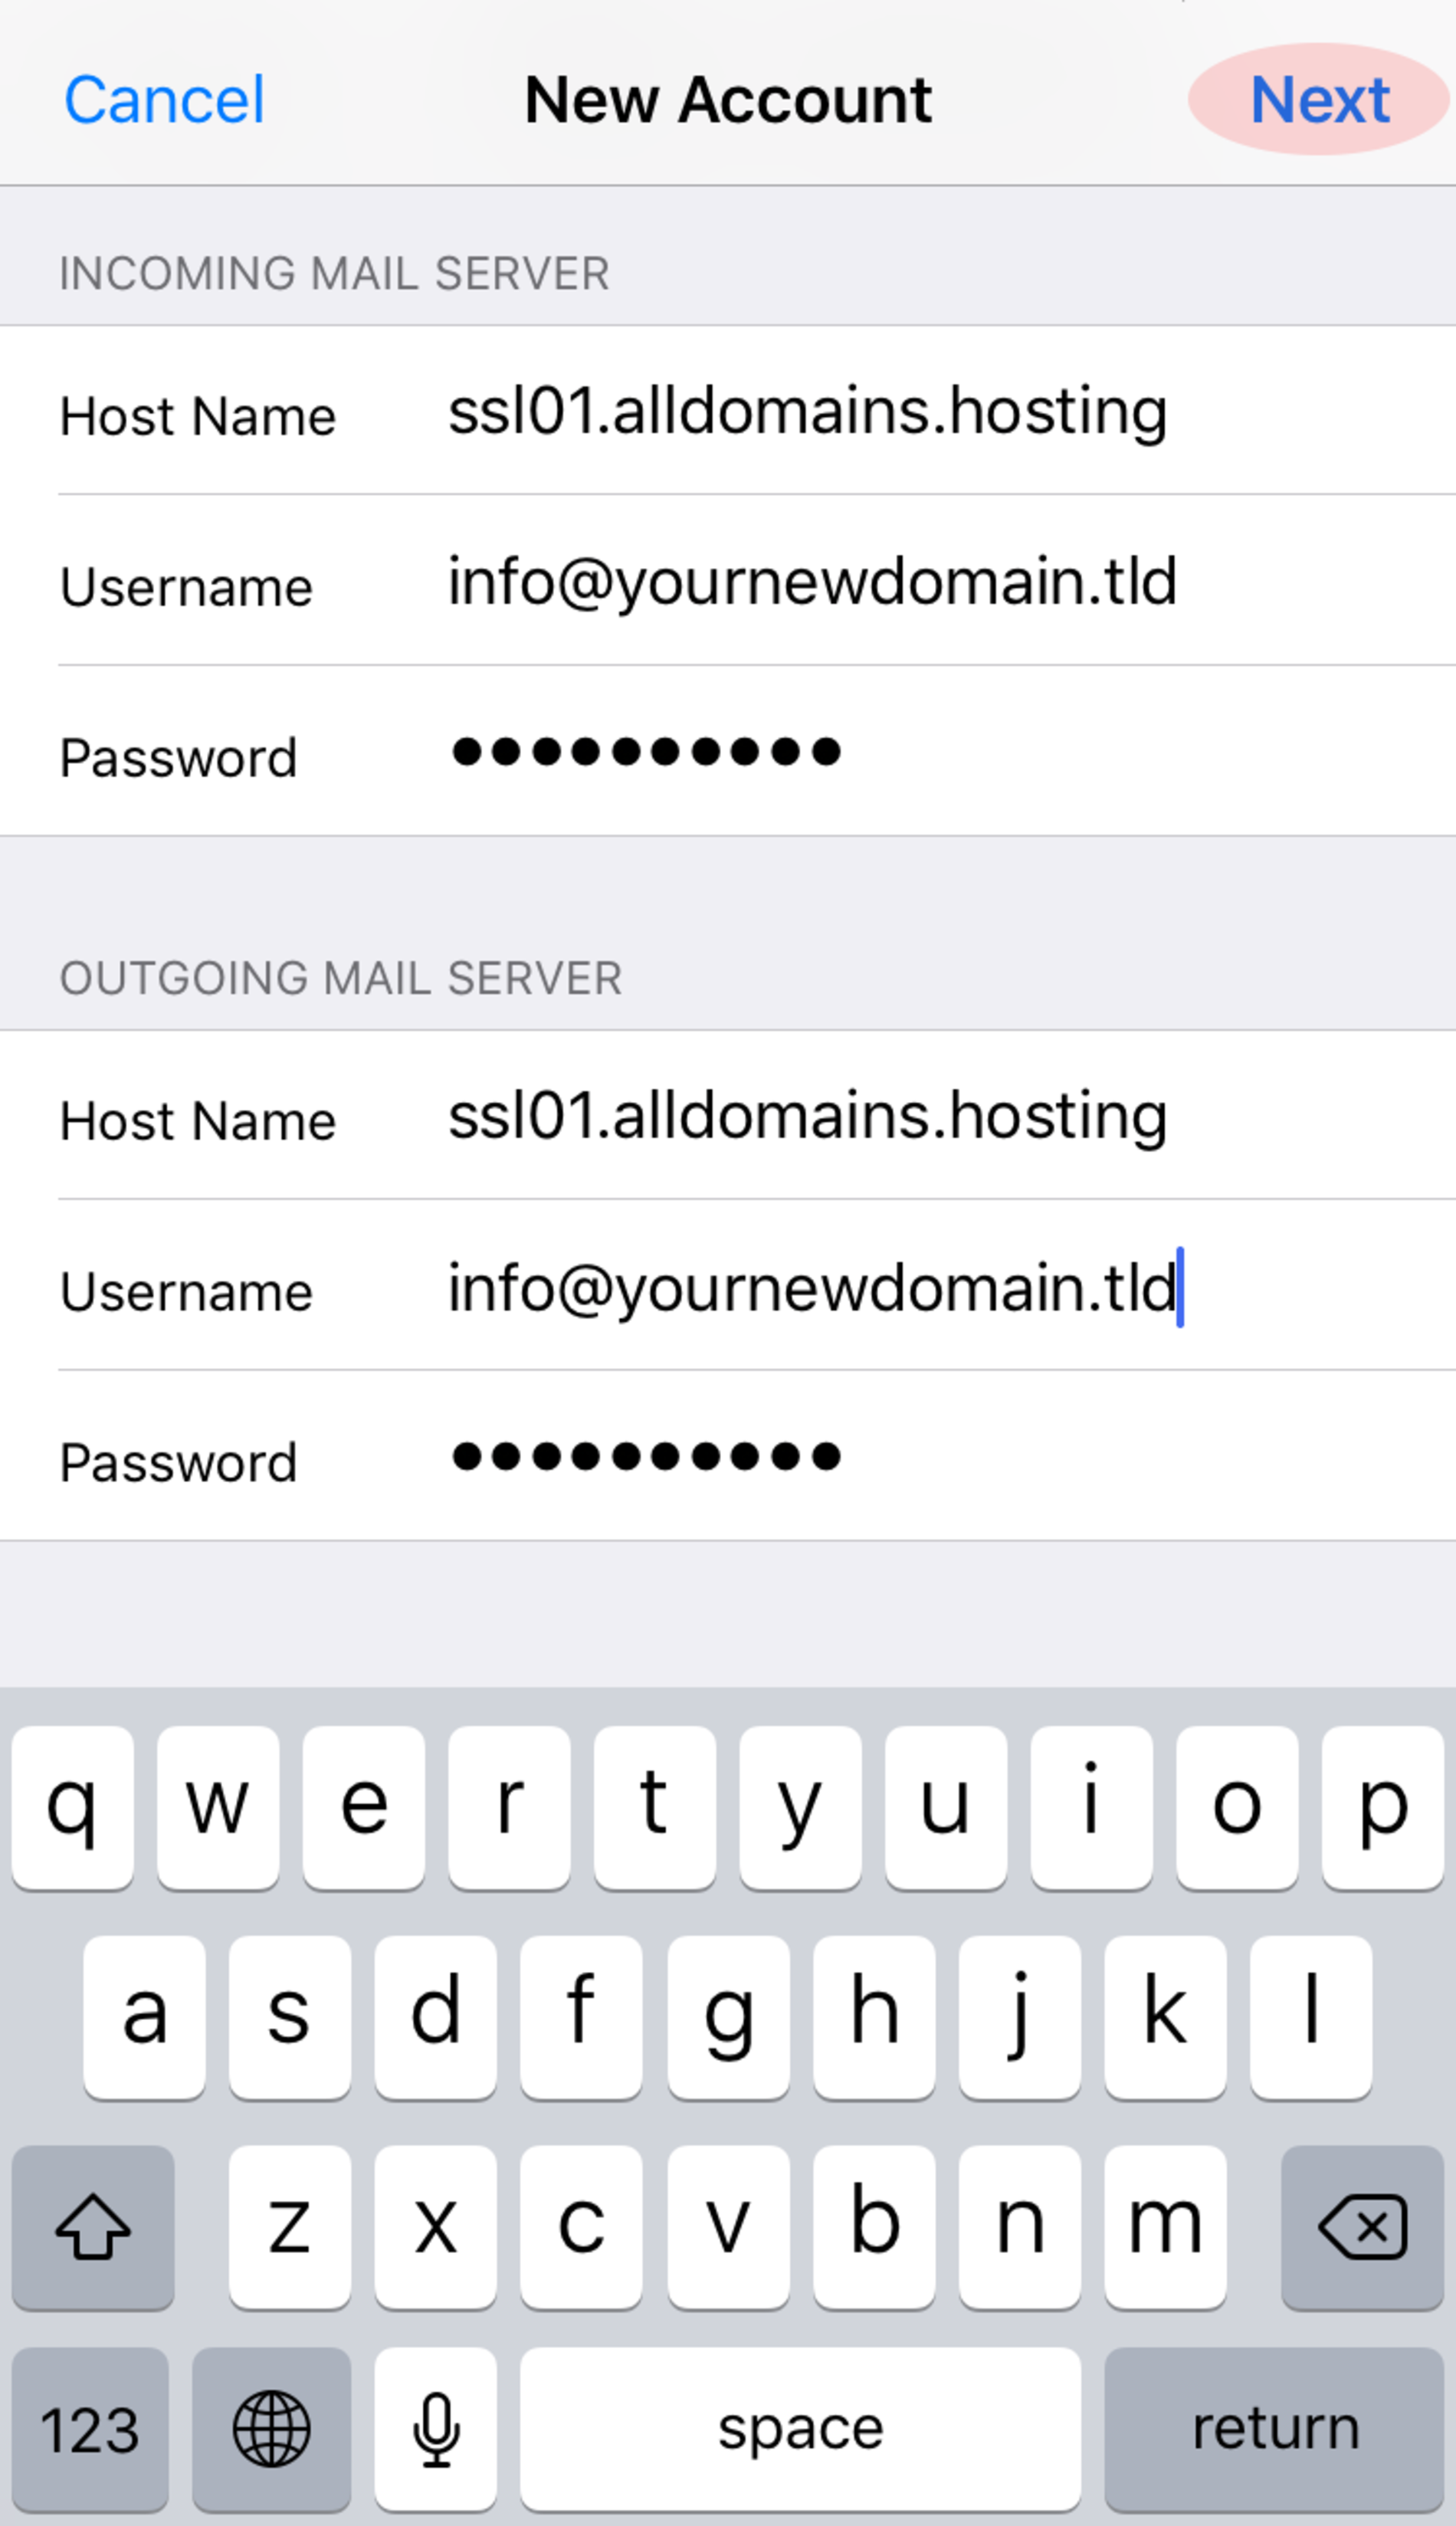
"INCOMING MAIL SERVER":
The "Host Name" is ssl01.alldomains.hosting.
"Username" is your e-mail address and the associated password you set at the Email Manager of your Control Panel.
"OUTGOING MAIL SERVER":
Enter also the "Host Name" ssl01.alldomains.hosting.
And once again type in your e-mail address at the field "Username" and the password of your e-mail address.
Double check your settings and hit the "Next" button in the upper right corner to continue.
Step 10
Your done settings are getting verified.

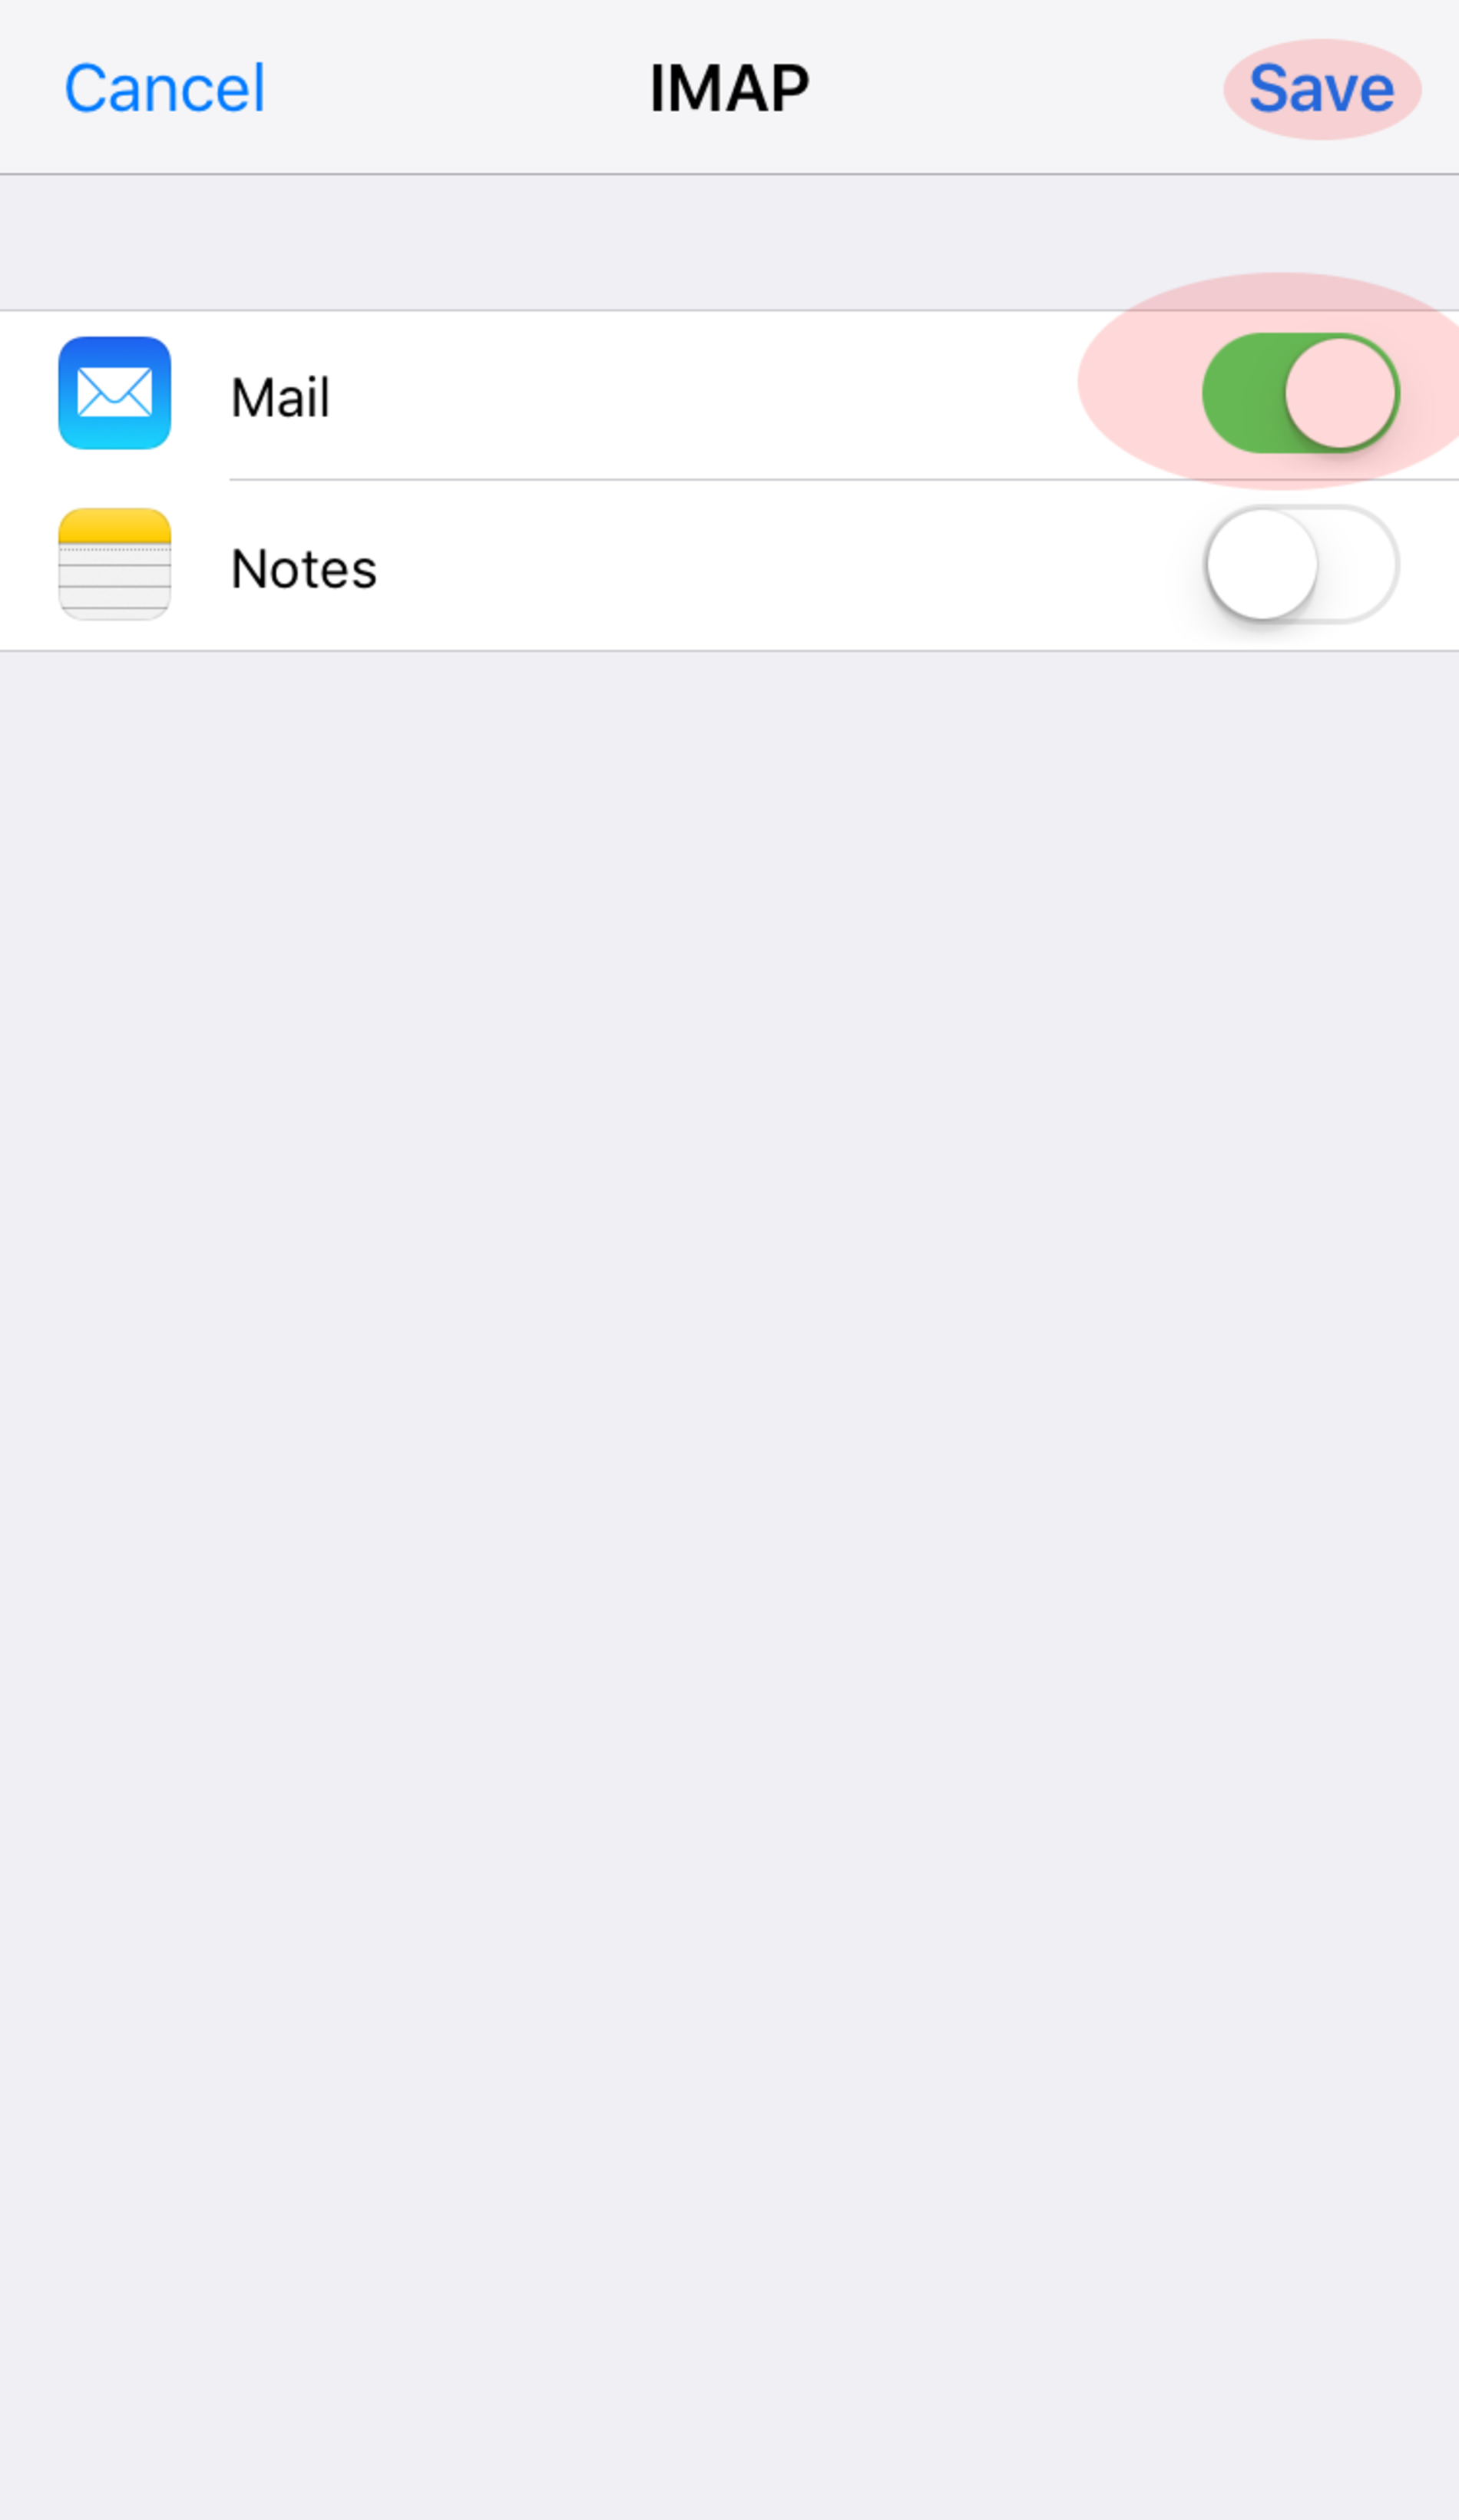
Step 11
At this step only allow access to "Mail".
You can finish the setup with the button "Save".
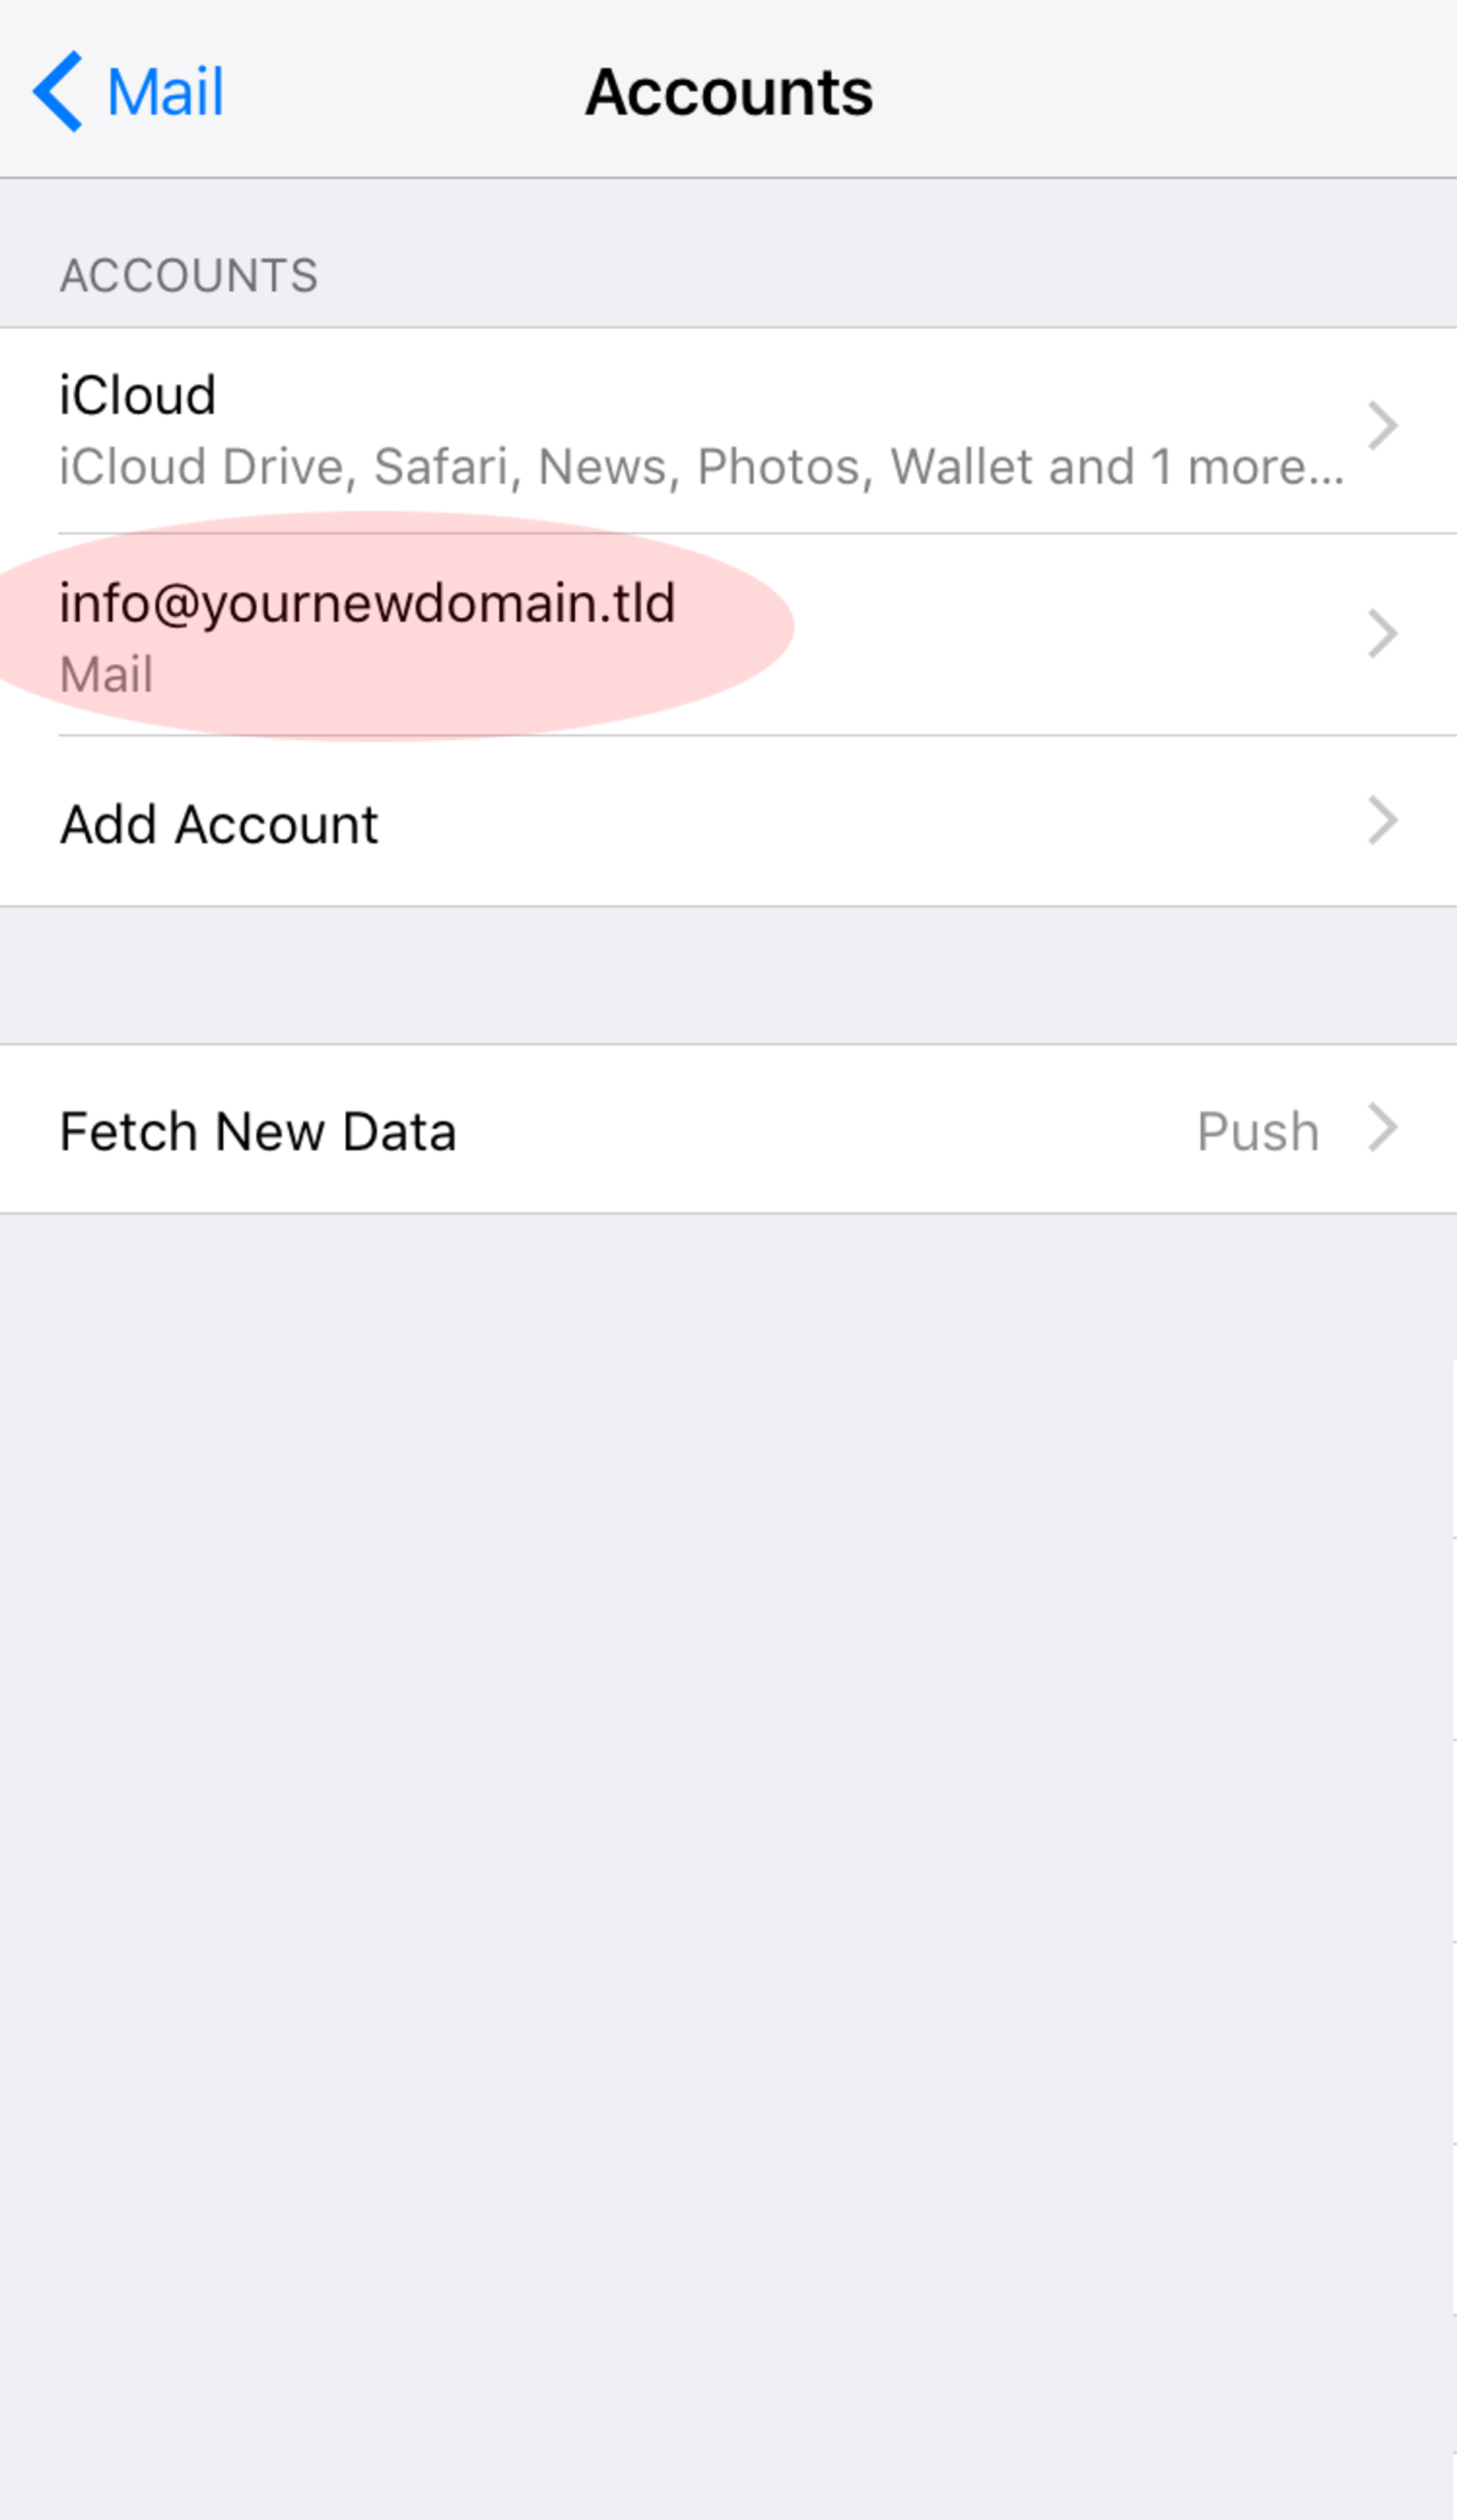
Step 12
The setup is finished and your new e-mail address is now added to the list of your e-mail accounts.