Set up new e-mail account in Outlook 2016 for Mac OS X
Bellow you find a detailed description of how you set up a new e-mail account in Outlook 2016 for Mac OS X.
Note:
If the e-mail address which should be set up is a new created one, we recommend to login into the webmail in your Control Panelbefore you start the configuration in your e-mail client.Start webmail:
You can start the webmail either with the Control Panel module Webmail or you use the alias /up by simply typing yourdomain.tld/up (yourdomain.tld have to be replaced by your own domain) into the search bar of your browser. More information about webmail and e-mail.
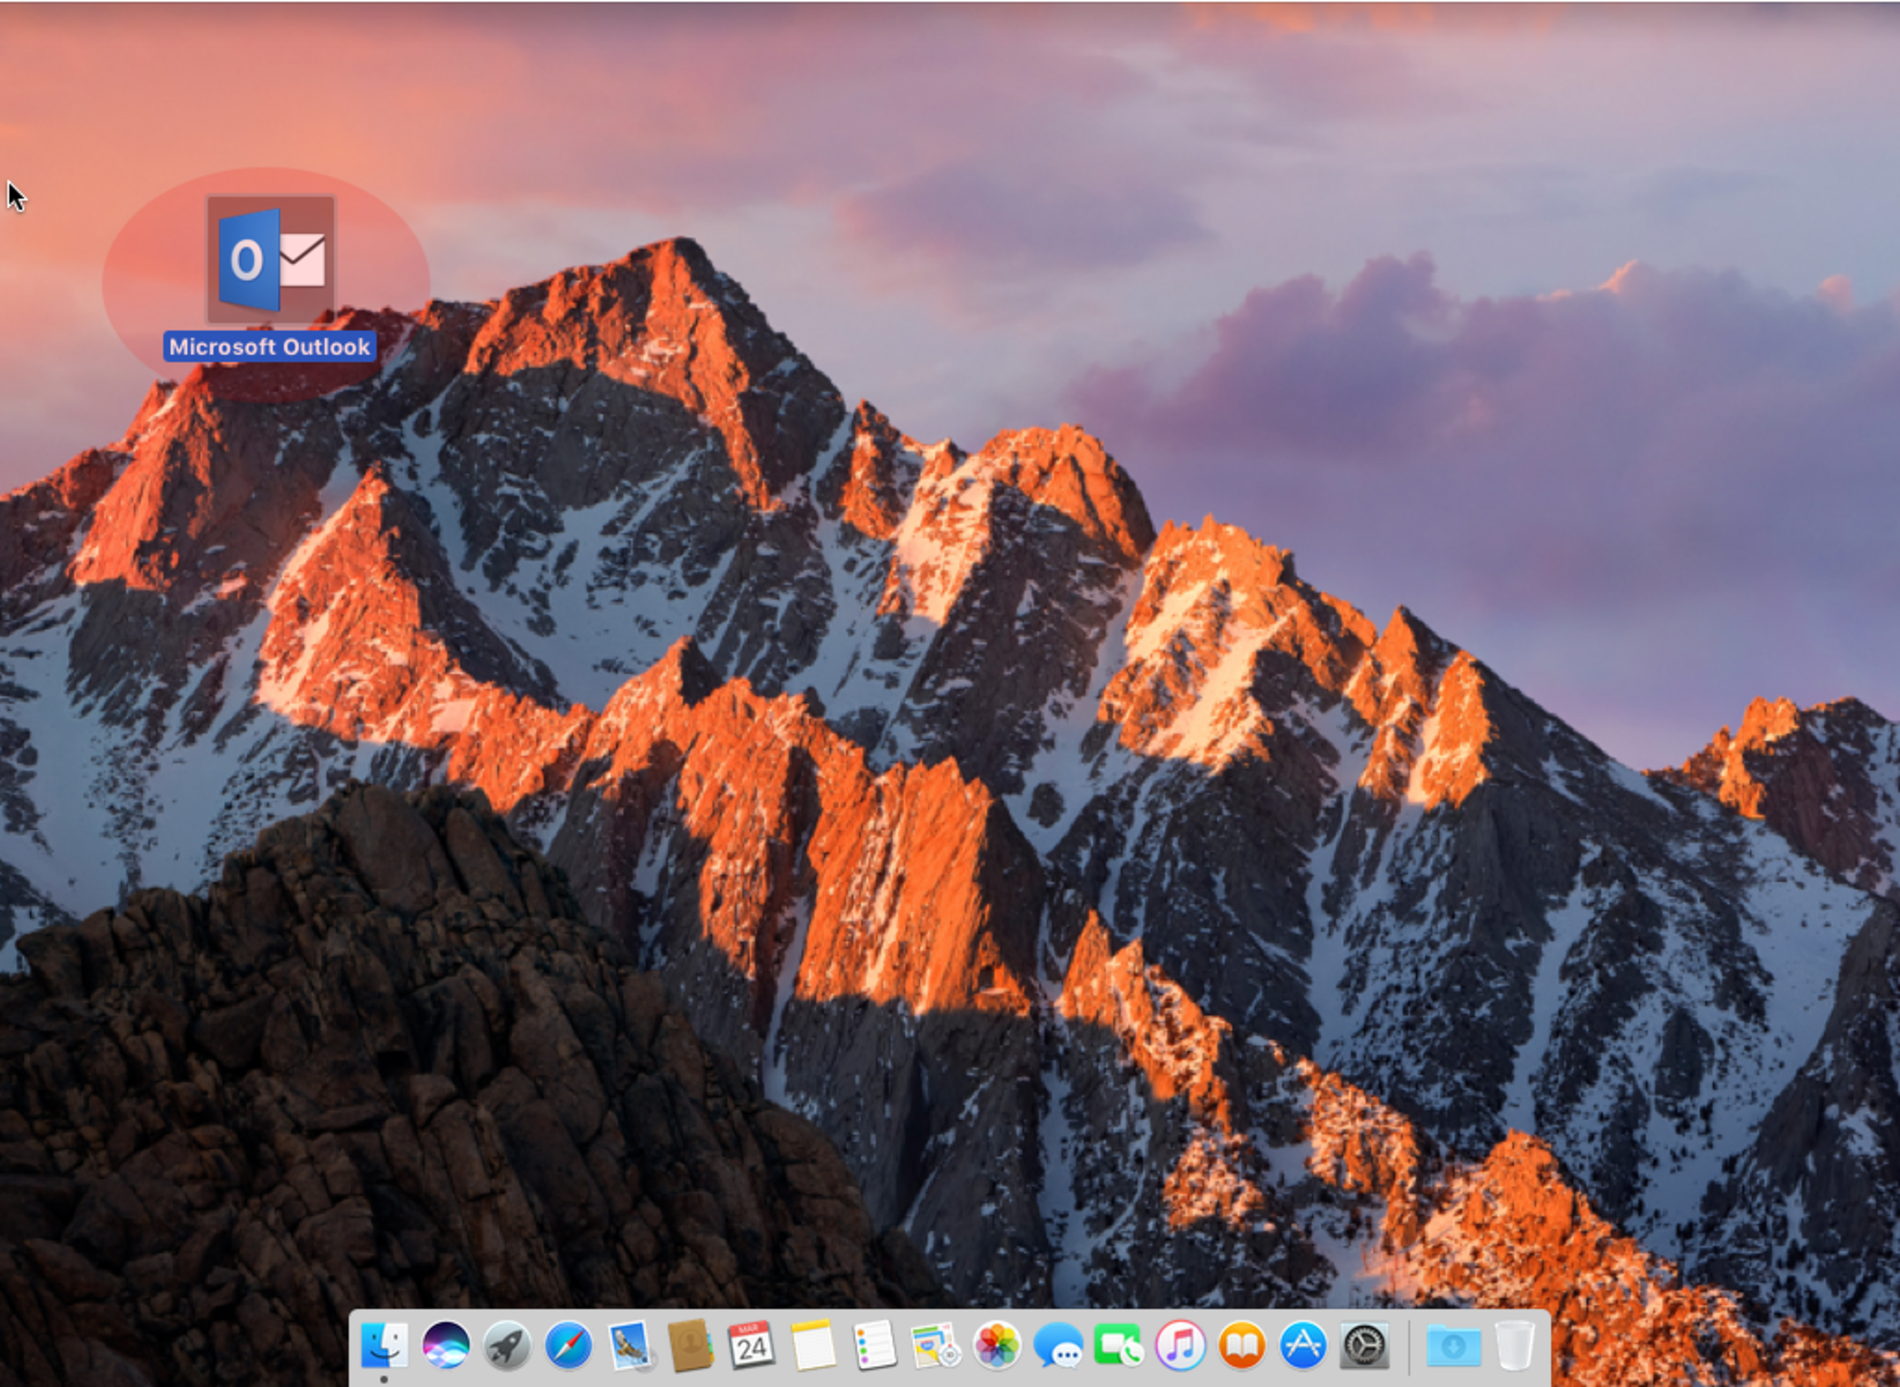
Step 1
At first you need to open the Mac OS X version of "Outlook 2016"
Step 2
If you have a new installation of "Outlook 2016" the setup assistant opens automatically.
If not you need to go to "Outlook", select "Settings" and then go to "Accounts". Here you can add a new account to your installation.

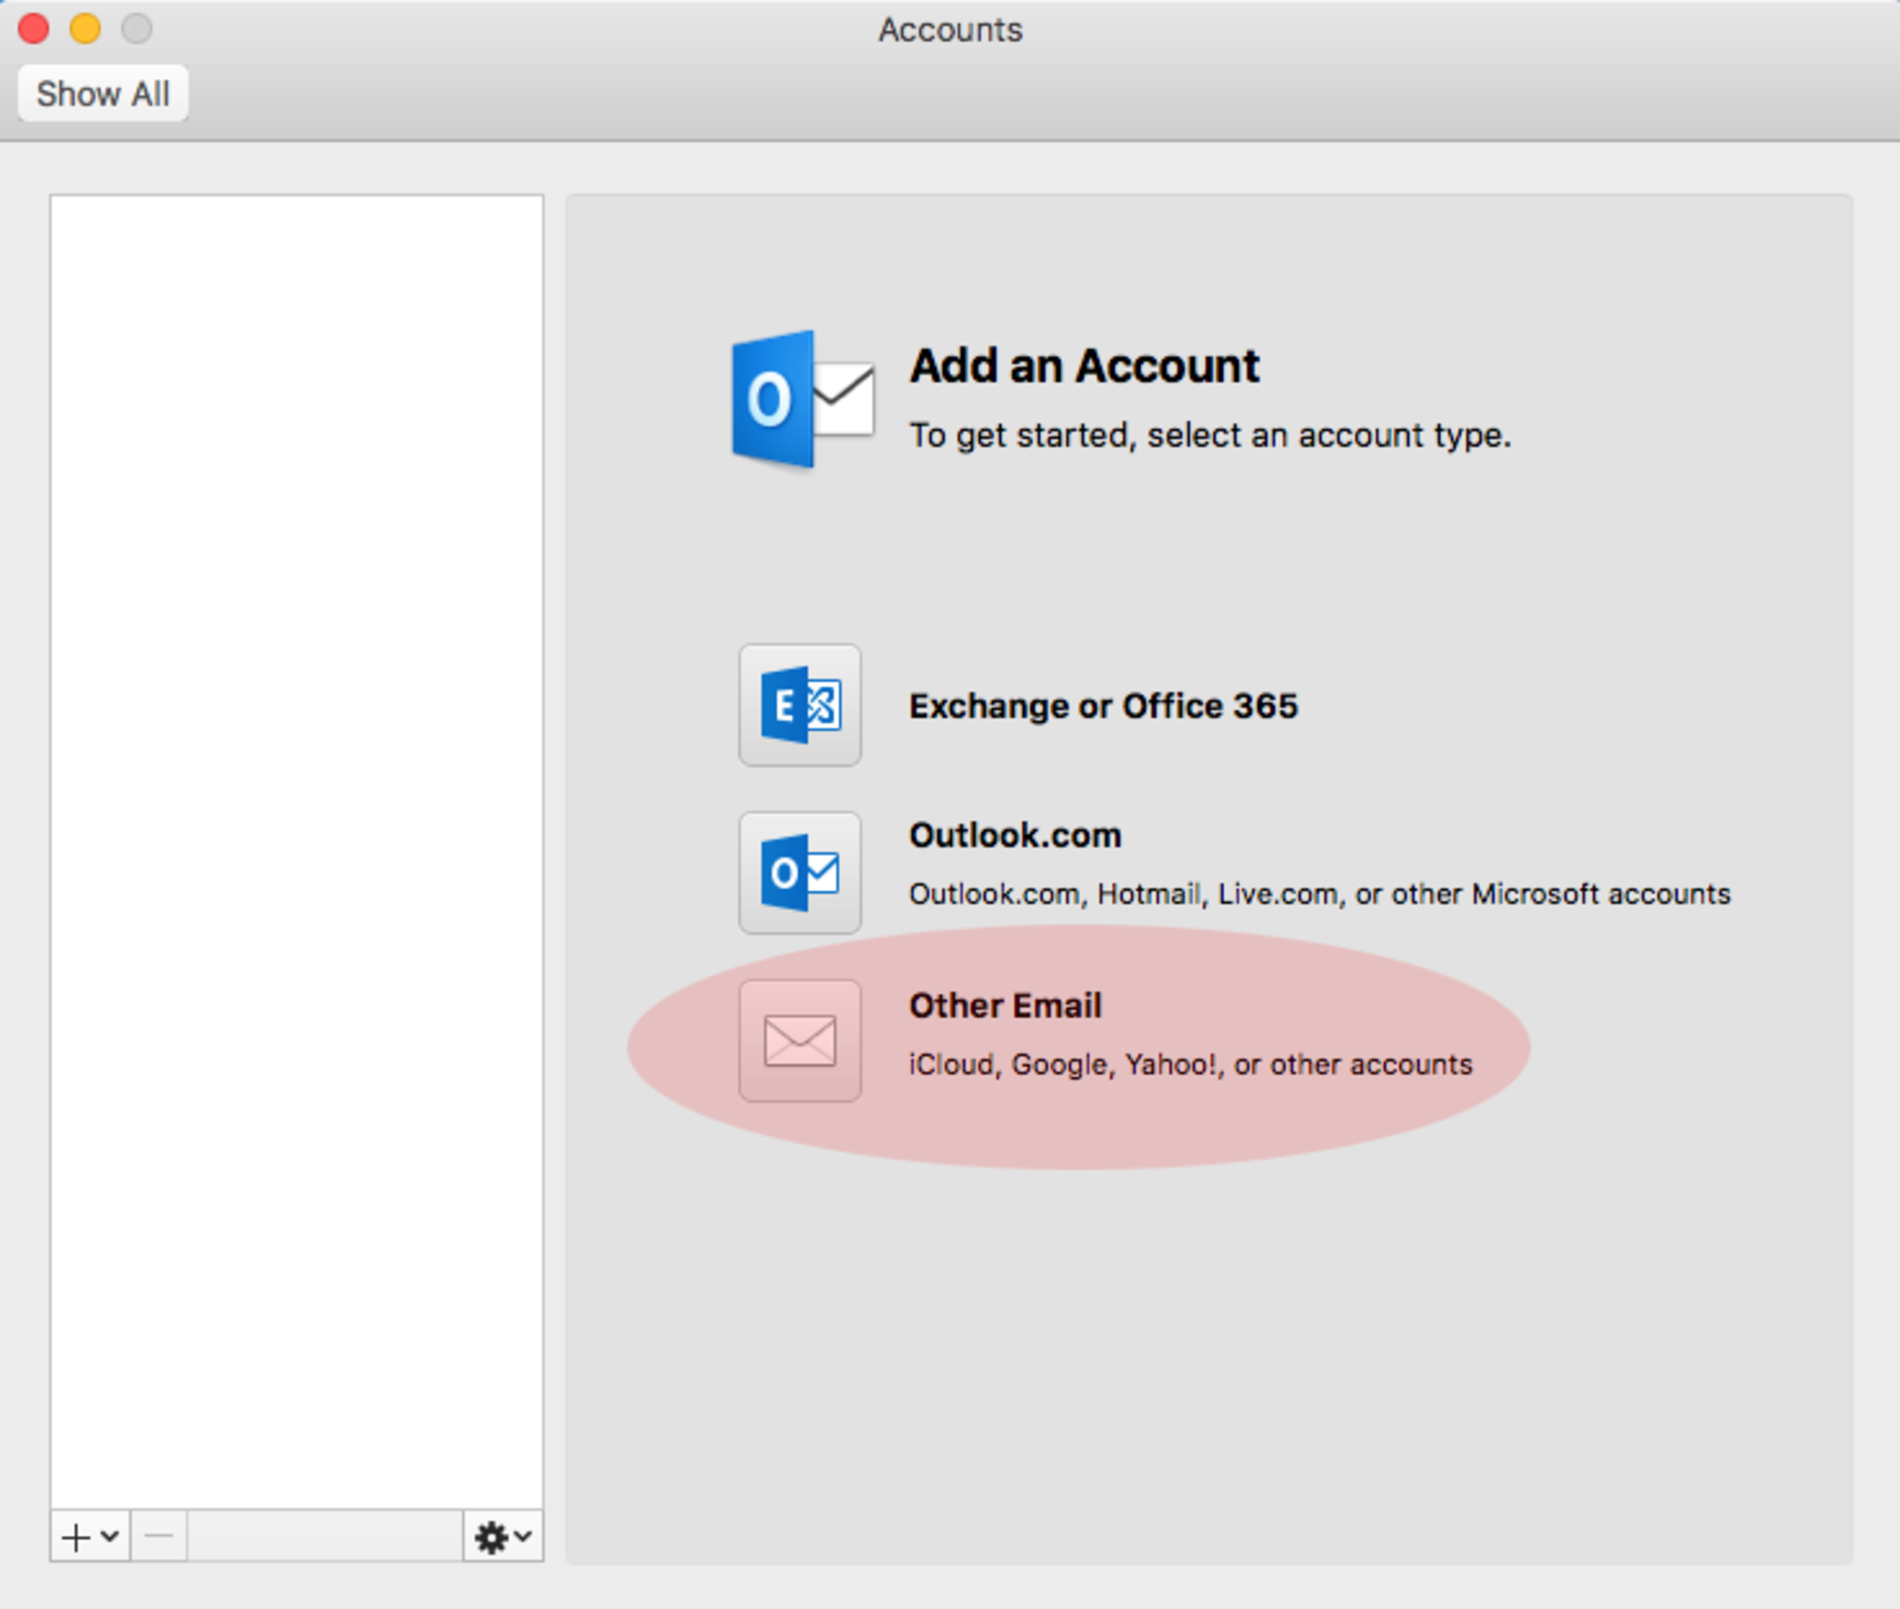
Step 3
In the setup assistant select the last option "Other Email".
Step 4
Now simply enter your "E-mail address" and the "Password" you created in your Control Panel with the Email Manager.
Remove the tick at "Configure automatically" for the next step.

Step 5
Please fill out the next fields like shown on the screenshots to use a SSL secured connection:
Enter your e-mail address at "Username".
Select the type "IMAP".
As server for "Incoming server" enter ssl01.alldomains.hosting.
Set a tick at "Use SSL to connect (recommended)".
The port should automatically adjust to 993. If this didn’t happen also set a tick at "Override default port" and type in the port993.

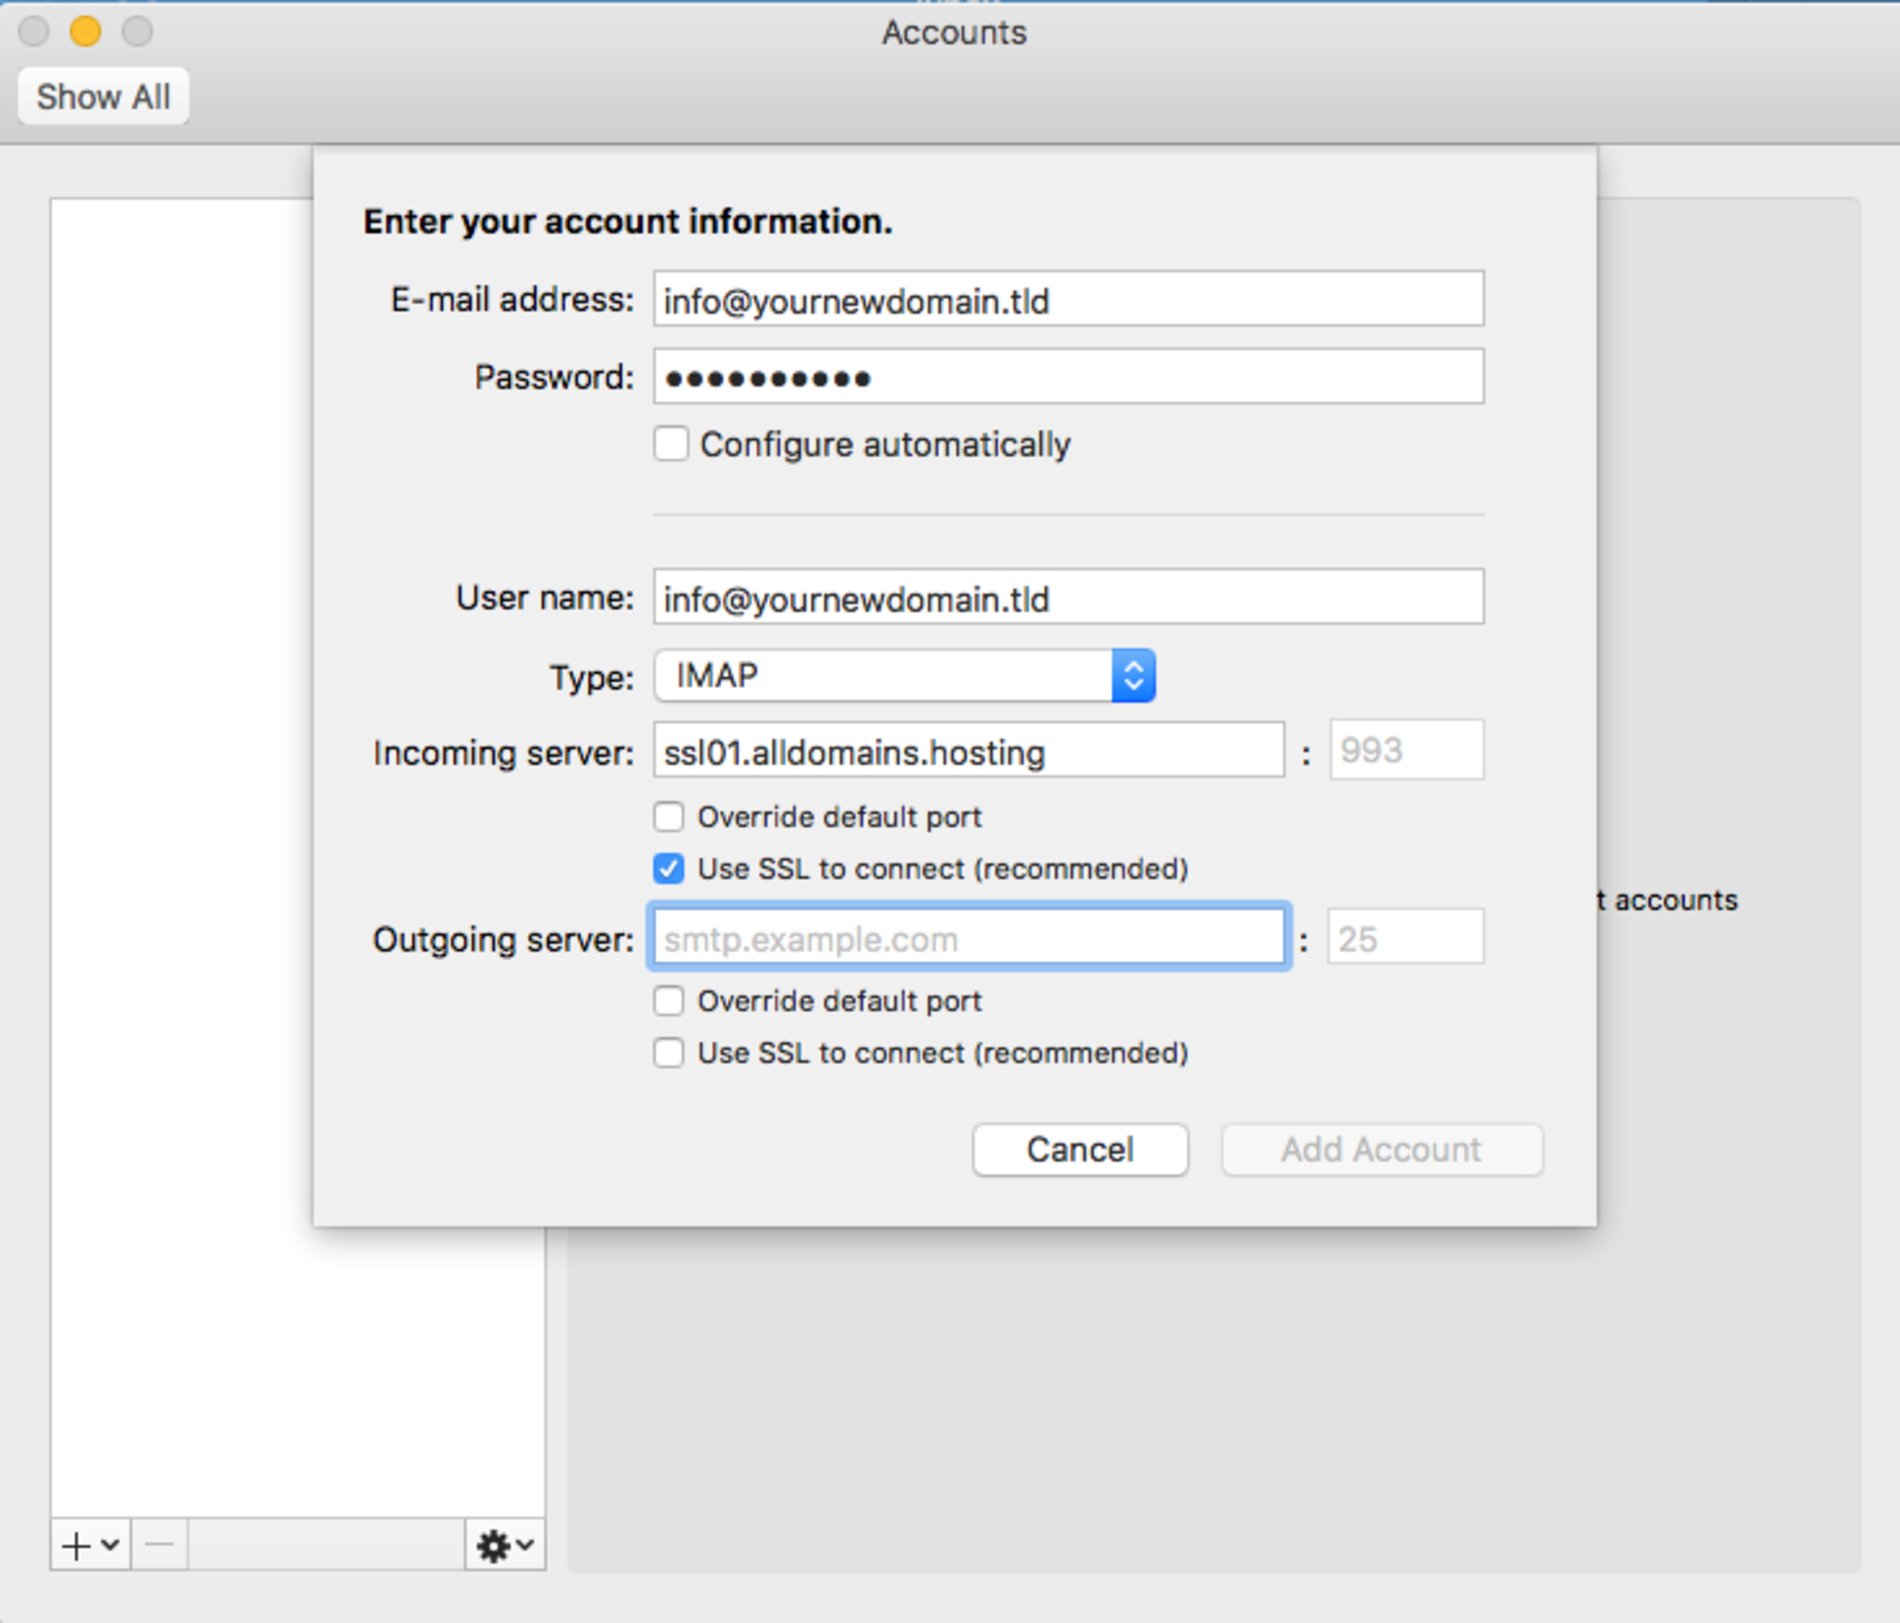
Step 6
For the "Outgoing server" enter again ssl01.alldomains.hosting.
Set a tick at "Override default port" and type in the port587.
Also set a tick at "Use SSL to connect (recommended)". It is possible that the entered port changes, if this happens please type in again 587.
Finally check all your settings and click on "Add Account".

Step 7
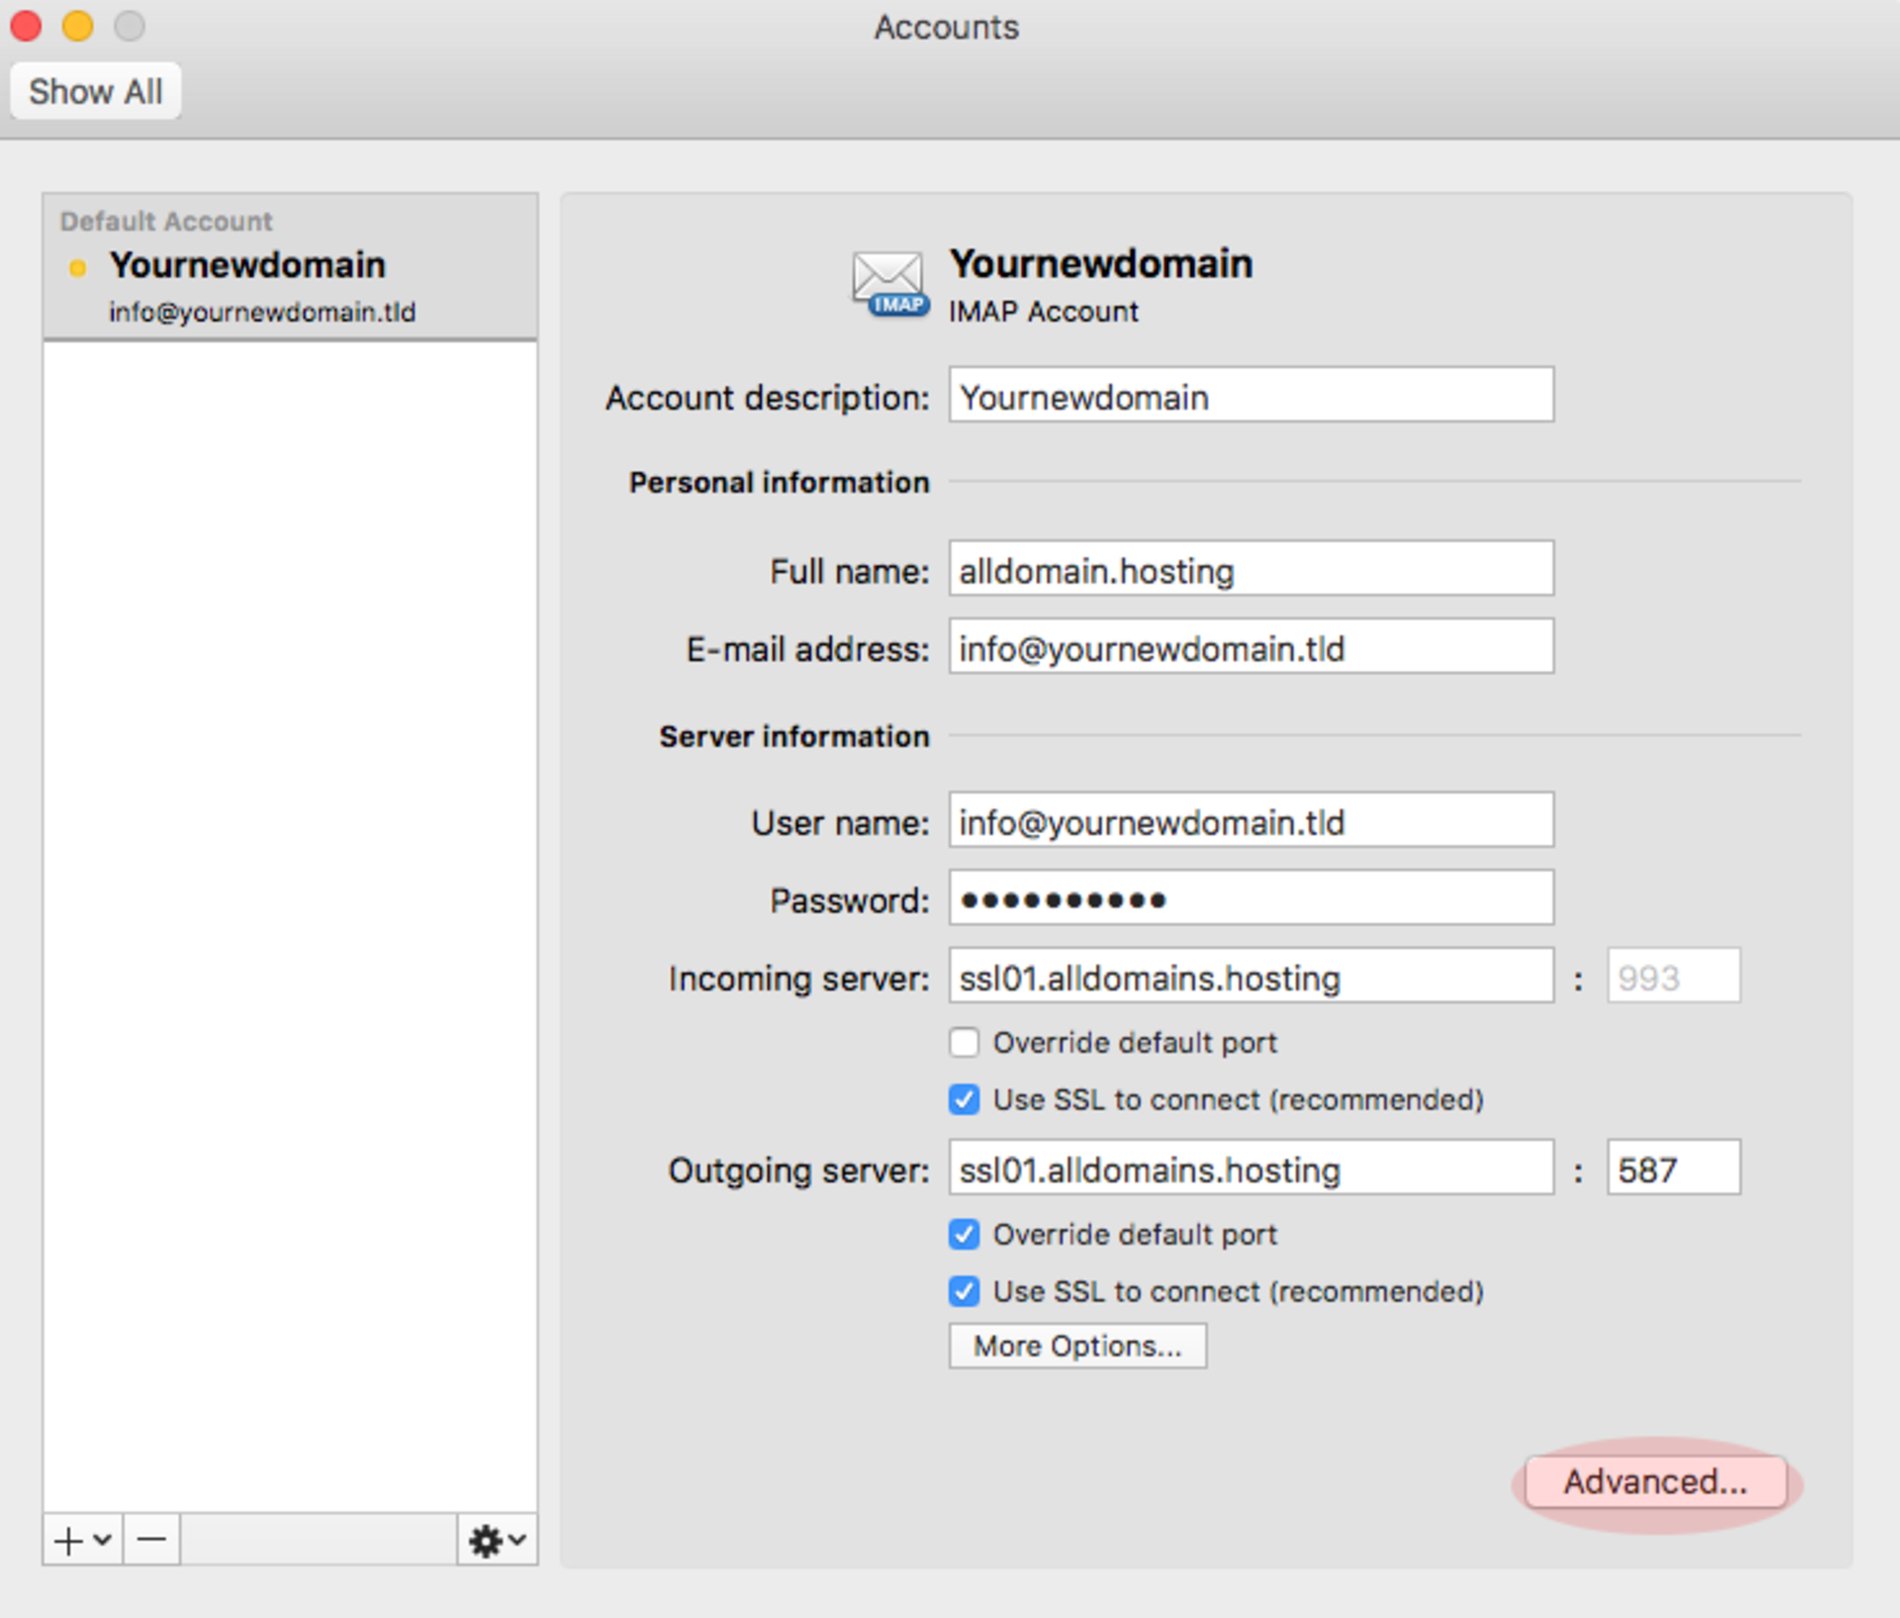
Your e-mail account is nearly set up.
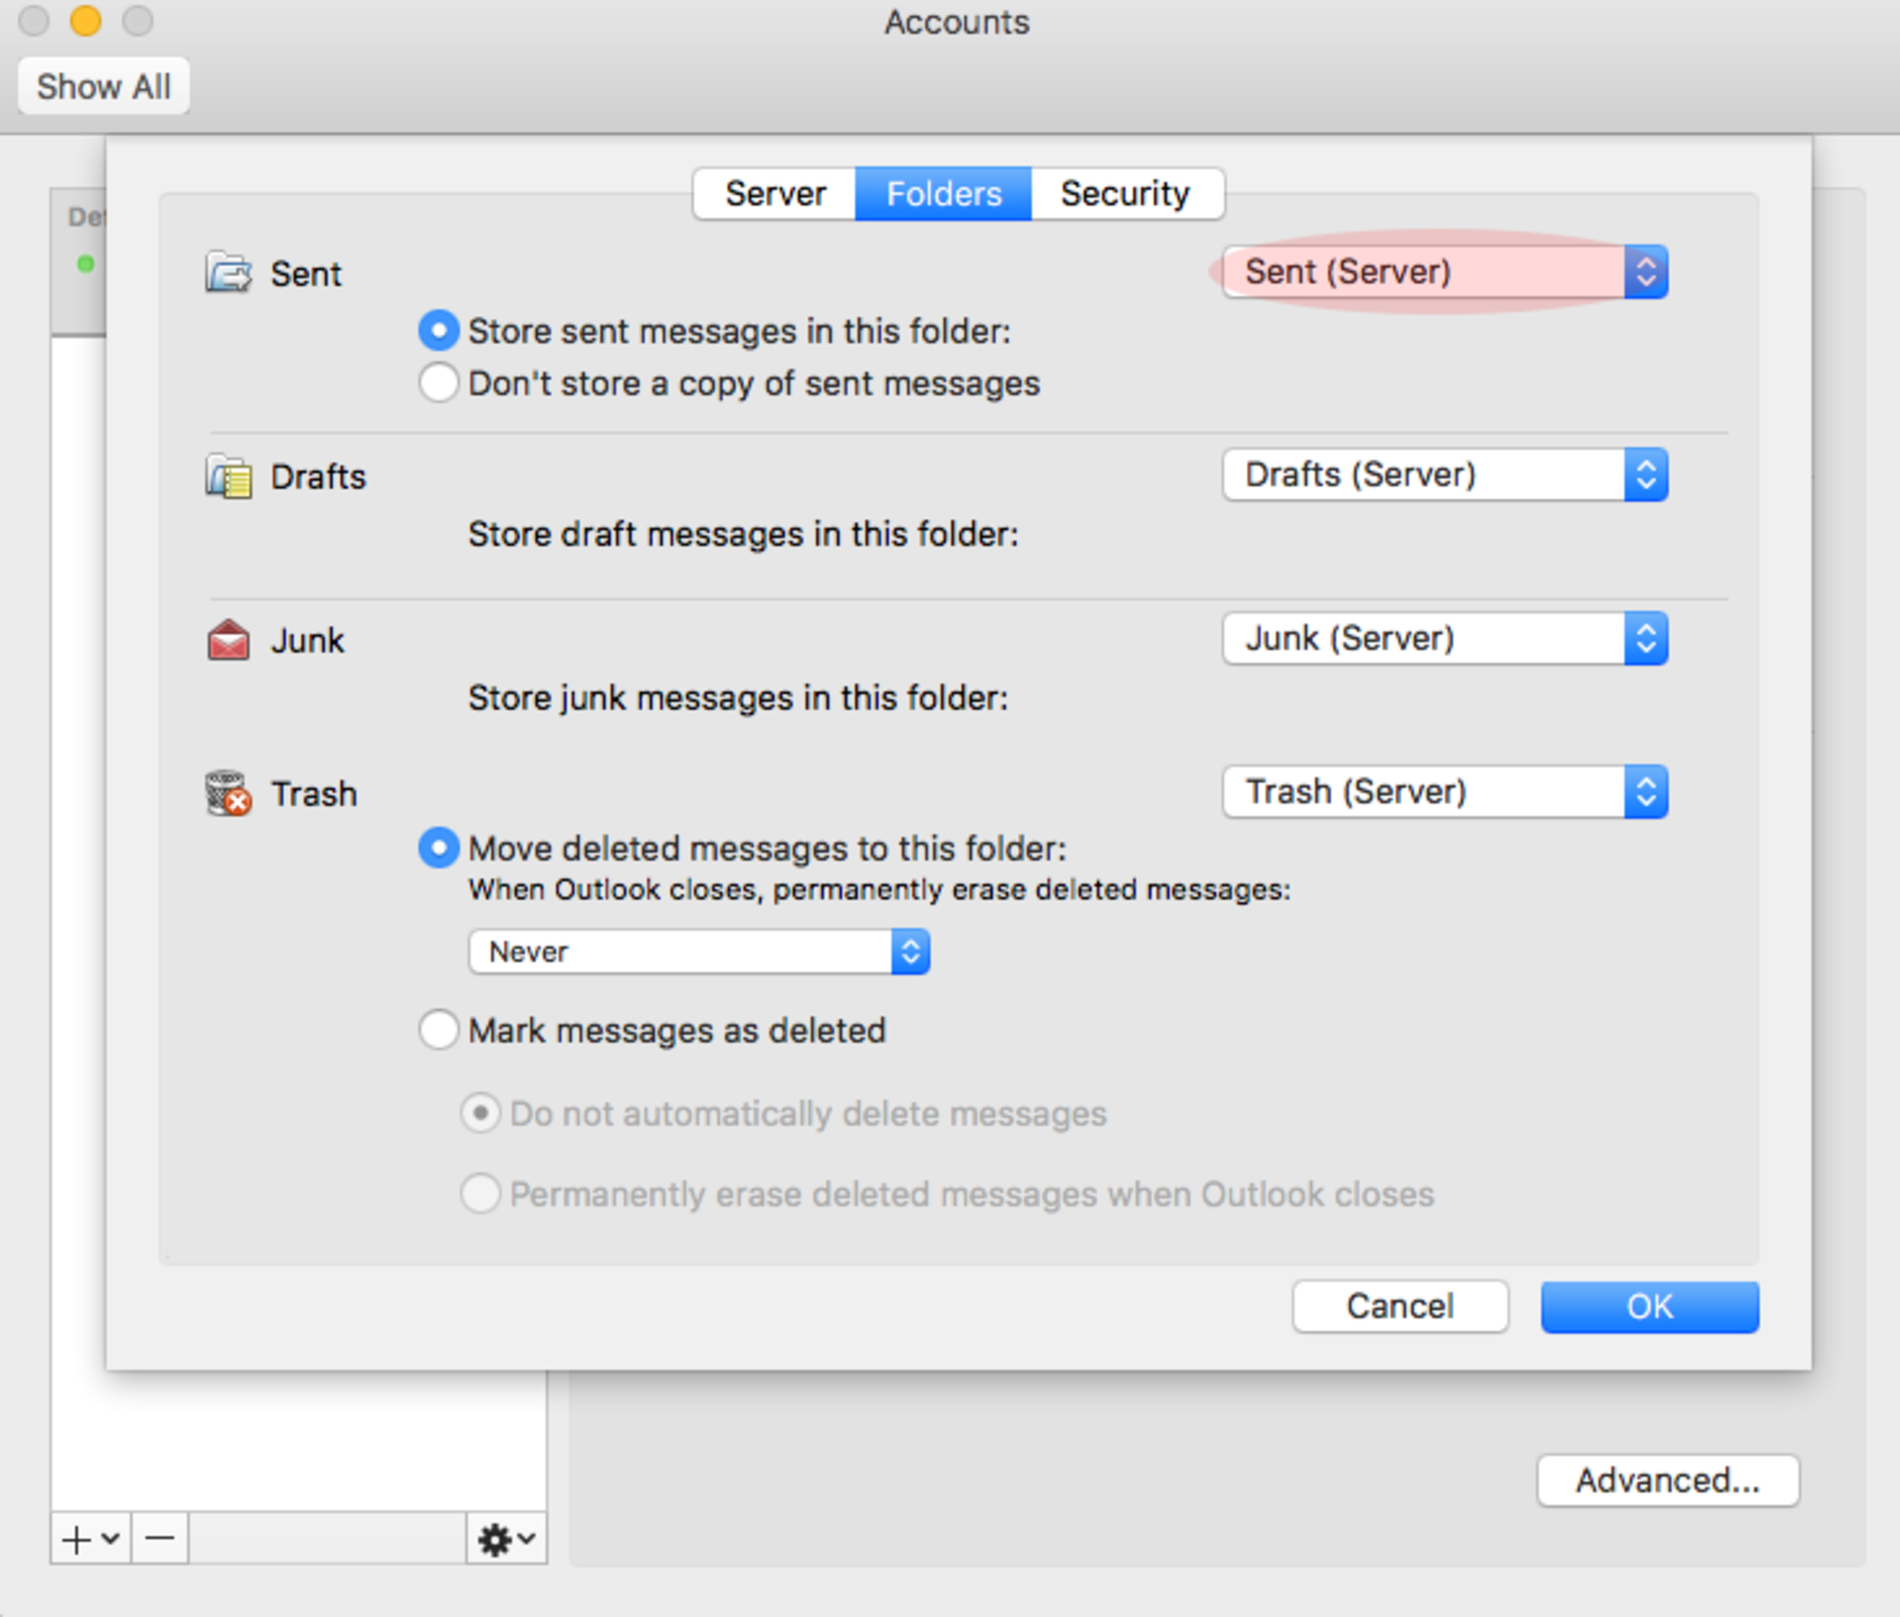
For the last steps select "Advanced…" on the right bottom.
In the opening view select the tab "Folders".
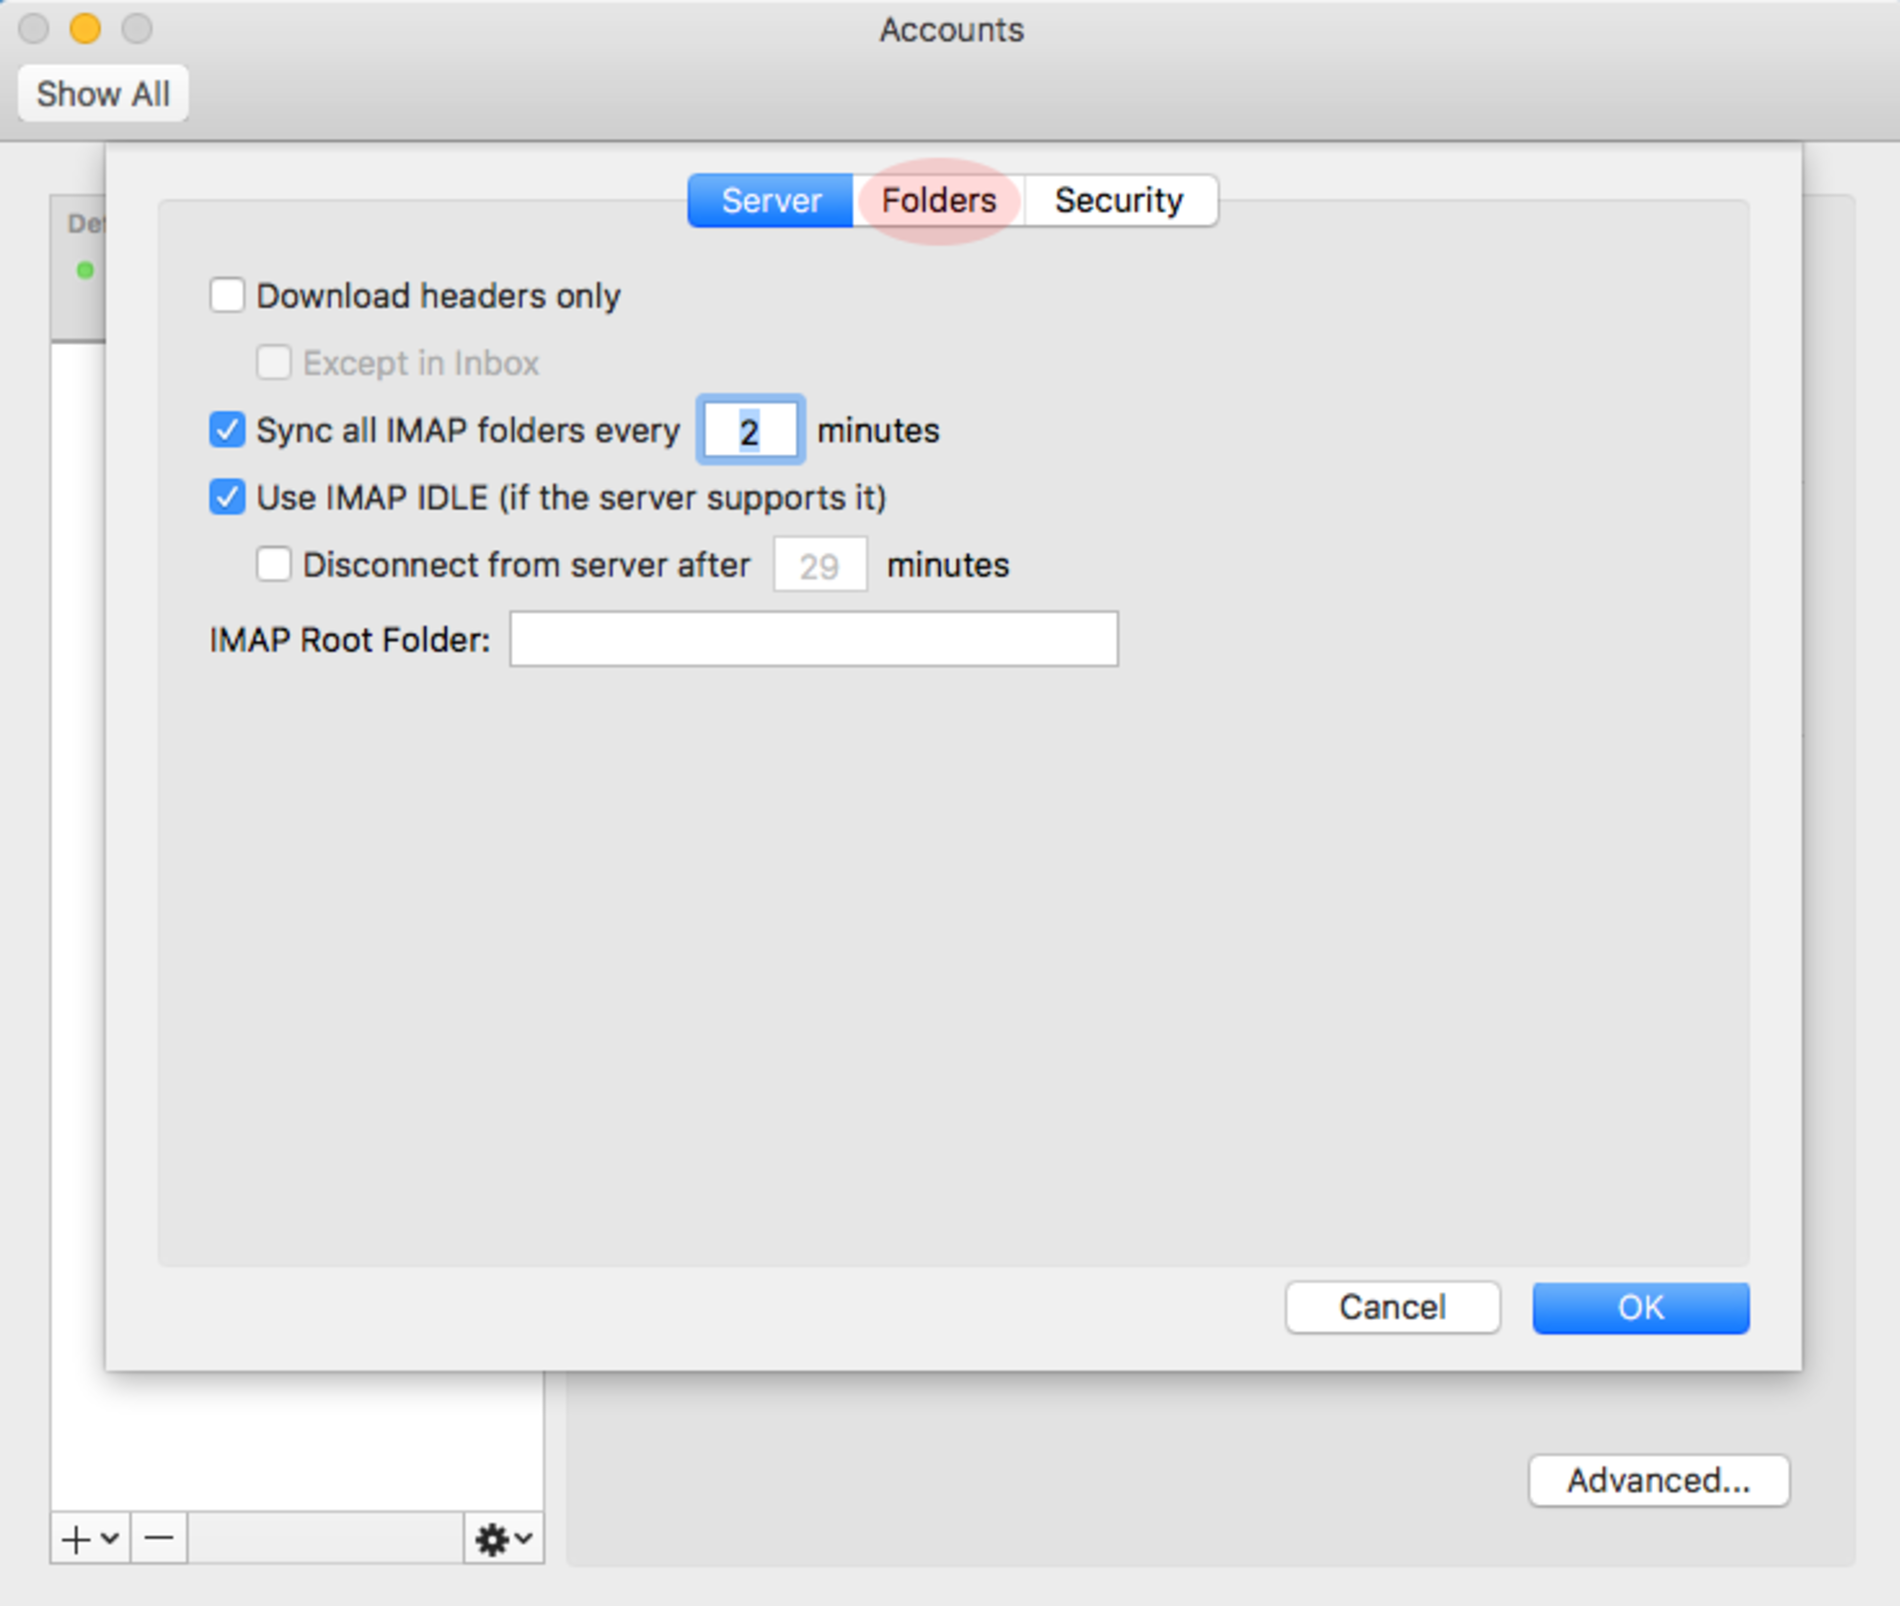
Step 8
At the entry "Sent" check that "Sent (Server)" is selected, if this is not selected, please change it to that entry.
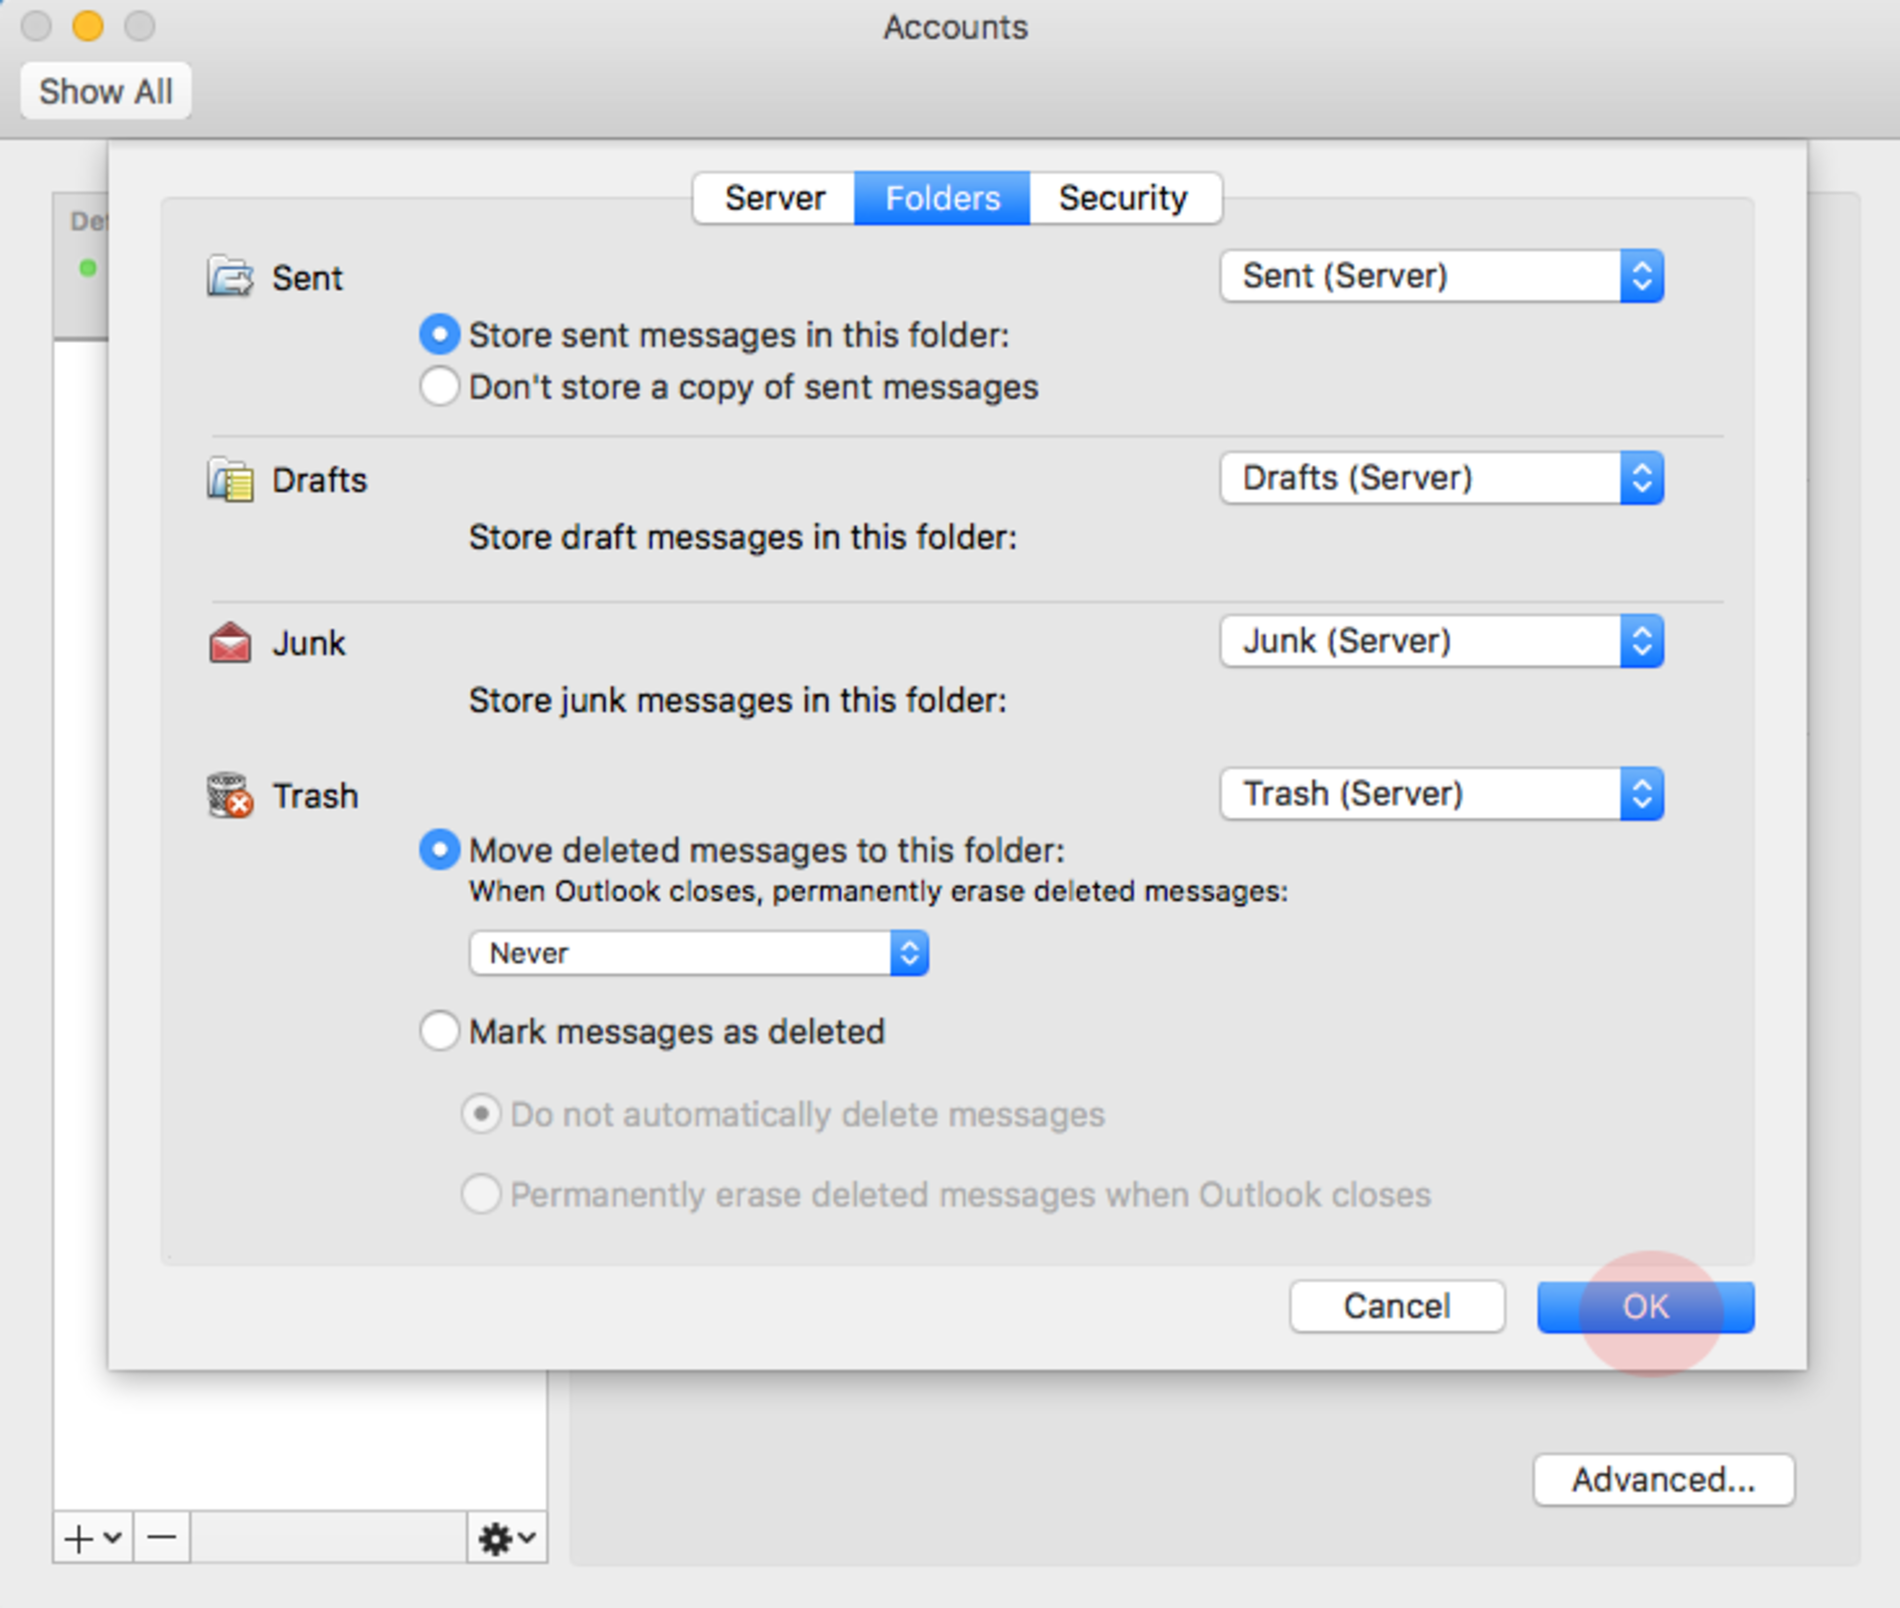
If you have done that you can finish the setup with a click on "OK".