Multi Domain Hosting – add additional domain
With selected hosting packages you have the possibility to add one or more additional domain names to your existing hosting package.
Instructions: Add additional domain
Your main domain and your additional domains share the available resources (storage, e-mail accounts and so on) of your hosting package.
You can decide by your own if you want to use the webspace and/or the e-mail functions for each additional domain.
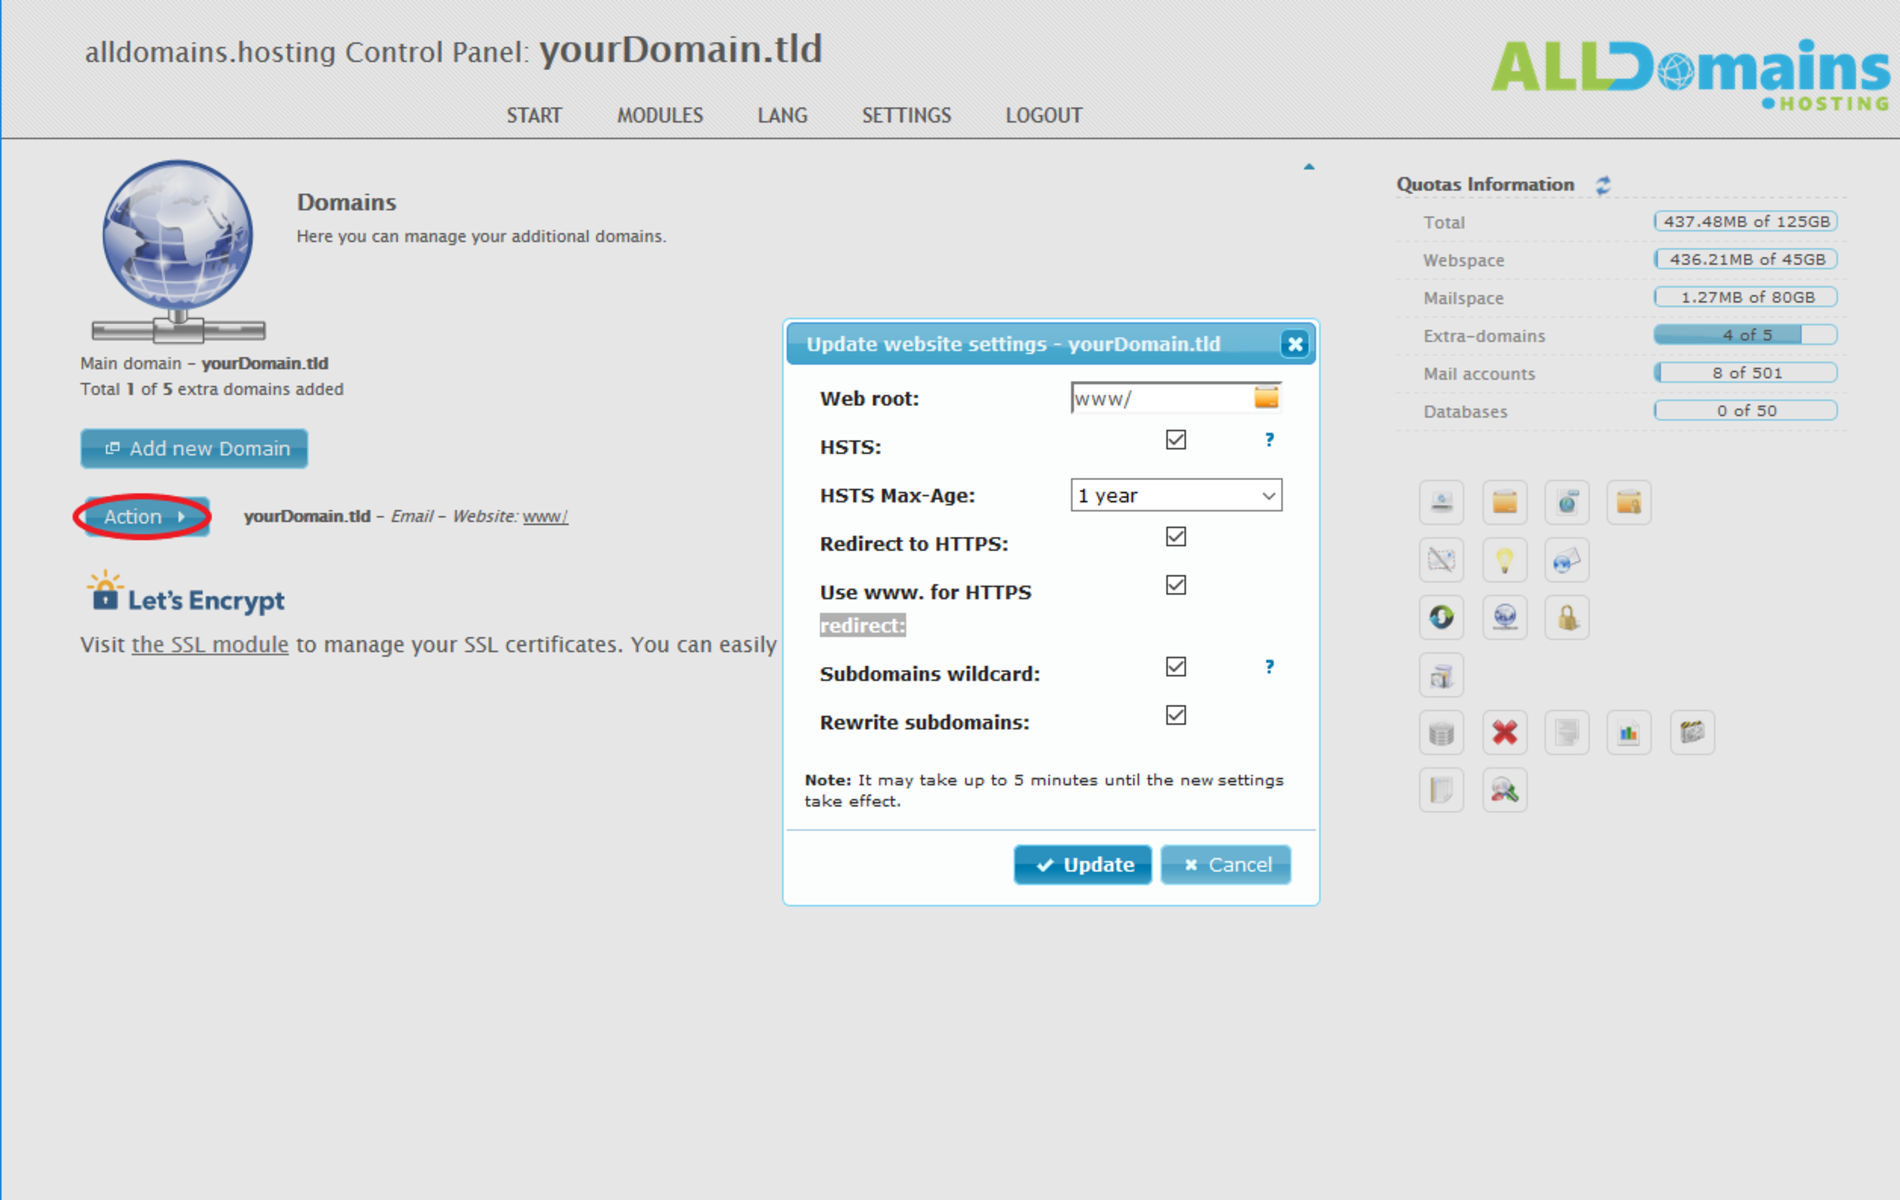
Website settings for your domain
Subdomain configuration:
You have to activate "Subdomain wildcards" in your alldomains.hosting control panel to make sure that not only "yourDomain.tld" is online but also all the subdomains like "blog.yourDomain.tld" are accessible. Therefore open the "Domains" module and click the "action" button on the left side of the chosen domain.
By activating "Rewrite subdomains" the subdomains are directed to the subdirectory of the main domain with the same name.
SSL certificates configurations (HTTPS):
If a SSL-certificate is activated, there are more possible settings for your domain:
HSTS-Header:
The HTTP Strict Transport Security Header allows web servers to declare that web browsers should only access it with HTTPS. A standard selection for HSTS Max-Age is 1 year.
Redirect:
Automatically redirect requests from "http: //yourDomain.tld" to "https://yourDomain.tld" and "https://yourDomain.tld" to "https://www.yourDomain.tld".
Instruction for adding additional domains
To add a domain to your hosting package two main steps are needed:
At first you need to add the domain to your Control Panel with the module Domains.
When this is done, you need to adjust the DNS settings for the newly added domain in your Customer Center.
Quick access:
#Step 1 - Add the domain as additional domain to your Hosting Control Panel
Please follow the steps bellow to add one or more domains to your hosting package.
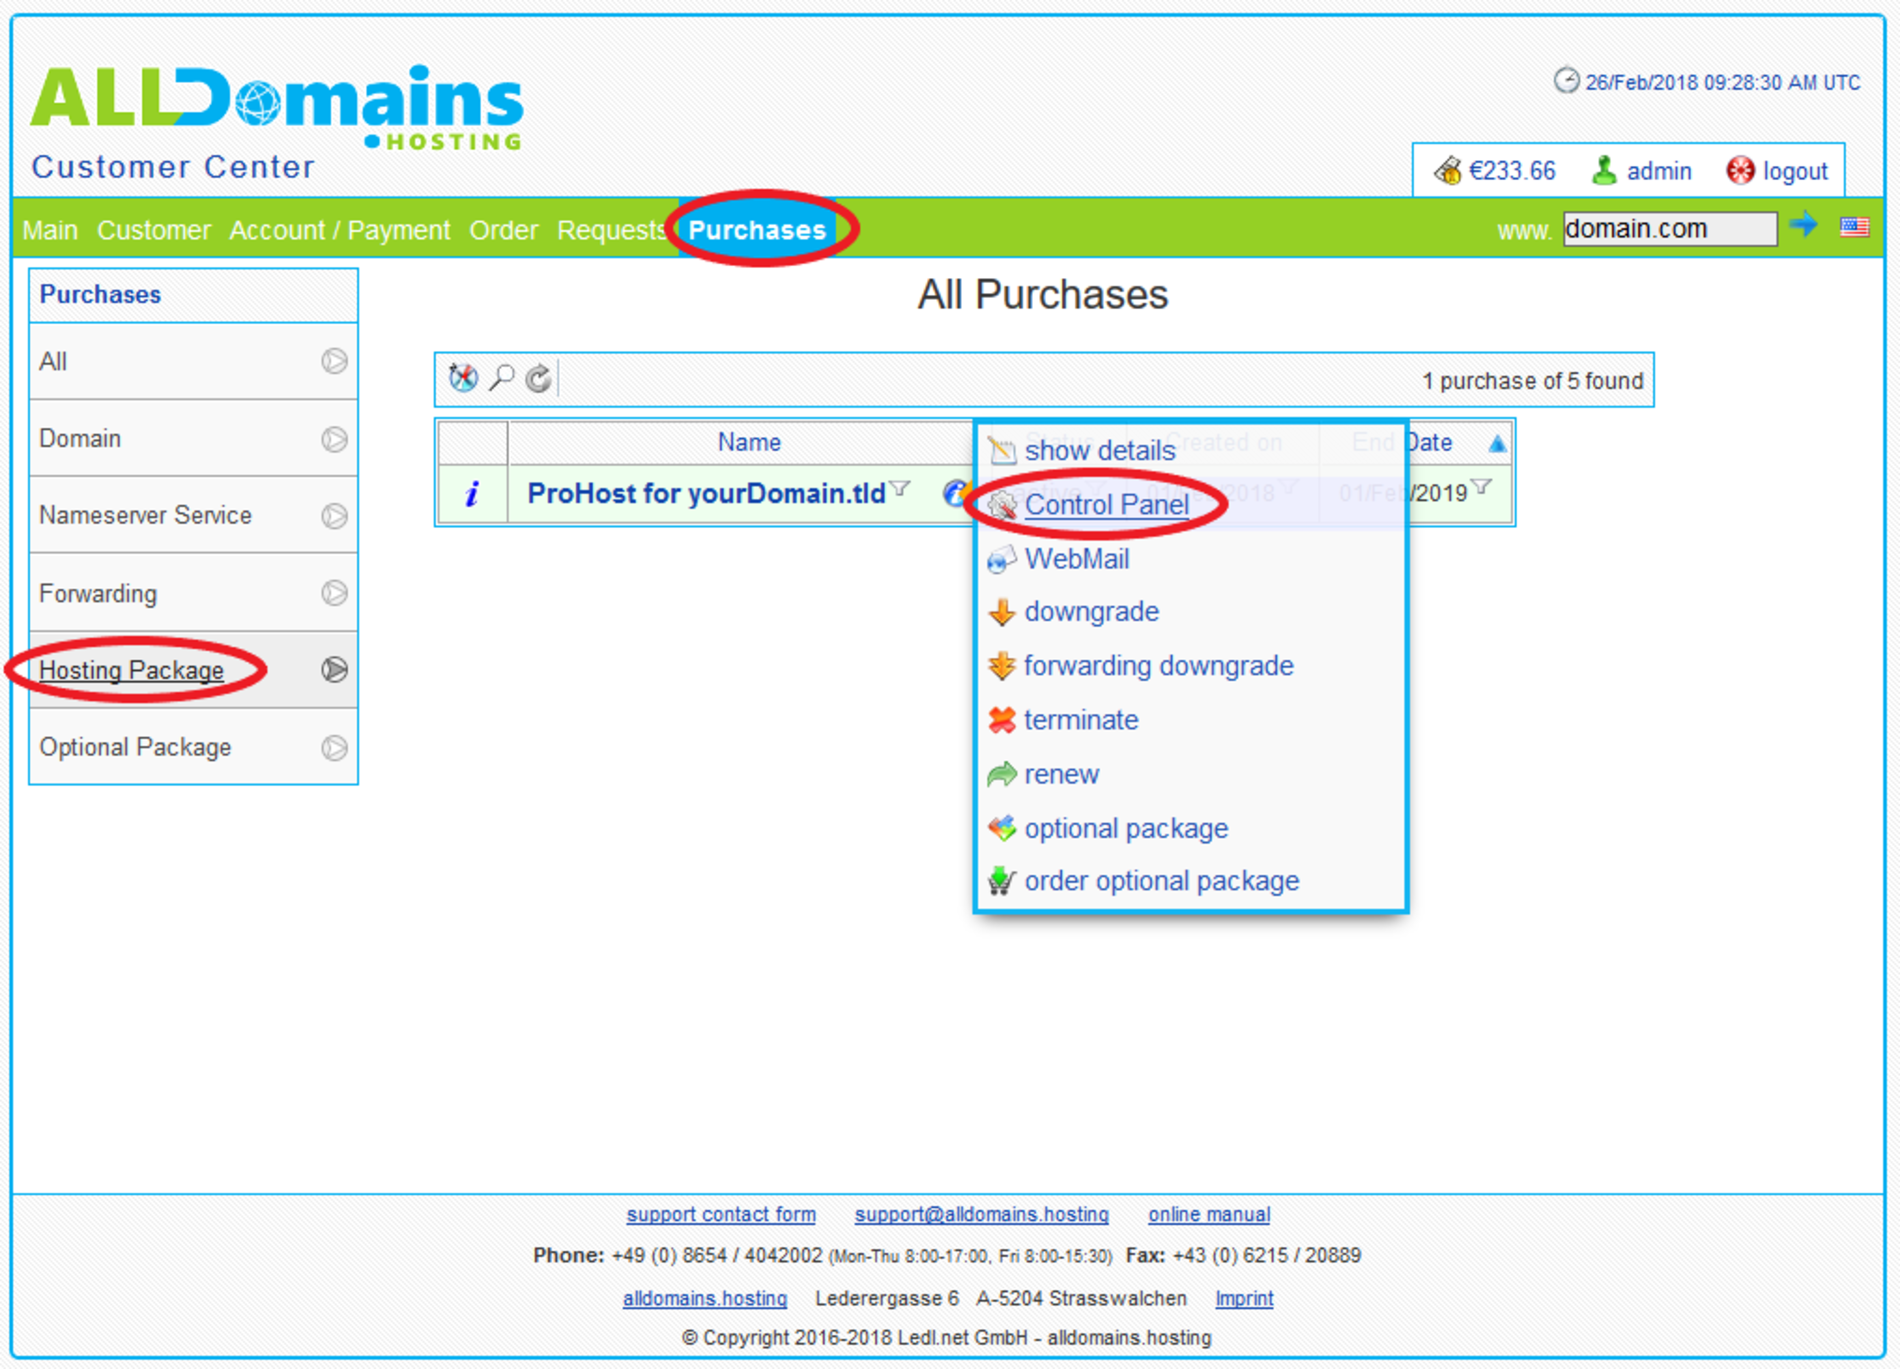
1.1 Hosting Control Panel Login
There are 3 different possibilities to open your Control Panel:
- either you enter "www.yourdomain.tld/cp" (www.yourdomain.tld has to be replaced by your own domain) into the address bar of your browser
- or you use the Control Panel Login at our website
- or you start it directly inyour Customer Center
Inside your Customer Center switch to the tab "Purchases" and move your mouse over the hosting package and click on the link "Control Panel" at the side menu that popped up.
#
1.2 Open module Domains
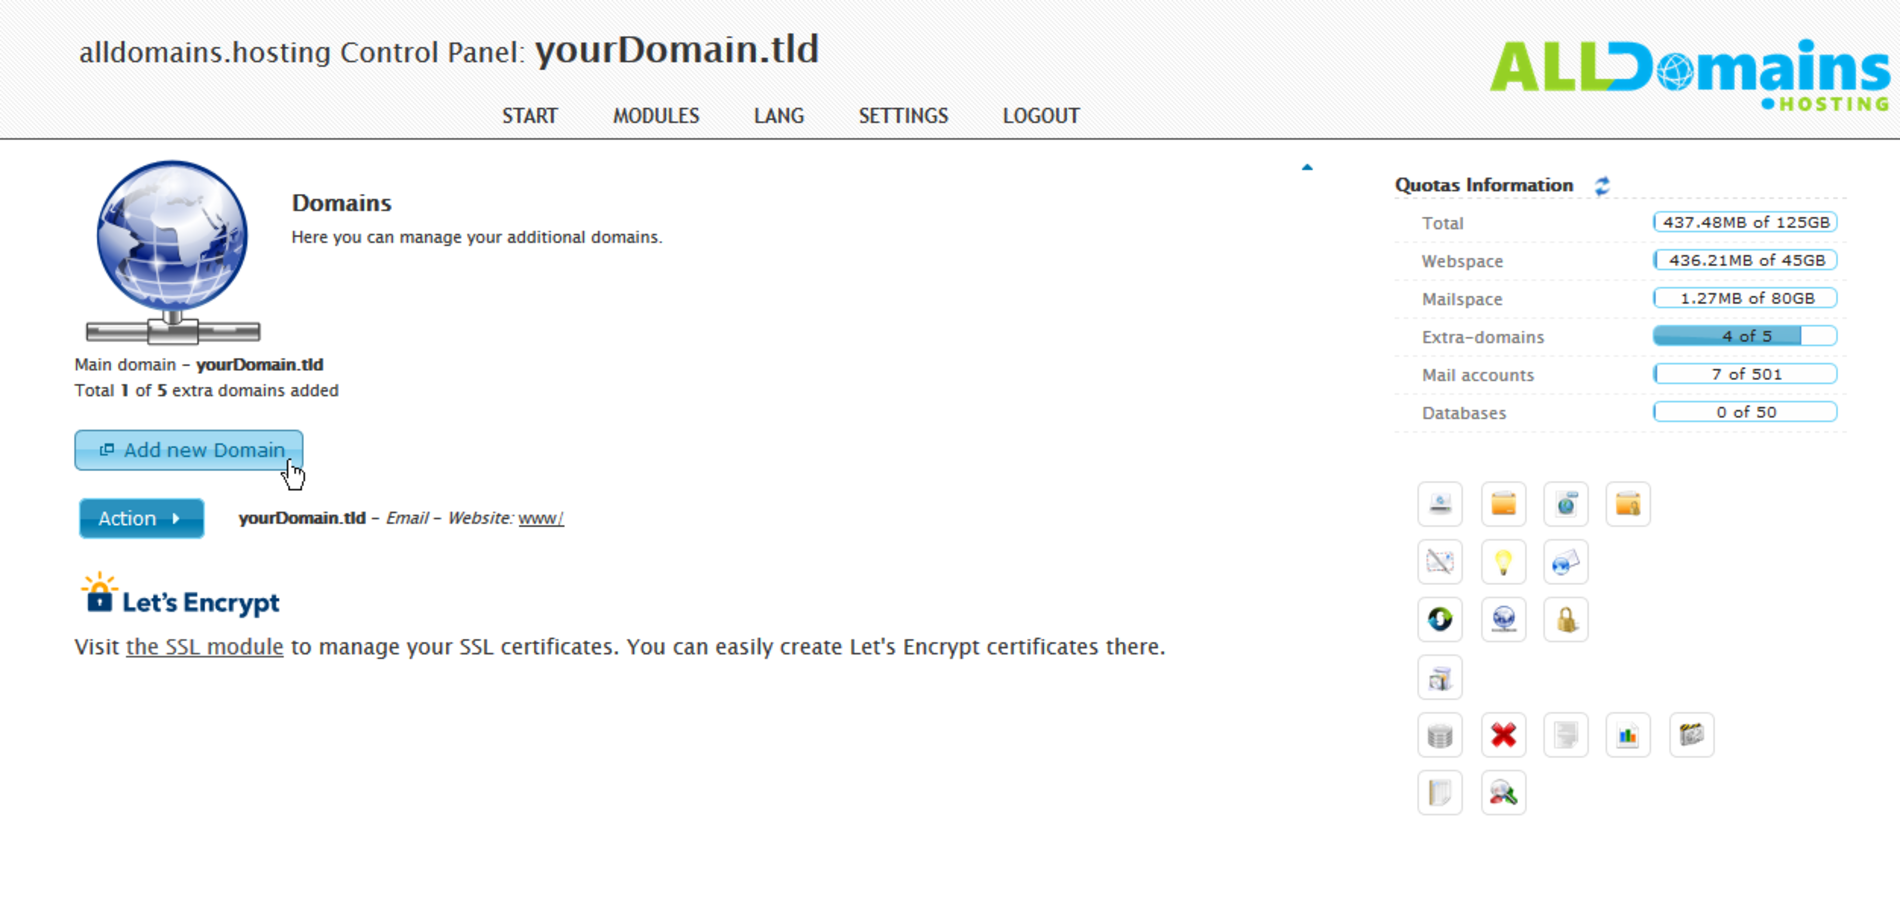
If you are logged in to your Control Panel please select the module Domains.
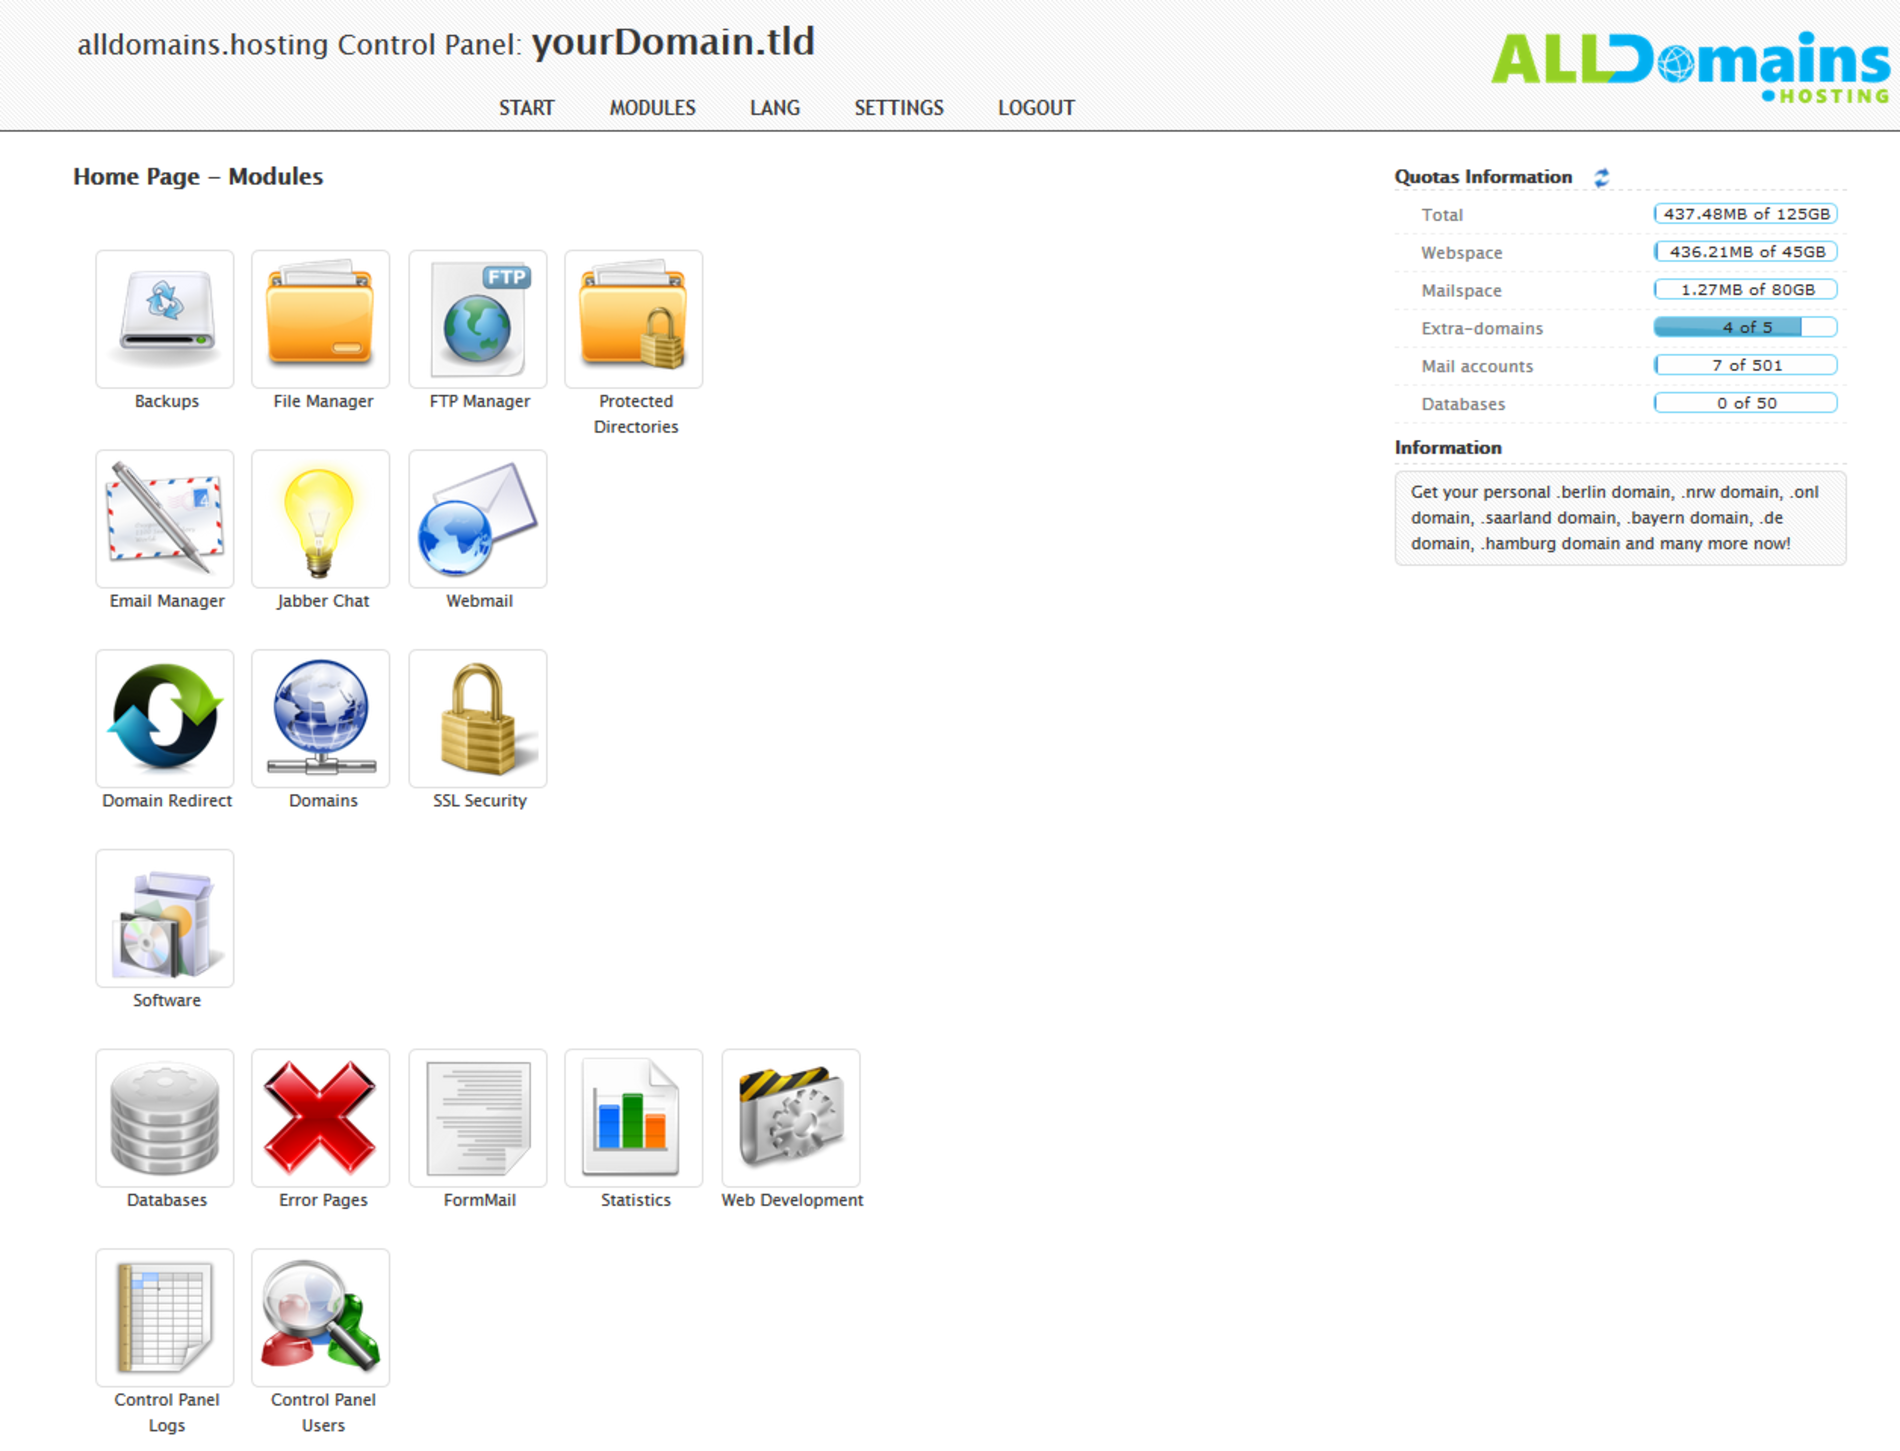
#
1.3 Add domain
In the module Domains click on "Add new Domain".
#
1.4 Insert data
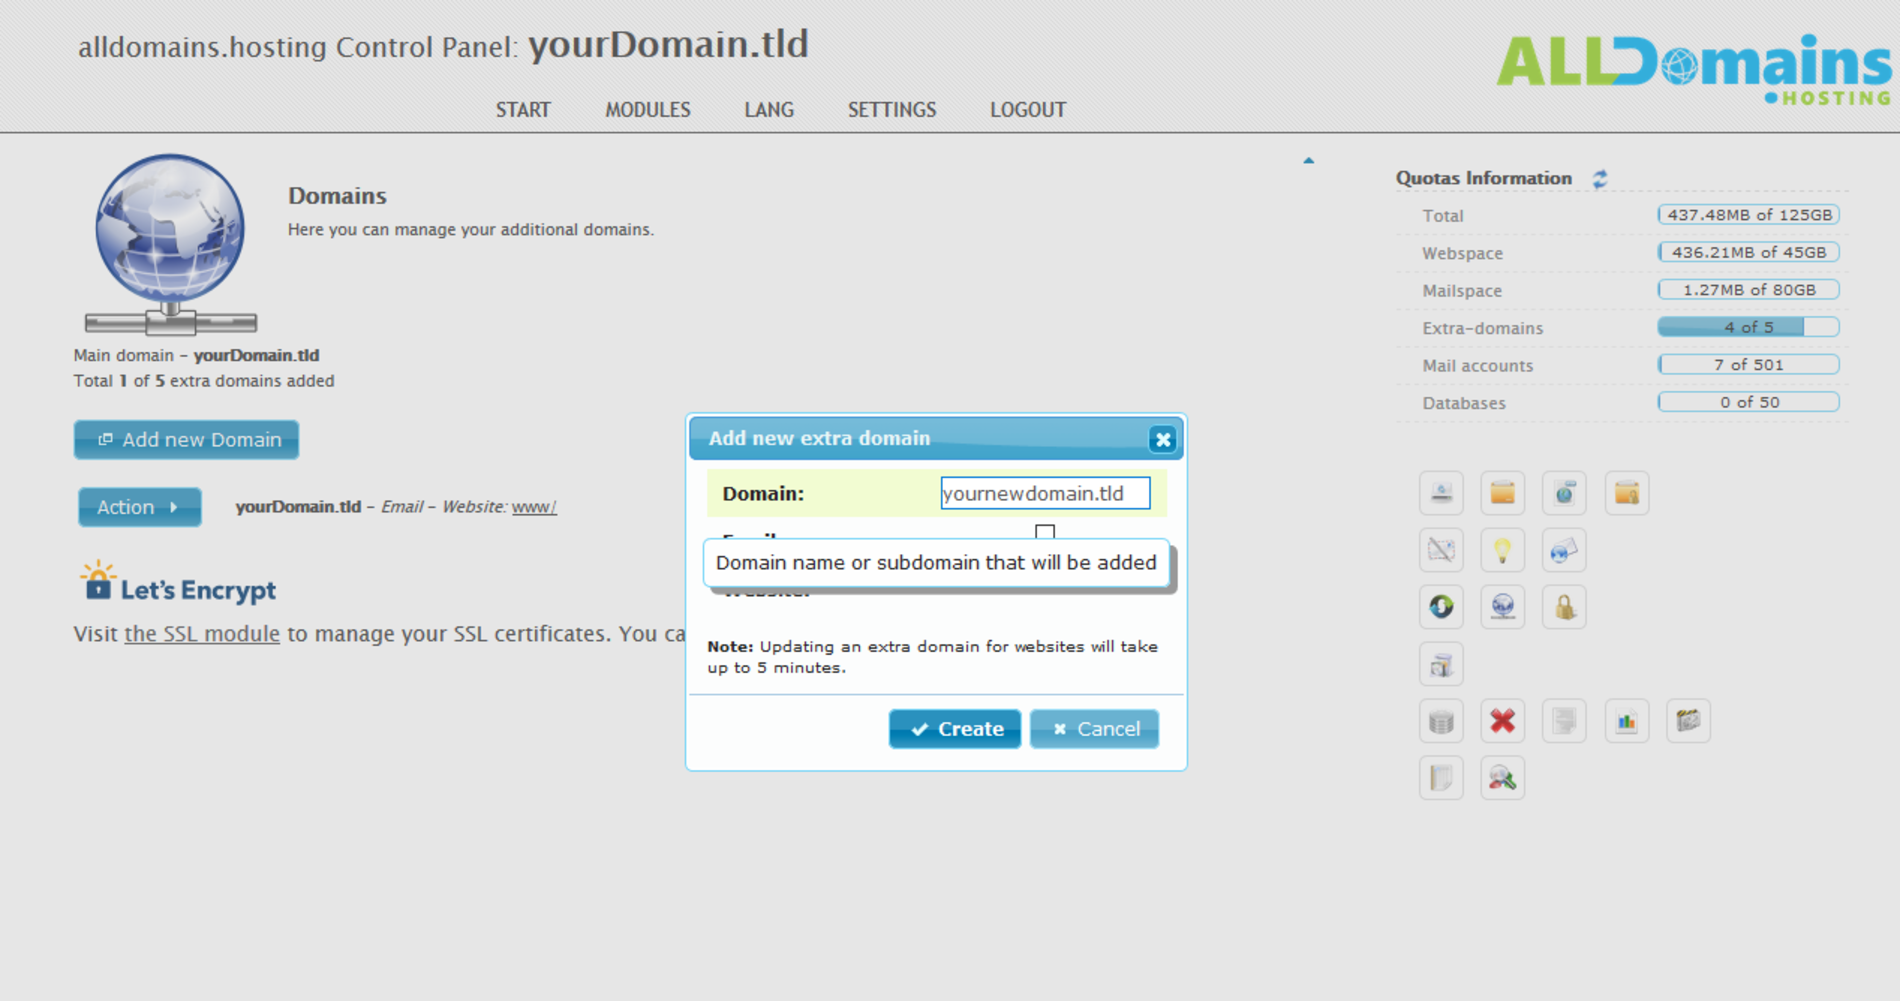
Now enter the new domain name, you want to add to your Control Panel, in the field "Domain".
#
1.5 Select services
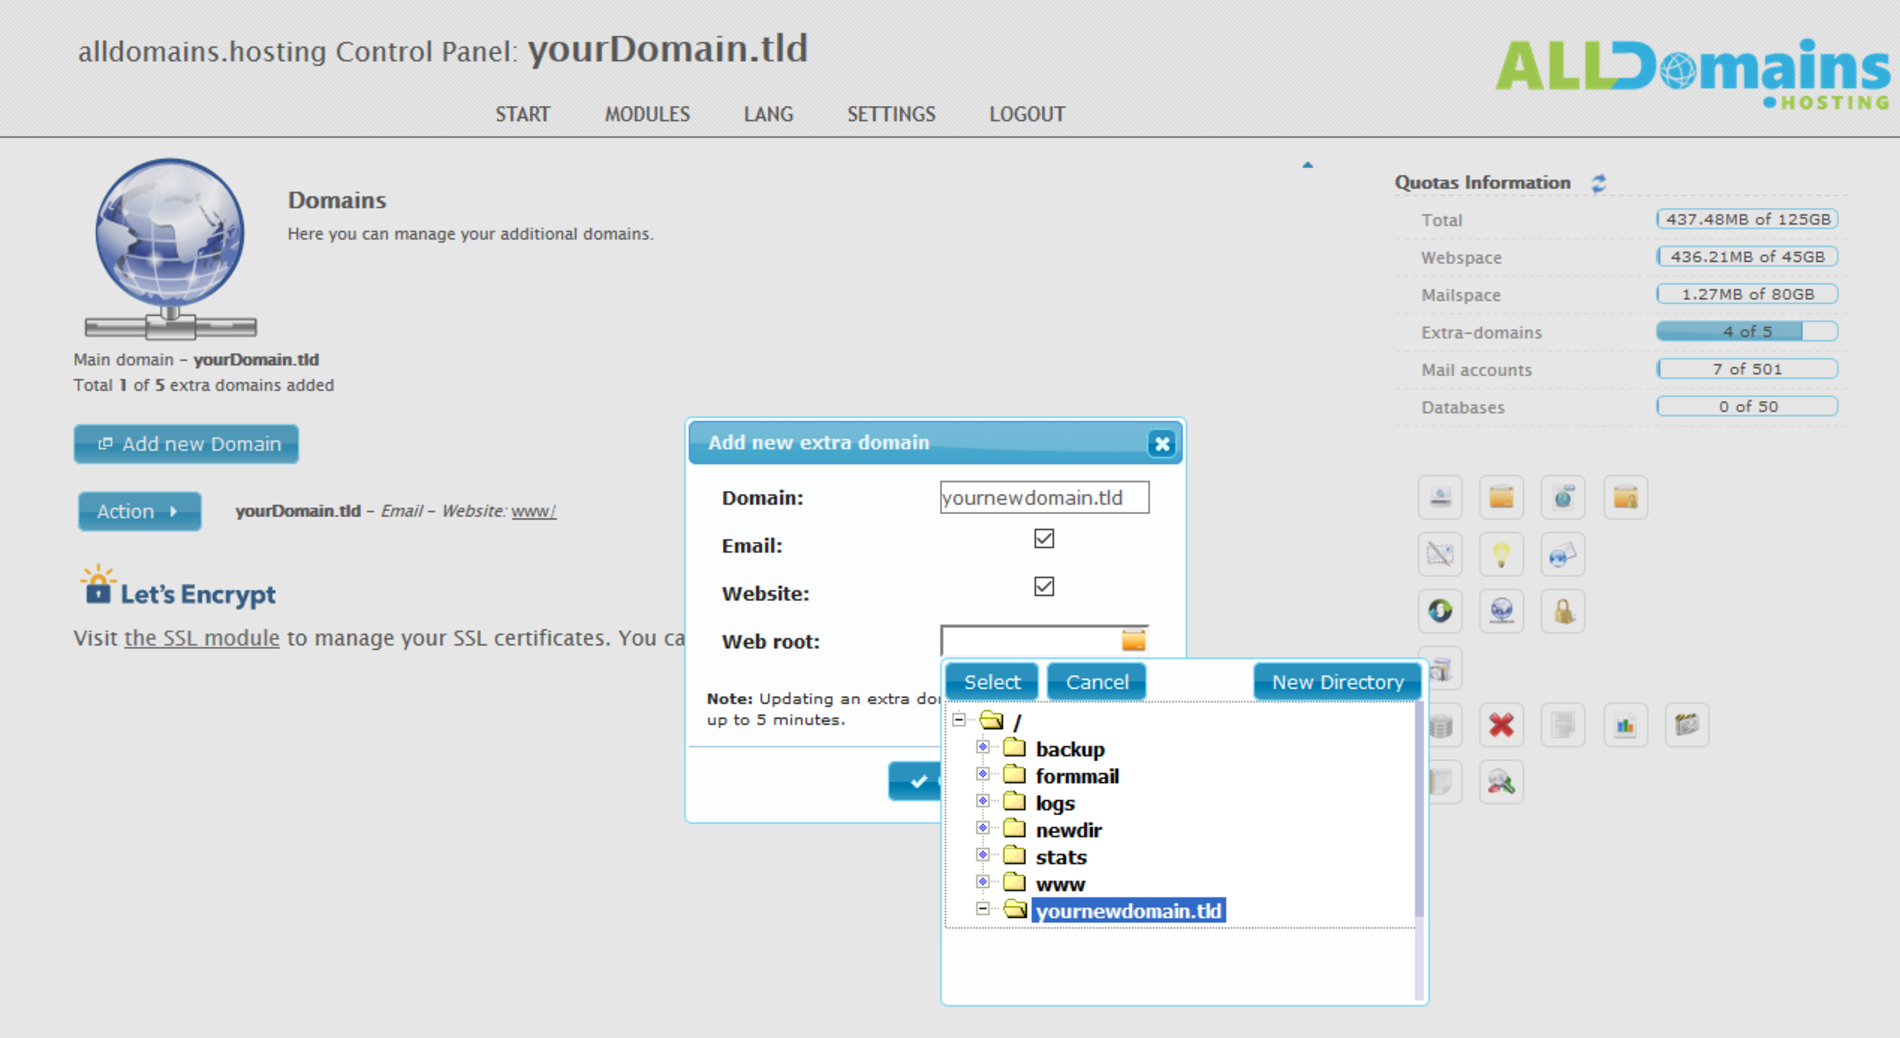
Next you can select if your additional domain should have its own e-mail functionality and/or own storage (website).
If you decide to use the webspace you need to select a root directory. You can use an existing directory or create a new one.
Please check that you don’t overwrite the directory of an existing domain.

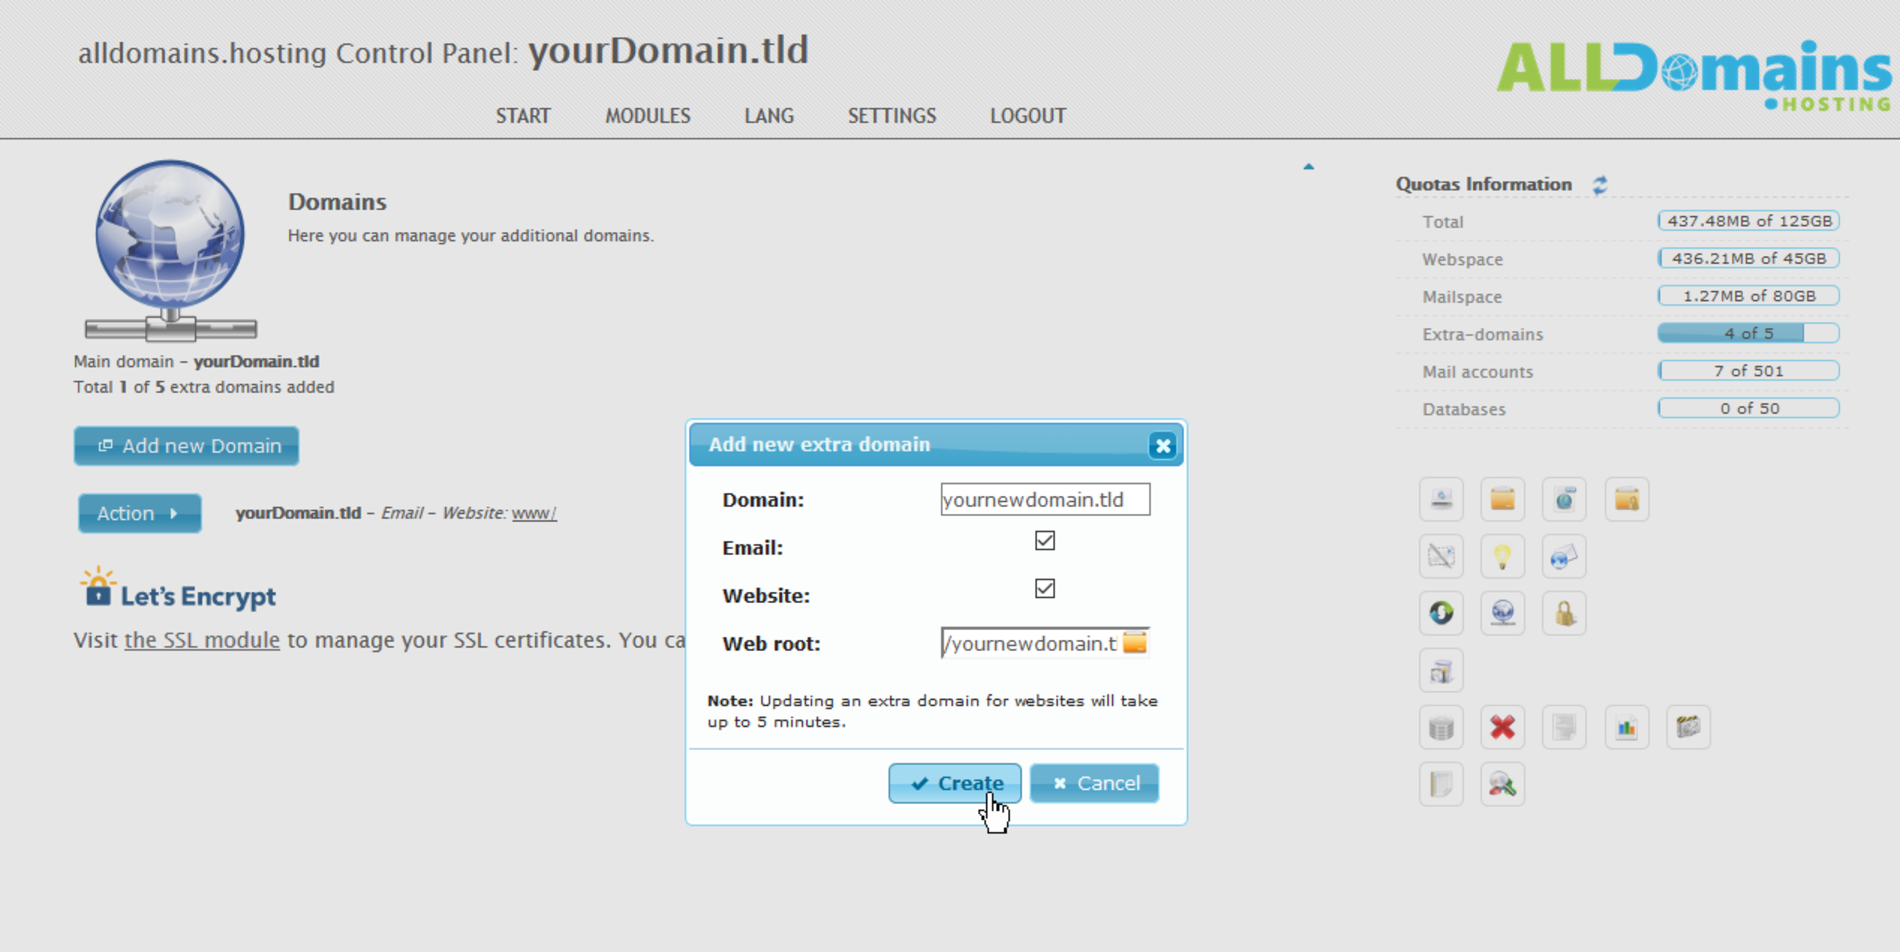
To finish the domain adding process click on "Create" and continue with the next step "Change DNS Settings".
#Step 2 – Change DNS settings
After adding the domain in the Control Panel it can take a few minutes until the services on the server are available for the added domain.
2.1 Login to the Customer Center
To have the possibility to change the DNS entries of your domain, you need to login to the Customer Center.
Select the entry "Nameserver Services" in the tab "Purchases".
If you move your mouse over the "DNS-Service" of your domain a menu opens, in that menu you need to select the entry "edit zone records".

#
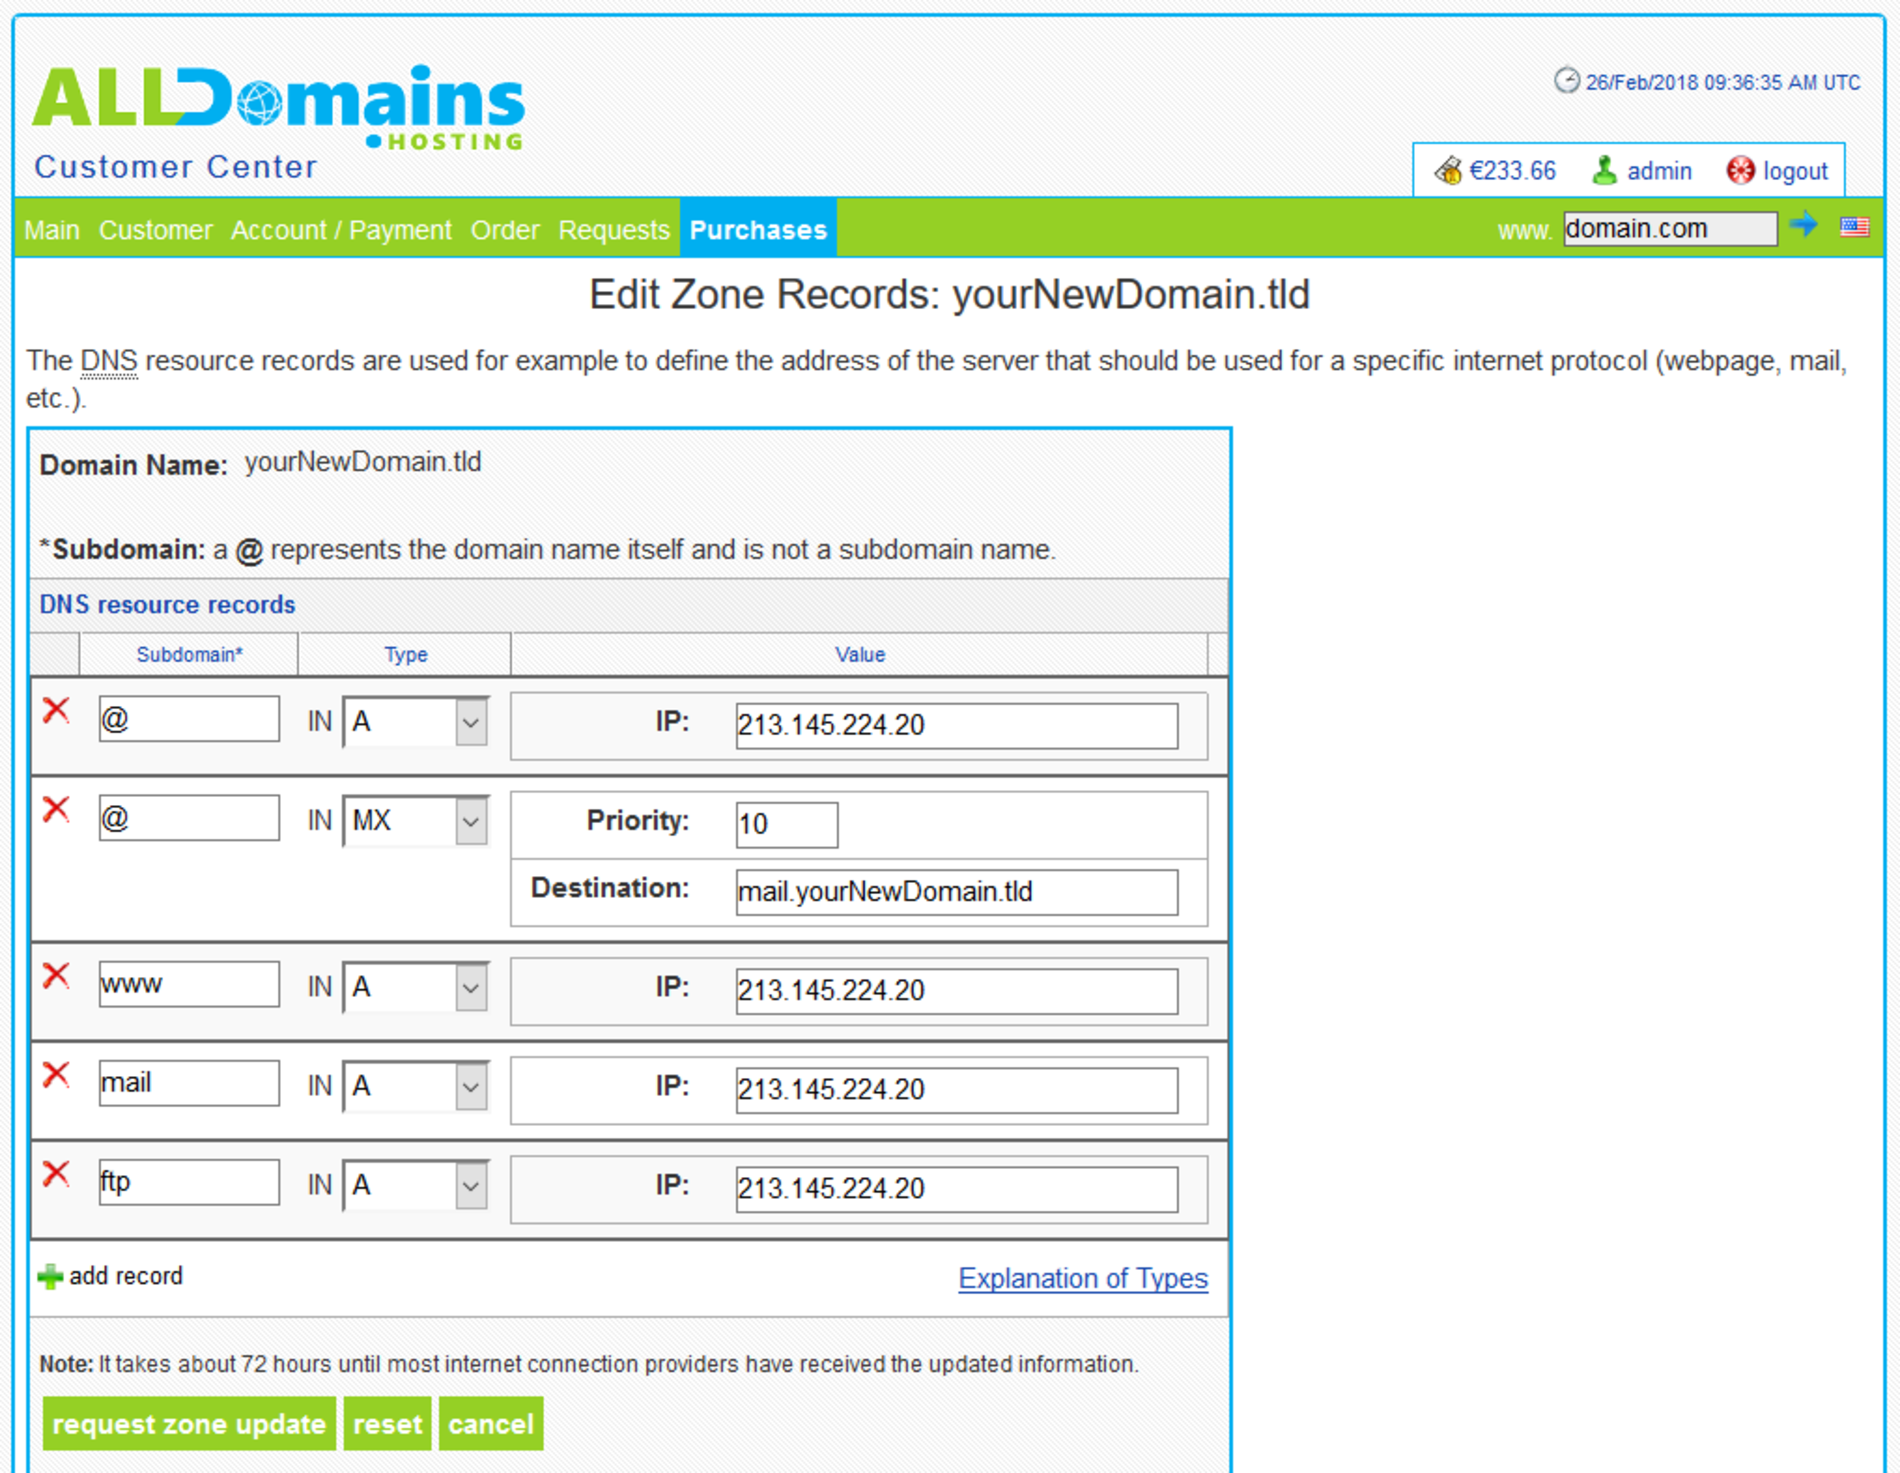
2.2 Change DNS settings
Now you can execute all needed changes on your DNS entries. You can change your existing entries and also add new entries.
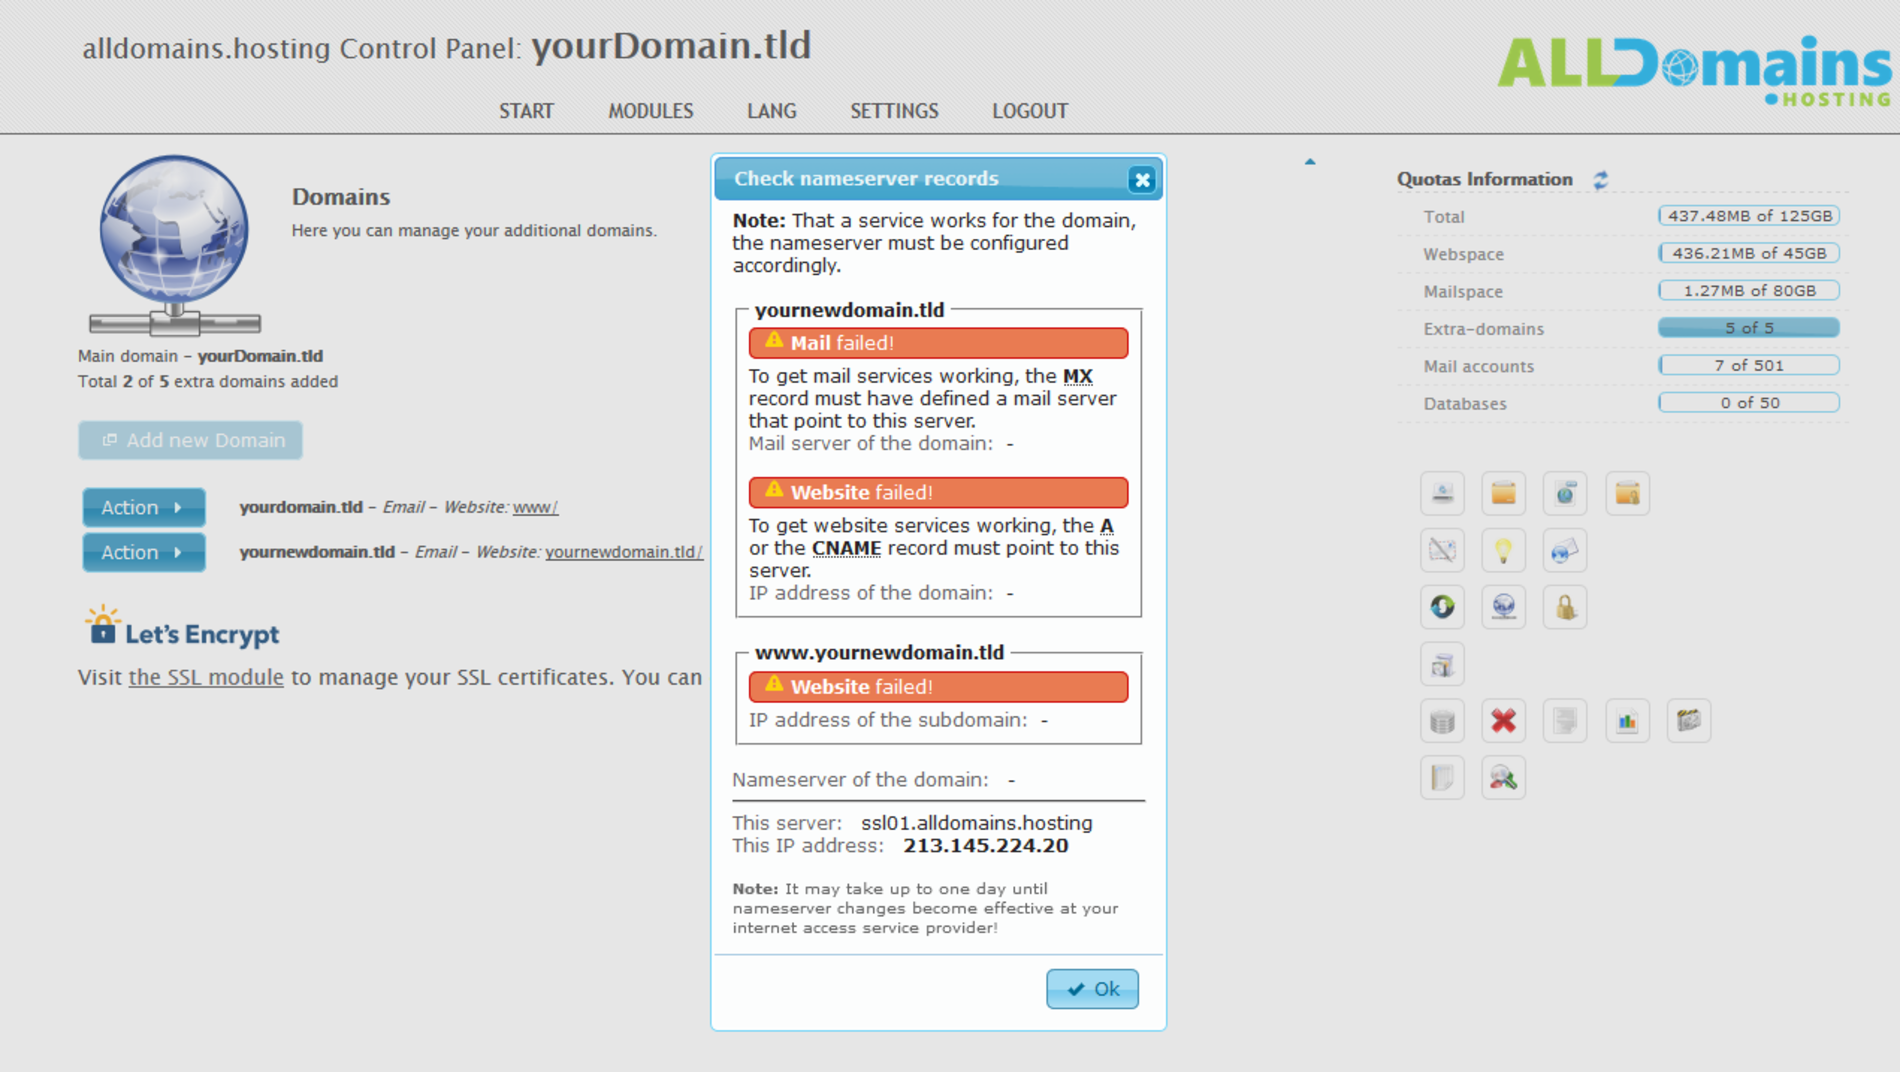
#Information about DNS settings
In the module Domains you can view the currently set DNS entries of your main domain and all extra domains.
For the entries of your main domain click on the "Check DNS" button on the right side of the "Add new domain" button.
Here you can check if the entries are correct and which IP-Address the server uses.
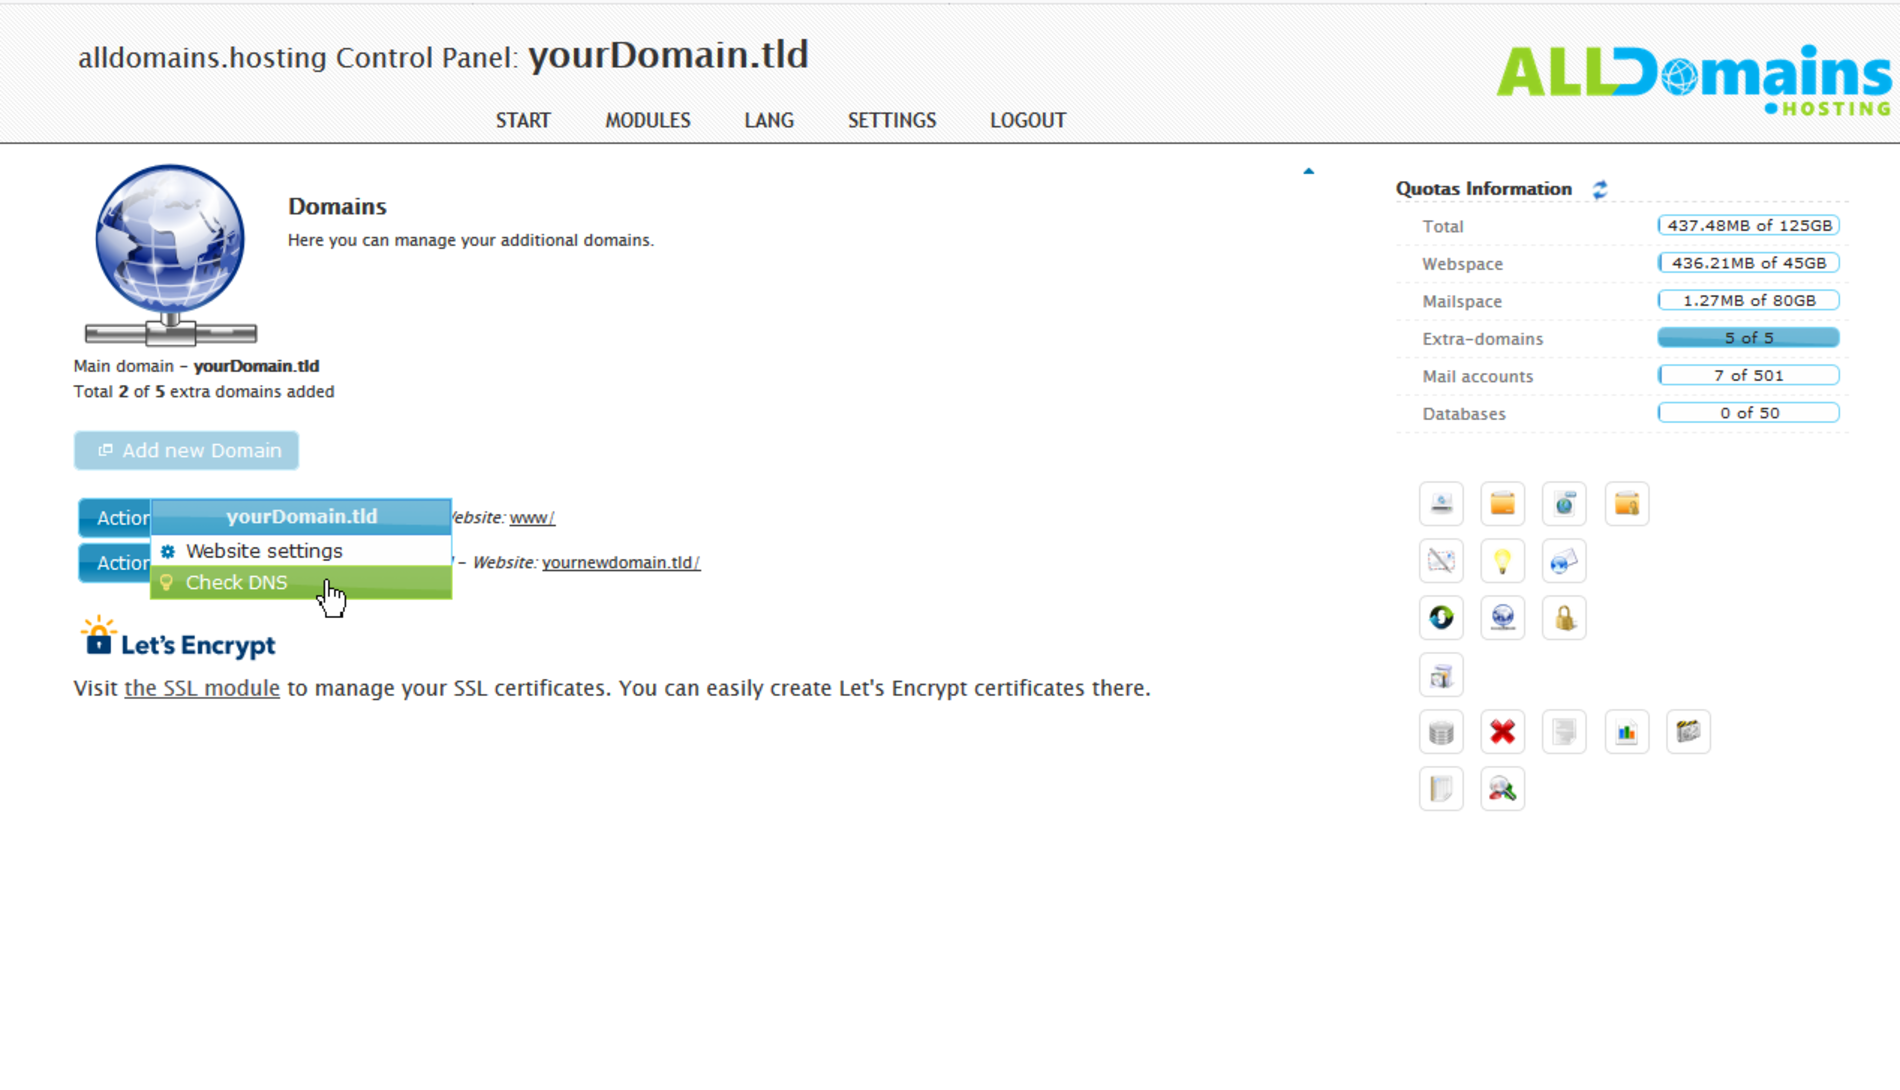
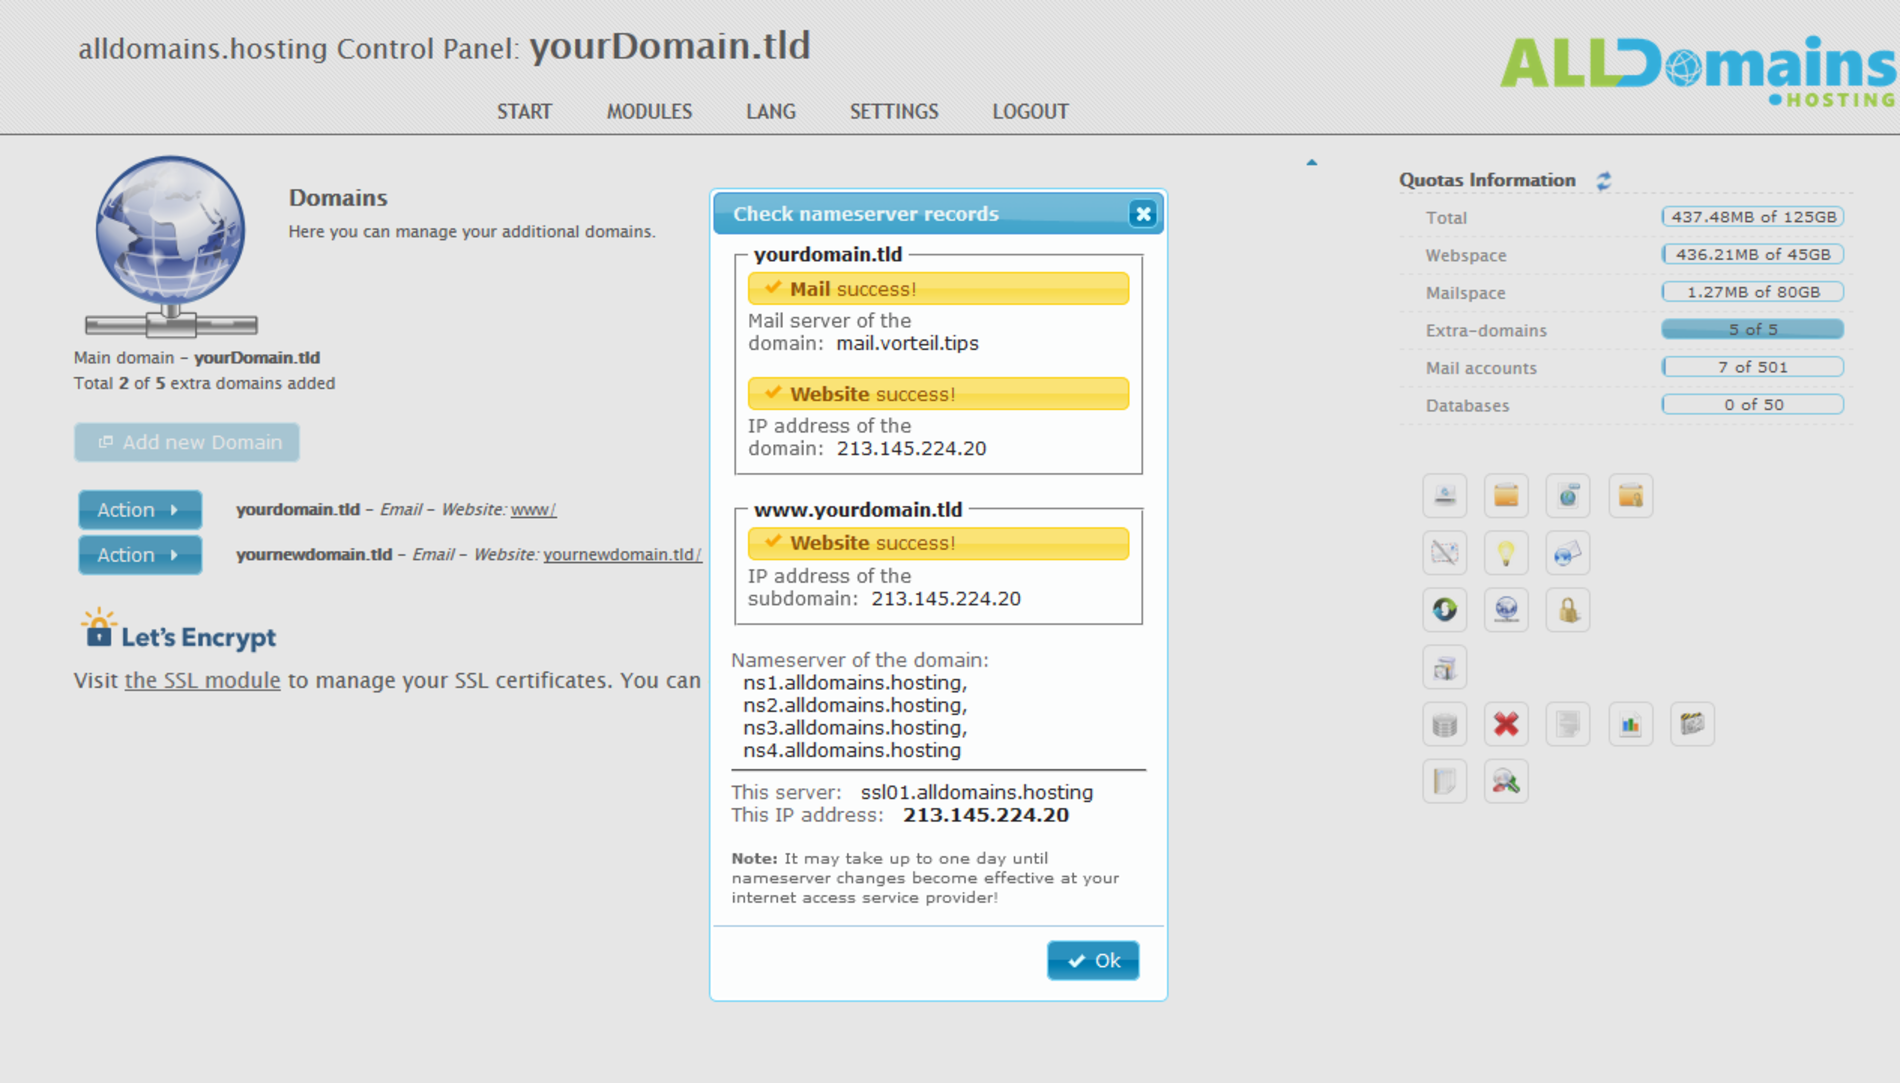
To check the DNS entries of an additional domain you need to select "Action >" and then "Check DNS".
The second screenshot shows how it looks if the entries are wrong/not set and which entries you have to correct.