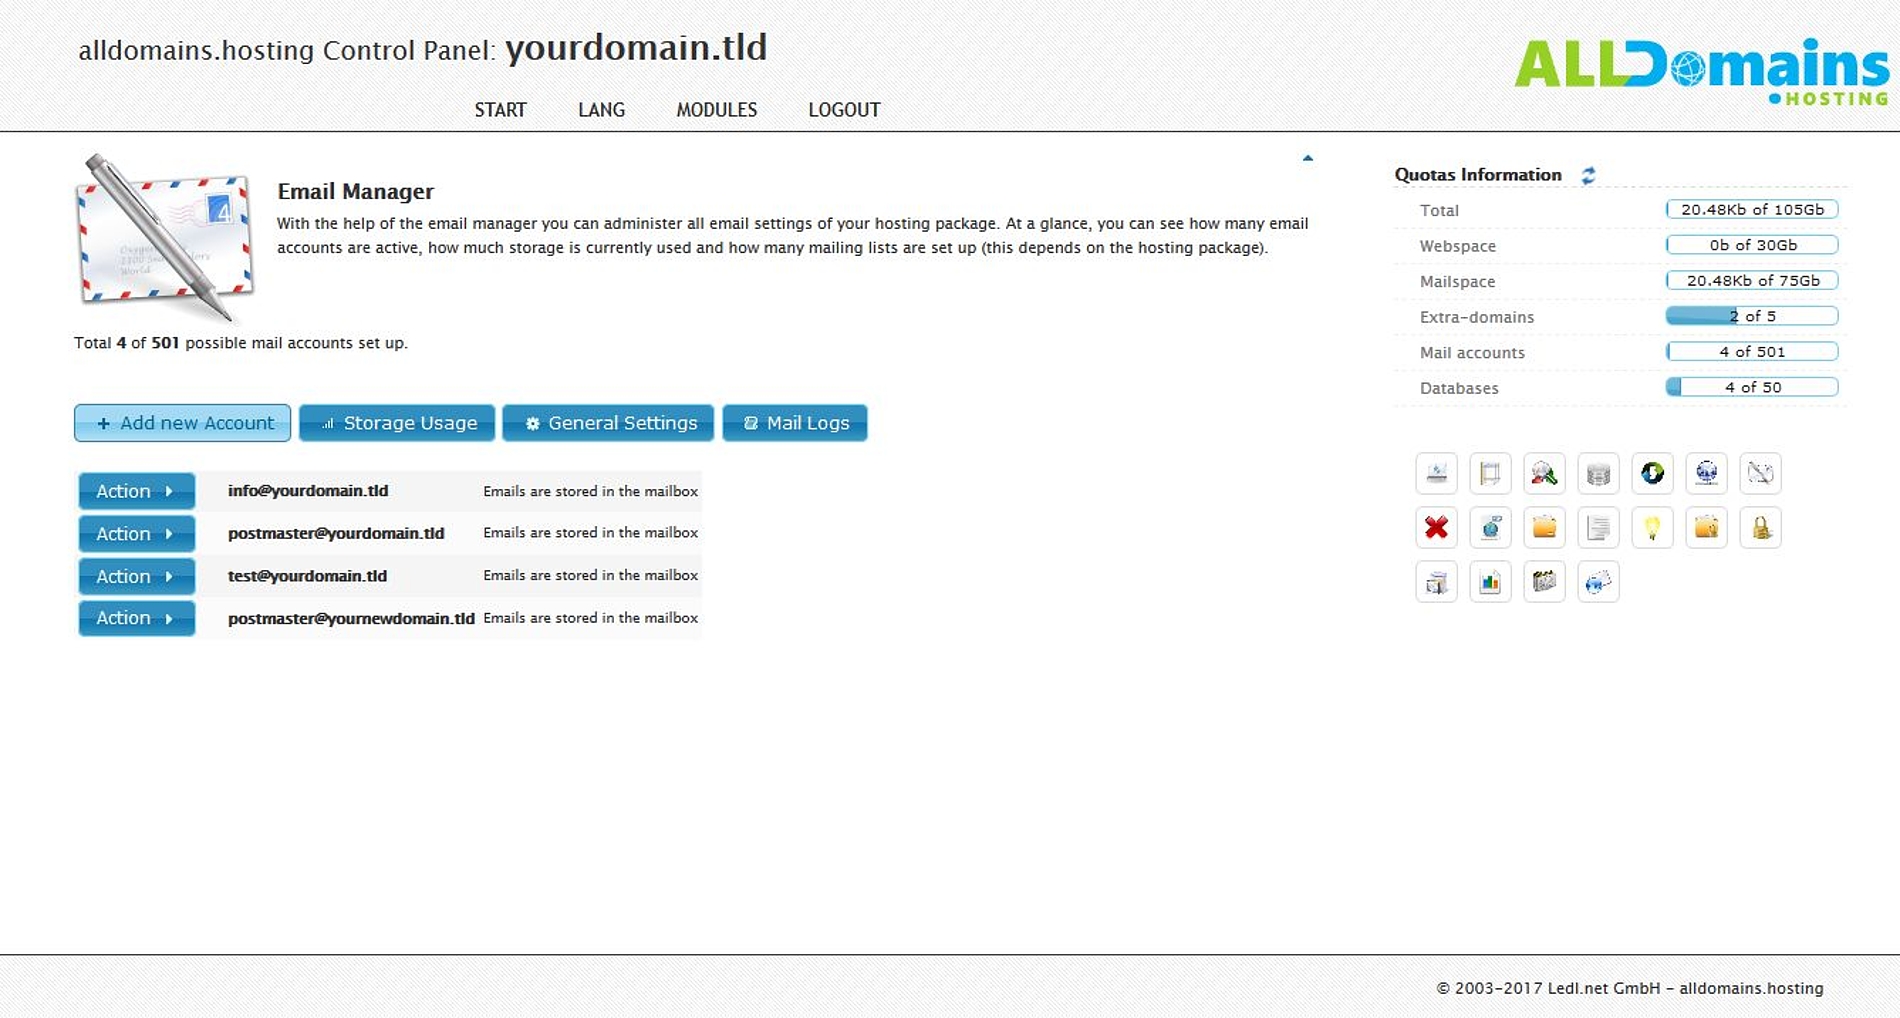
Email Manager
With the Email Manger module of your Hosting Control Panel you have the possibility to manage all the e-mail accounts of your hosting package and their settings. With the Email Manager you have the possibility to change general settings of all e-mail accounts or account specific settings of a certain e-mail account.
You can see all created e-mail accounts of your hosting package in one view. You can create forwardings, e-mail aliases and setup a multi-level spam filter.
With the integrated Mail-Logs of your Email Manager you get detailed information about the sent and received e-mails of each singe e-mail account.
Quick access:
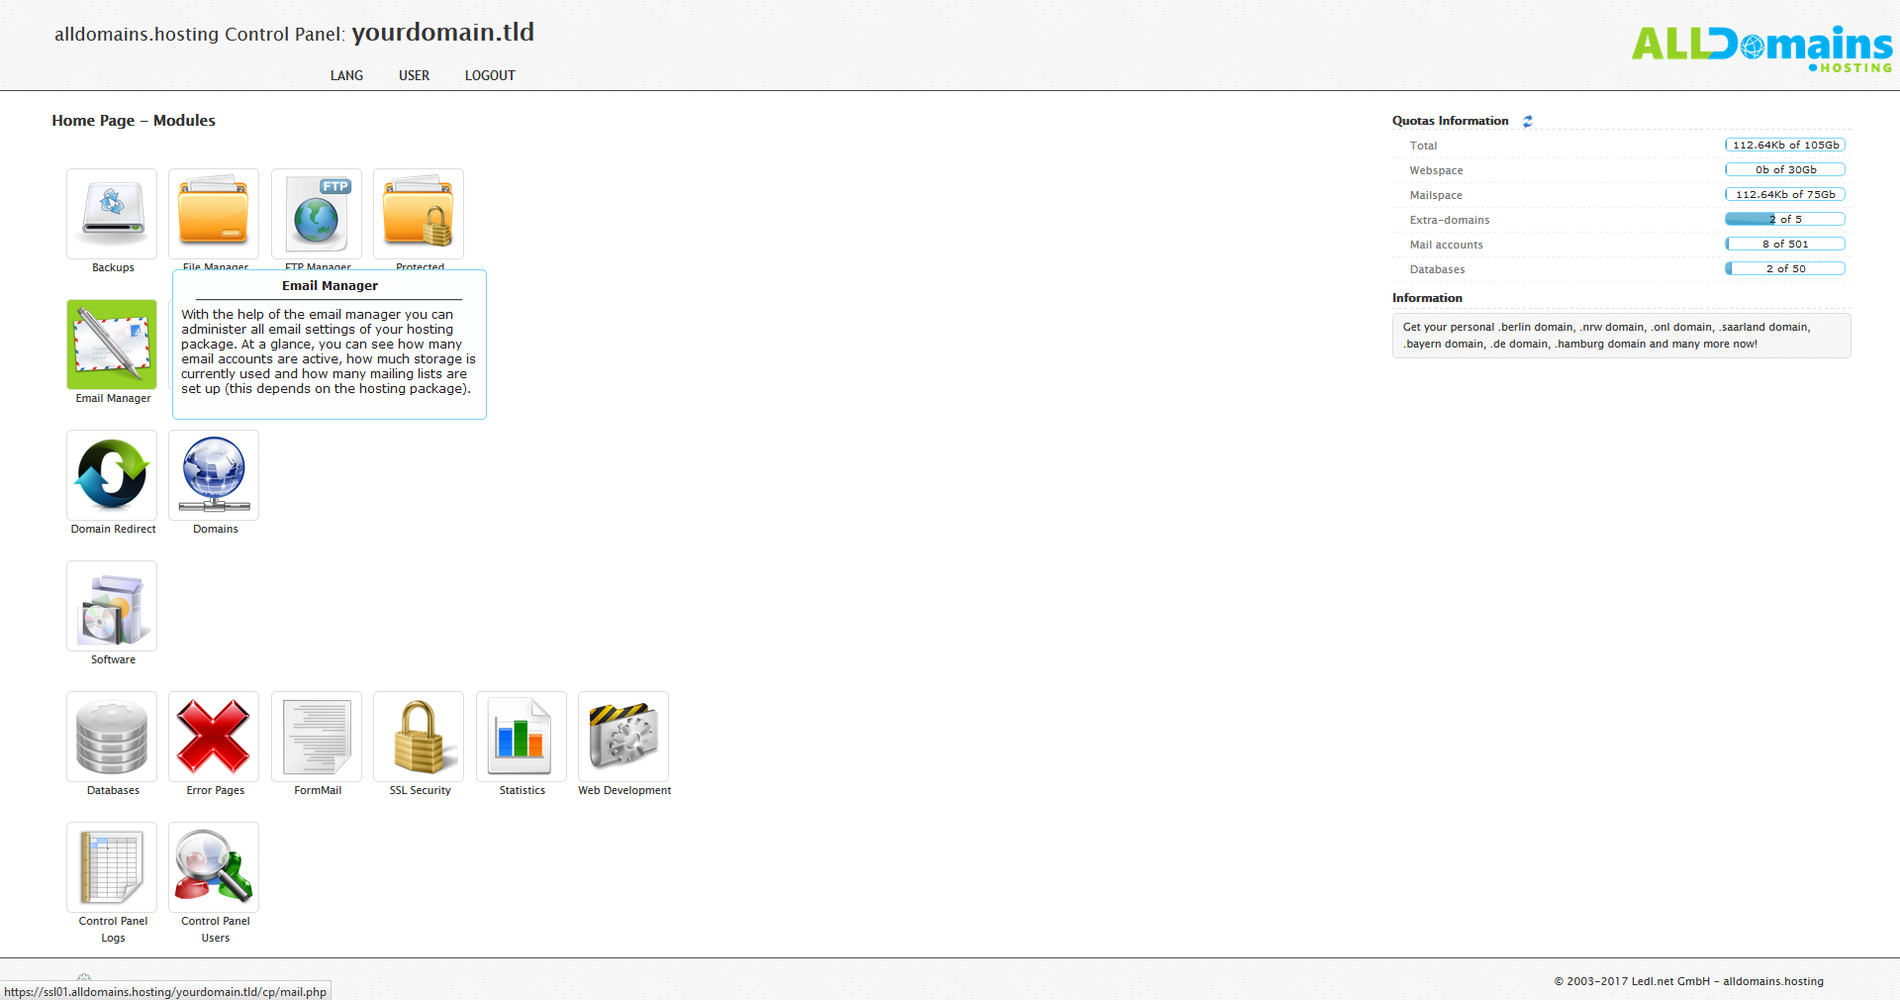
Open the module Email Manager
Before you start you need to login to your Hosting Control Panel.
You can choose between 3 different ways to start your Control Panel:
- either you enter "www.yourdomain.tld" (www.yourdomain.tld have to be replaced by your own domain) into the address bar of your browser
- or you use the Control Panel Login at our website
- or you start it directly inside your Customer Center
In your Customer Center switch to the tab "Purchases" and move your mouse over the hosting package and click on the link "Control Panel" at the side menu that popped up.

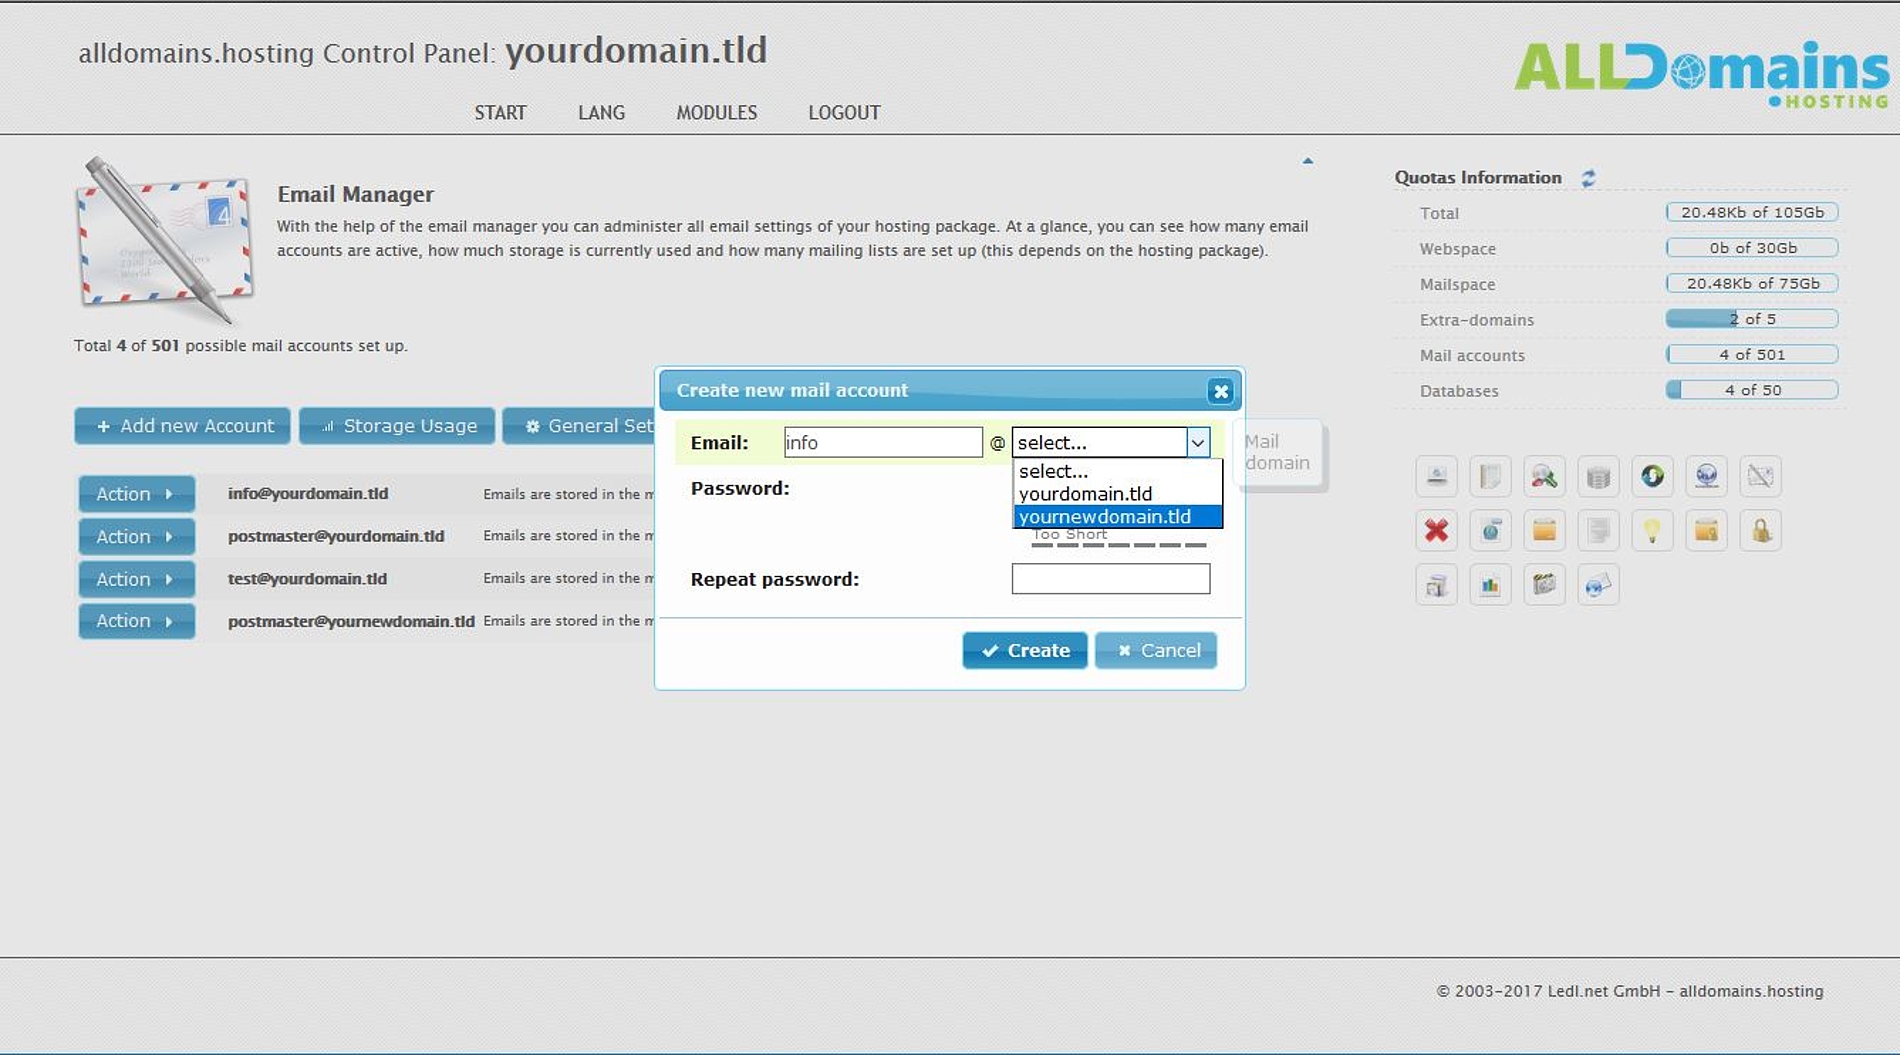
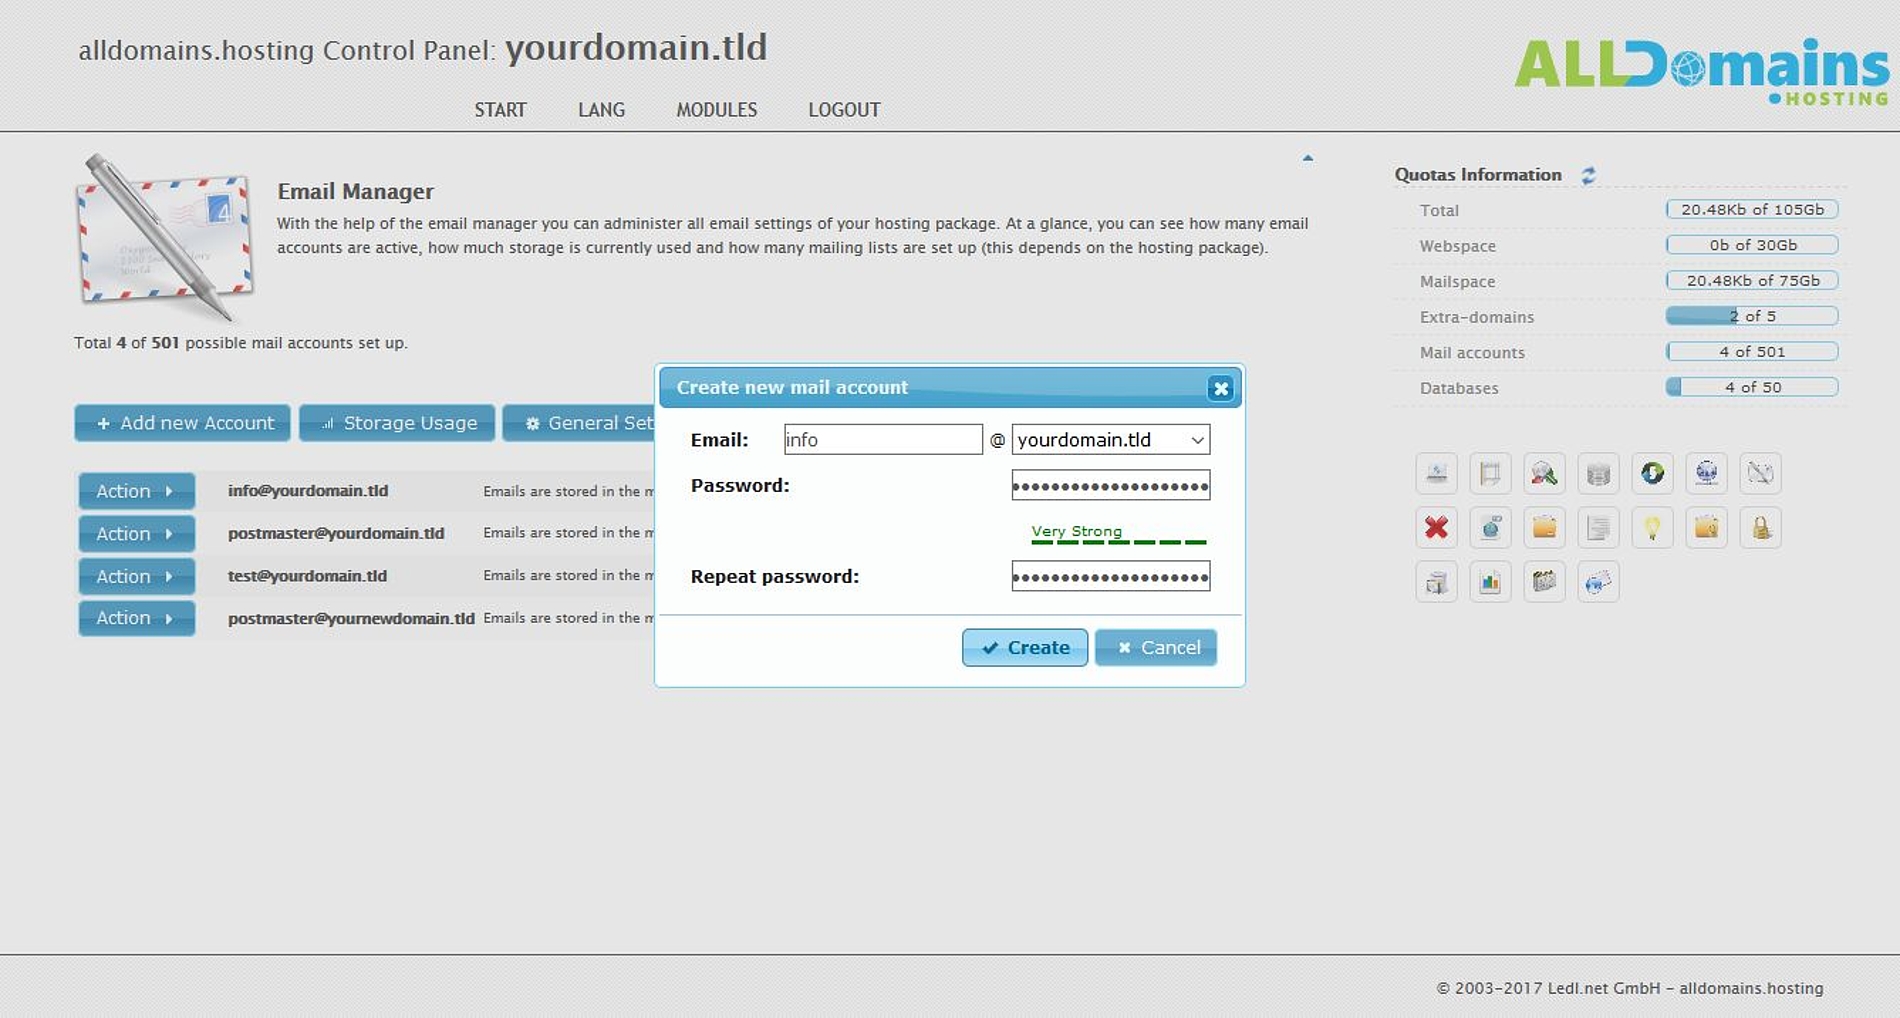
#Create new account
To create a new e-mail account you need to click on "Add new Account".
You can now provide the name of the e-mail address and if you have added an extra domain or a subdomain you can select for which of your domains you want to create the new e-mail address.
Finally you need to insert a secure password and click on "Create" to create the e-mail address.
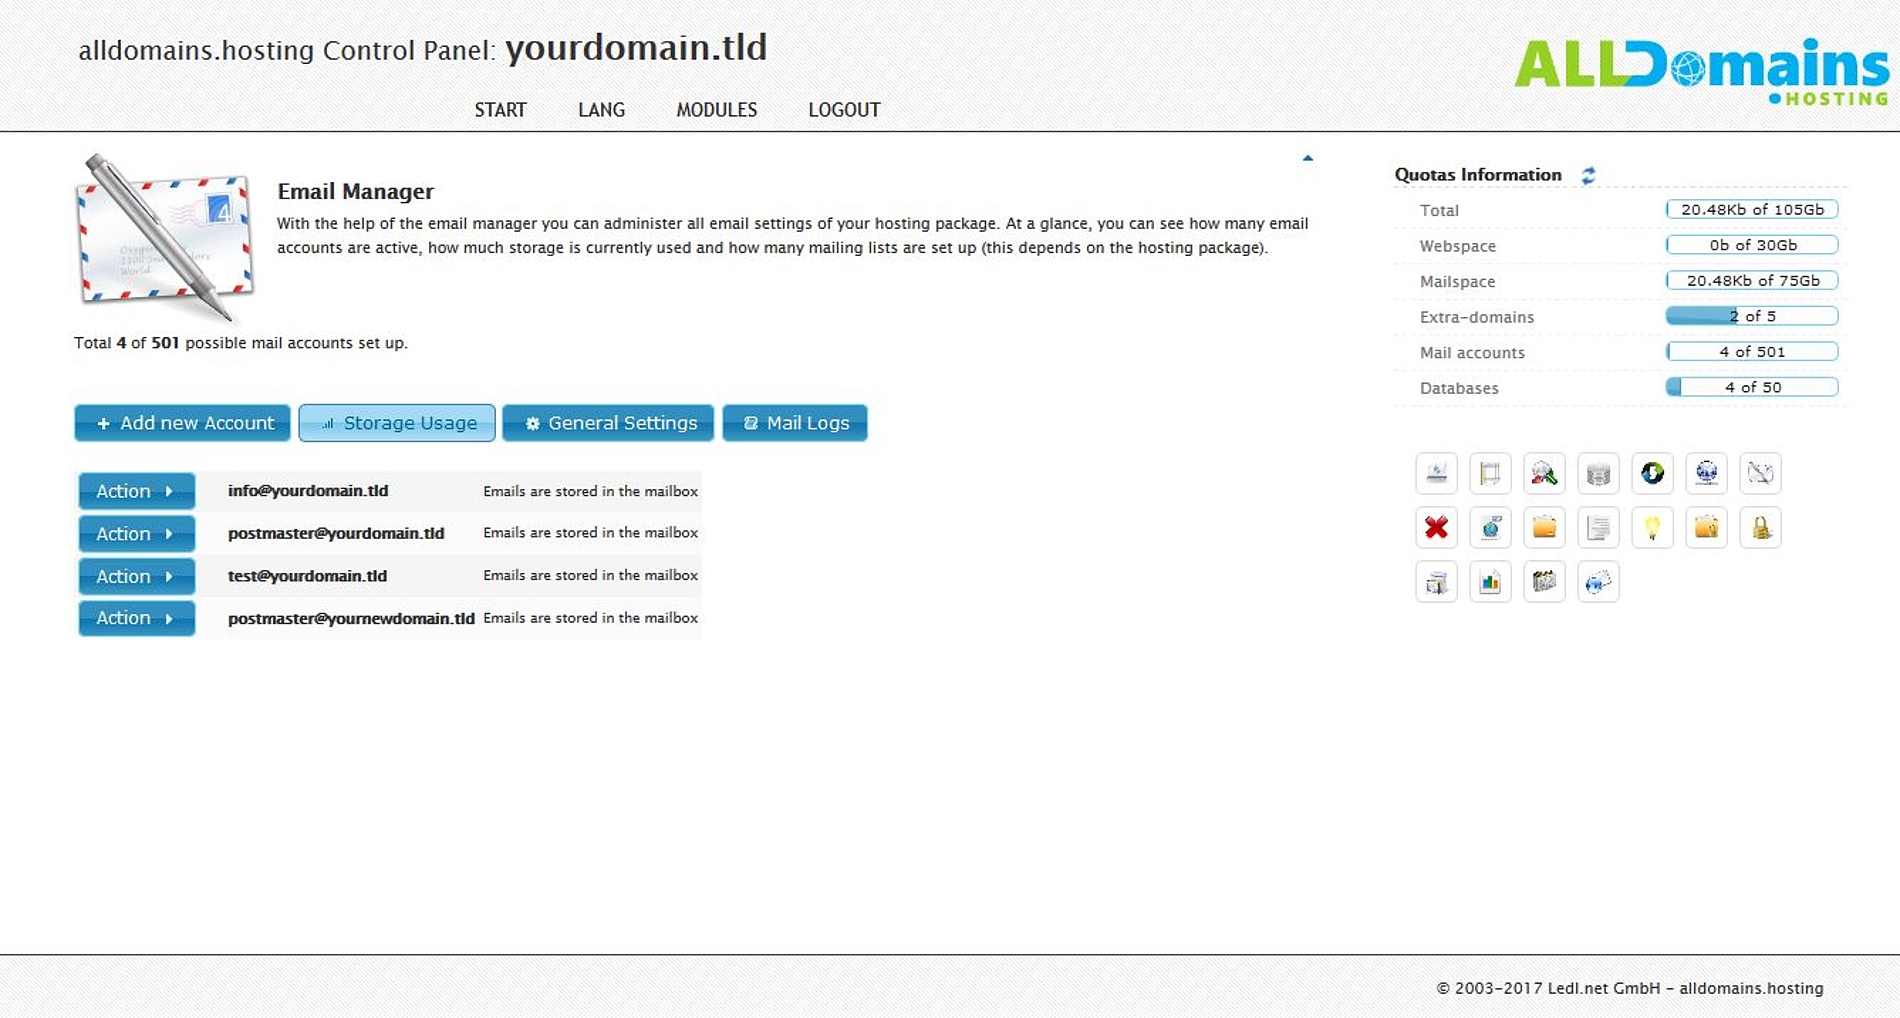
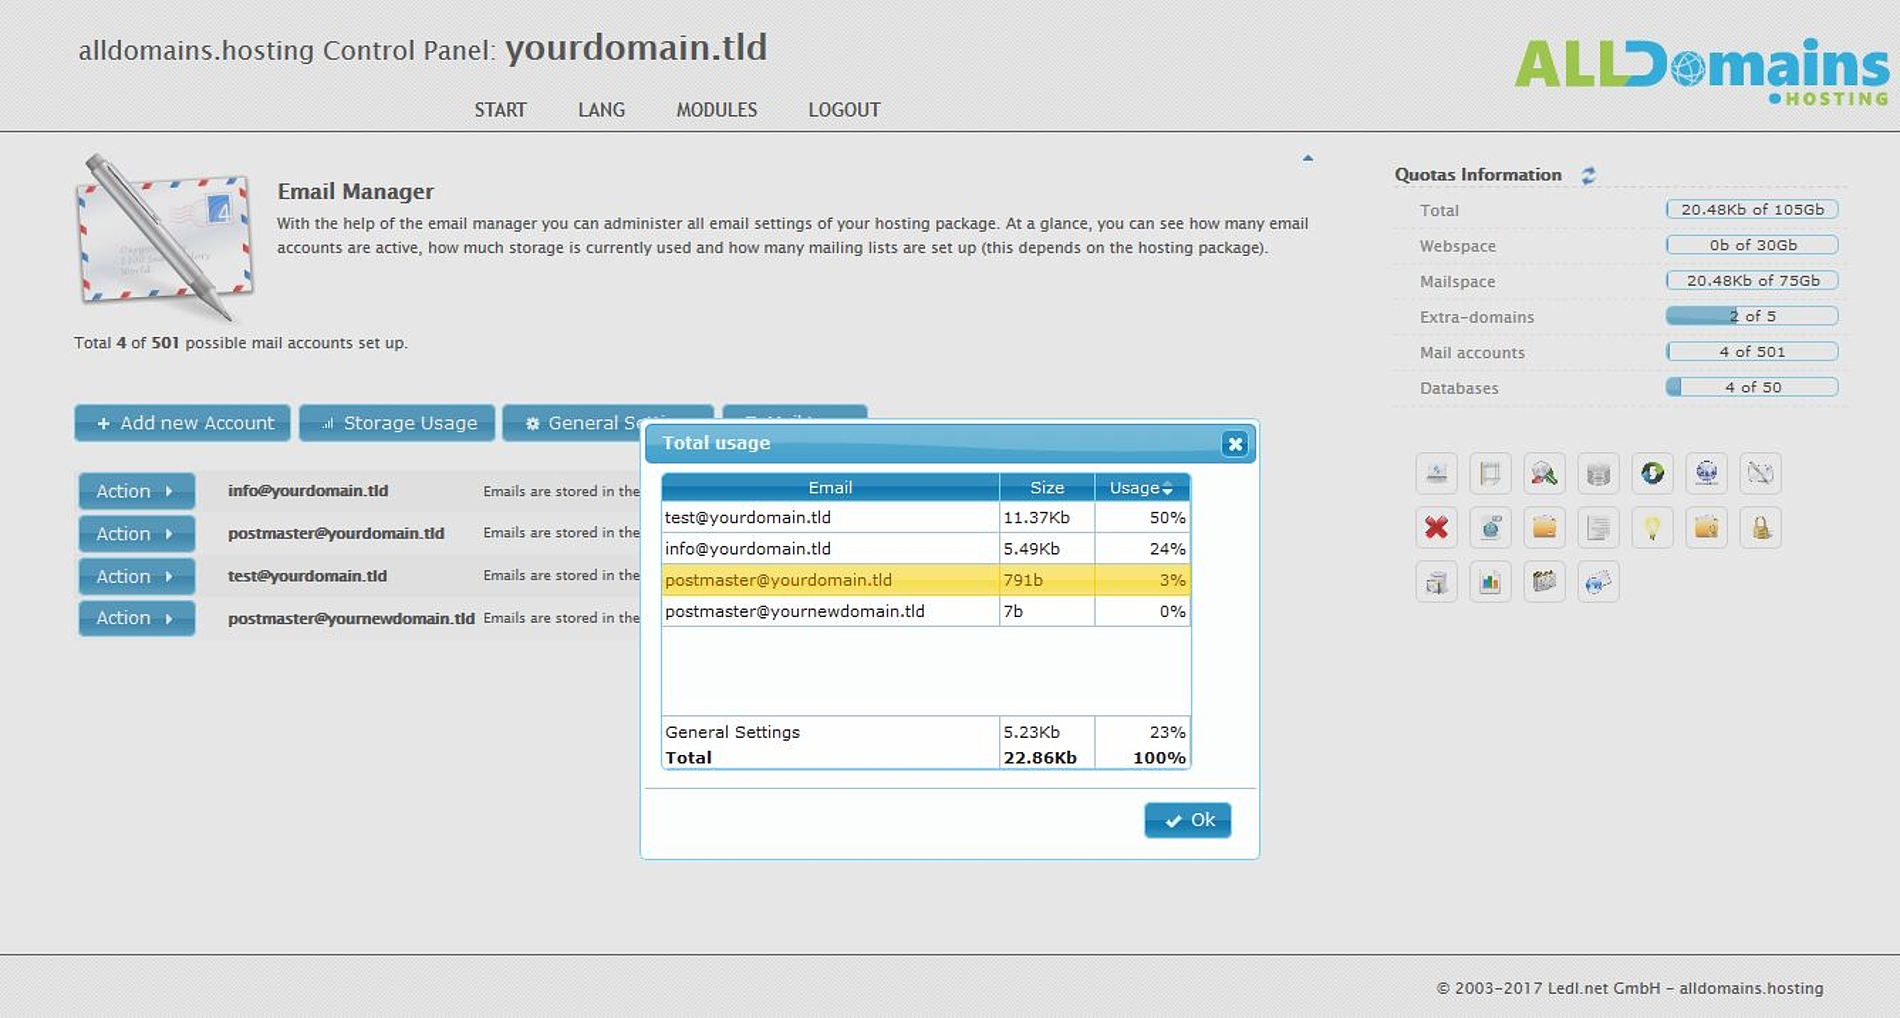
#Storage usage
All e-mail accounts share the e-mail storage of your hosting package.
With a click on "Storage usage" you can see an overview which e-mail account needs how much storage.
Note: the 100% at "Total" don’t mean that you use 100% of the available e-mail storage it only means the size of all e-mail accounts together, in our example it is 22.86Kb (take a look on the second screenshot).
The totally available resources can be found on the right side at "Quotas Information".
The totally available resources can be found on the right side at "Quotas Information".
#General settings
With the button "General Settings" you can change the settings for all e-mail accounts of the selected domain.
Catchall Settings
Here you can select how to process e-mails sent to a non existing e-mail account. For example if the e-mail address fo@yourdomain.tld is used as recipient instead of info@yourdomain.tld. You have three options what should happen with these e-mails:- Forward all e-mails for unknown users to postmaster@yourdomain.tld
- Drop e-mails for unknown users (without returning information to sender)
- Bounce e-mails for unknown users (will return an error message to sender)
General antispam settings
The general antispam filter should always (except testing) be active for every e-mail account, to prevent you from a huge amount of unwanted spam messages. The general antispam filter protects for example e-mails sent from really bad configured servers or botnet-PCs. Another protection is the check of the IP-Address (if there is an DNS Blacklist-entry), rDNS (the IP-Address must have a valid rDNS entry) and a check of the sender’s domain (a mx-entry has to be set and resolvable).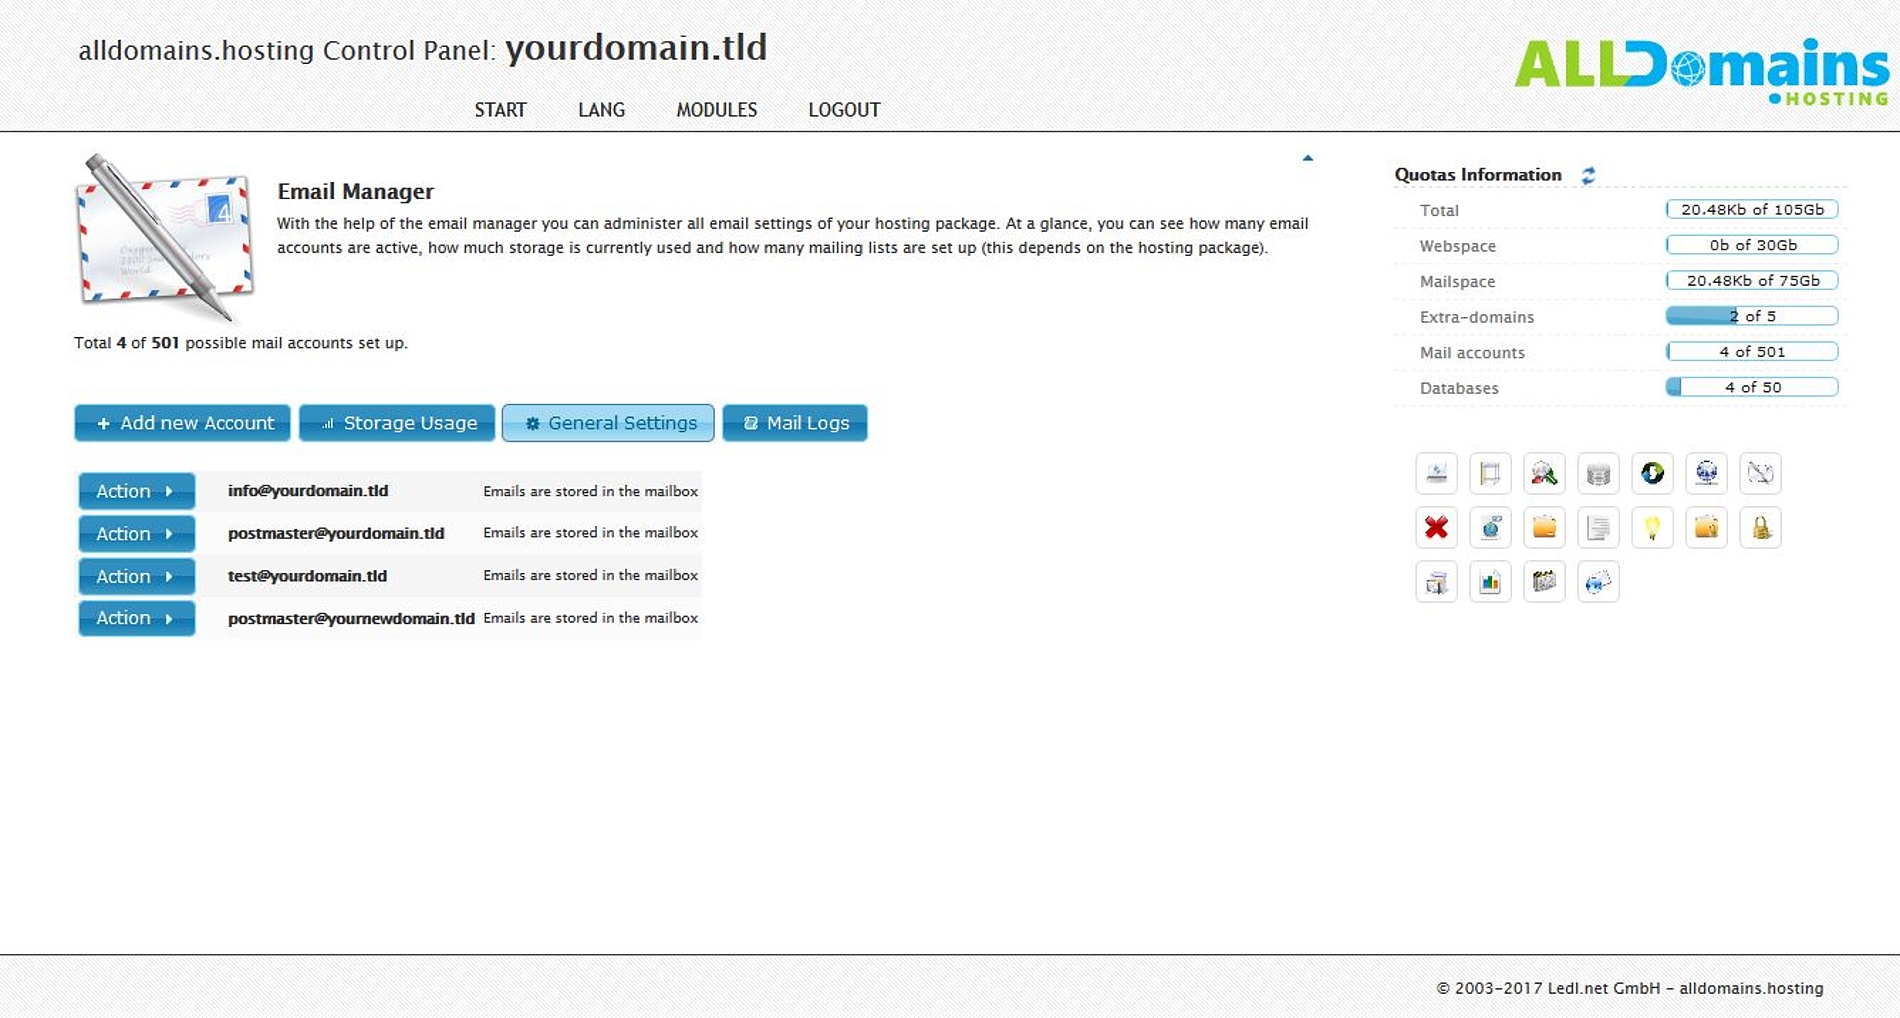

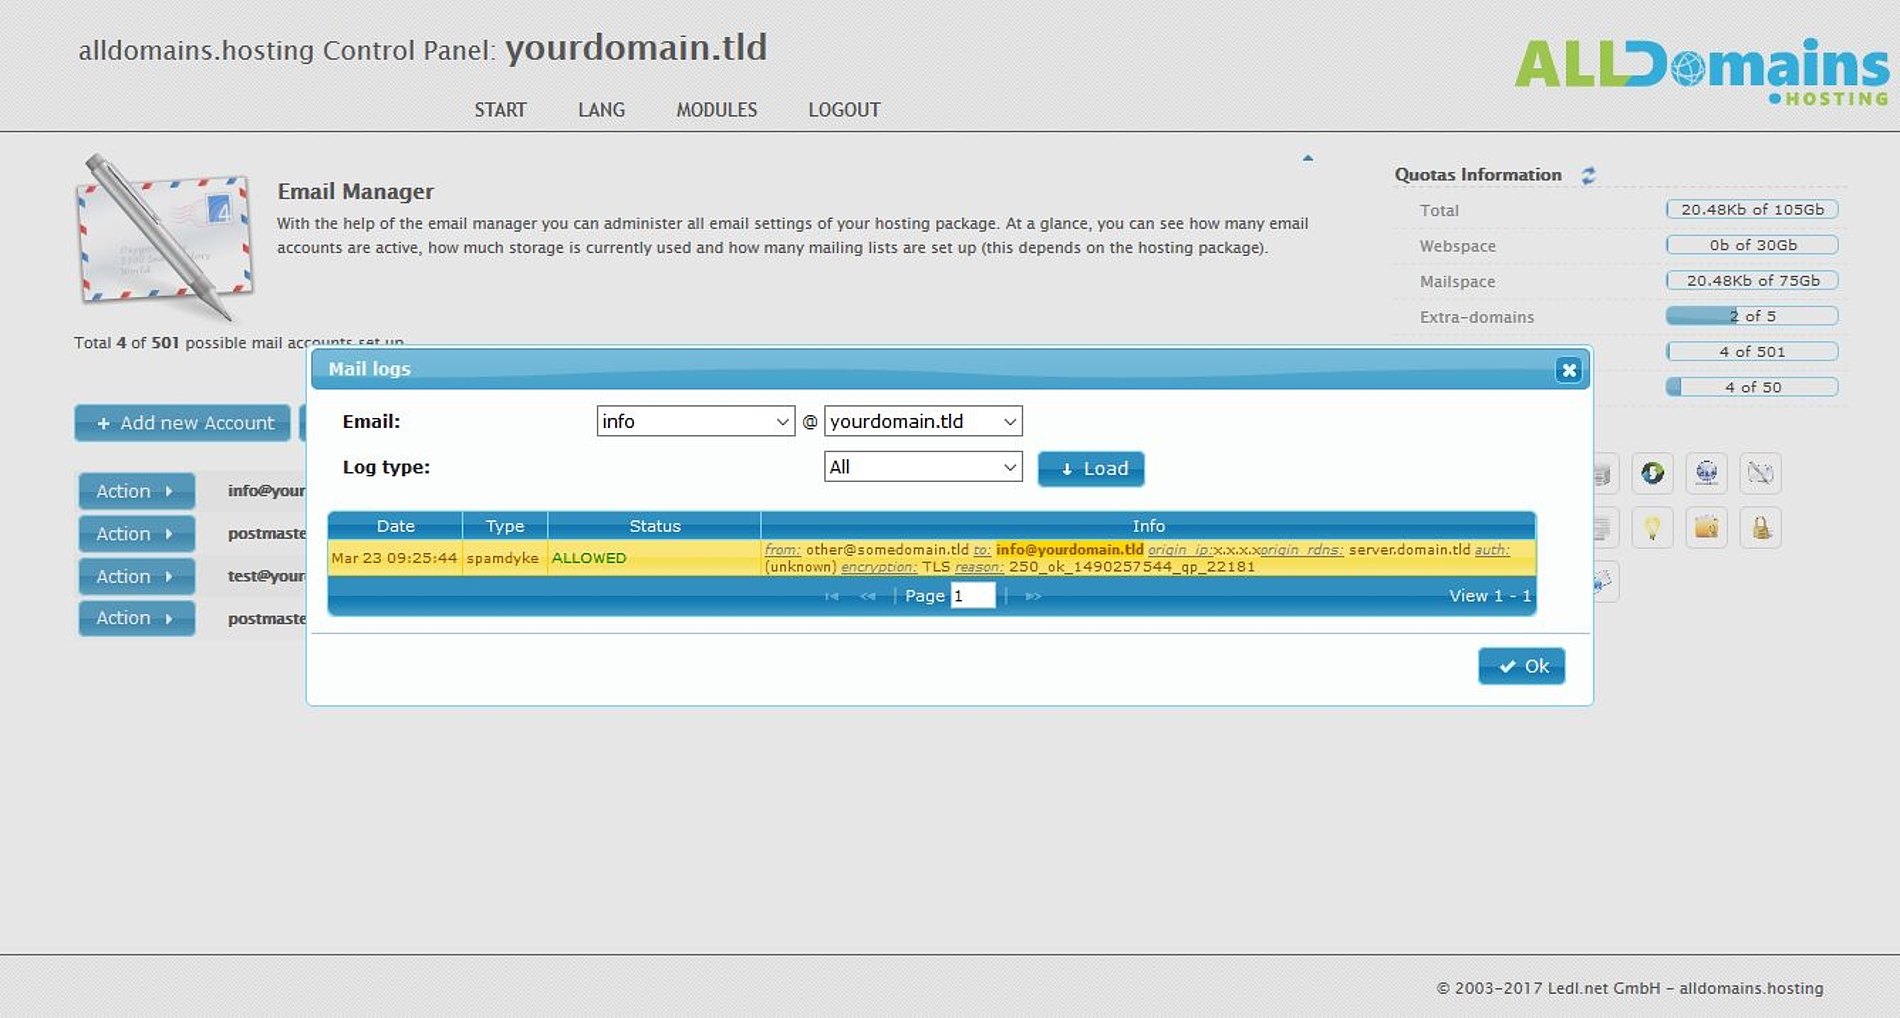
#Mail-Logs
With the button "Mail Logs" you can see the logs about sent and received messages of your e-mail accounts.
If you want, you can limit the output to only a specific e-mail account or a certain log type. If you want to see both log types you need to select "Log type: All".
Log Type
Spamdyke: That log type checks the DNS-configuration of the sending mail server and if it is listed on any Black/Whitelists. If a message is rejected because of that log type, the sending mail server is misconfigured and/or listed on a blacklist. SpamAssasin: The Apache SpamAssasin is an account filter which rates incoming messages with points according to different criteria and multiple filters. The more points the message gets, the higher is the chance that it is a spam message. The criteria are updated regularly by the software developers and by our company to make sure this filter is as safe as possible.
#
Successful e-mail traffic
If the status of an e-mail shows ALLOWED, it means that the e-mail was accepted for delivery. The server spam filter doesn’t have any reason to block the e-mail. If there is shown a green status with a number followed by several letters, that means the e-mail was checked by SpamAssasin but it wasn't marked as spam and therefore permitted.#
Incorrect e-mail traffic
If the status of your e-mail is showing DENIED_, an error occurred and your e-mail wasn't delivered. You have to separate between errors when you are sending messages or when you are receiving them.Error at sending messages:
The most common reason why sent e-mails don't get delivered correctly is a wrong configured e-mail client. Please make sure you have configured your e-mail account correctly like it is shown in our e-mail client setup manuals. Status:DENIED_OTHER This error message is shown if the mail was sent without SMTP-authentication, that means without username or/and without password at the outbox server (auth: unknown). DENIED_IDENTICAL_SENDER_RECIPIENT This error message occurs if the sender and receiver of the e-mail are identical. To solve this problem you have to activate the SMTP-authentication.Error receiving messages:
If your error message starts with Y 1-X (points) followed by one or several error codes, the spam filter (SpamAssasin) has rated the message as spam. To get more information click on the red text. Status:DENIED_RDNS_MISSING The e-mail server of the sending person doesn't have a rDNS-entry (reverse DNS). DENIED_RDNS_RESOLVE The e-mail server of the sending person has an invalid rDNS-entry (reverse DNS). DENIED_SENDER_NO_MX The e-mail server of the sending person doesn't have an MX-entry.#Button "Action >"
With the button "Action >" you can do settings that only concern to the selected e-mail address.
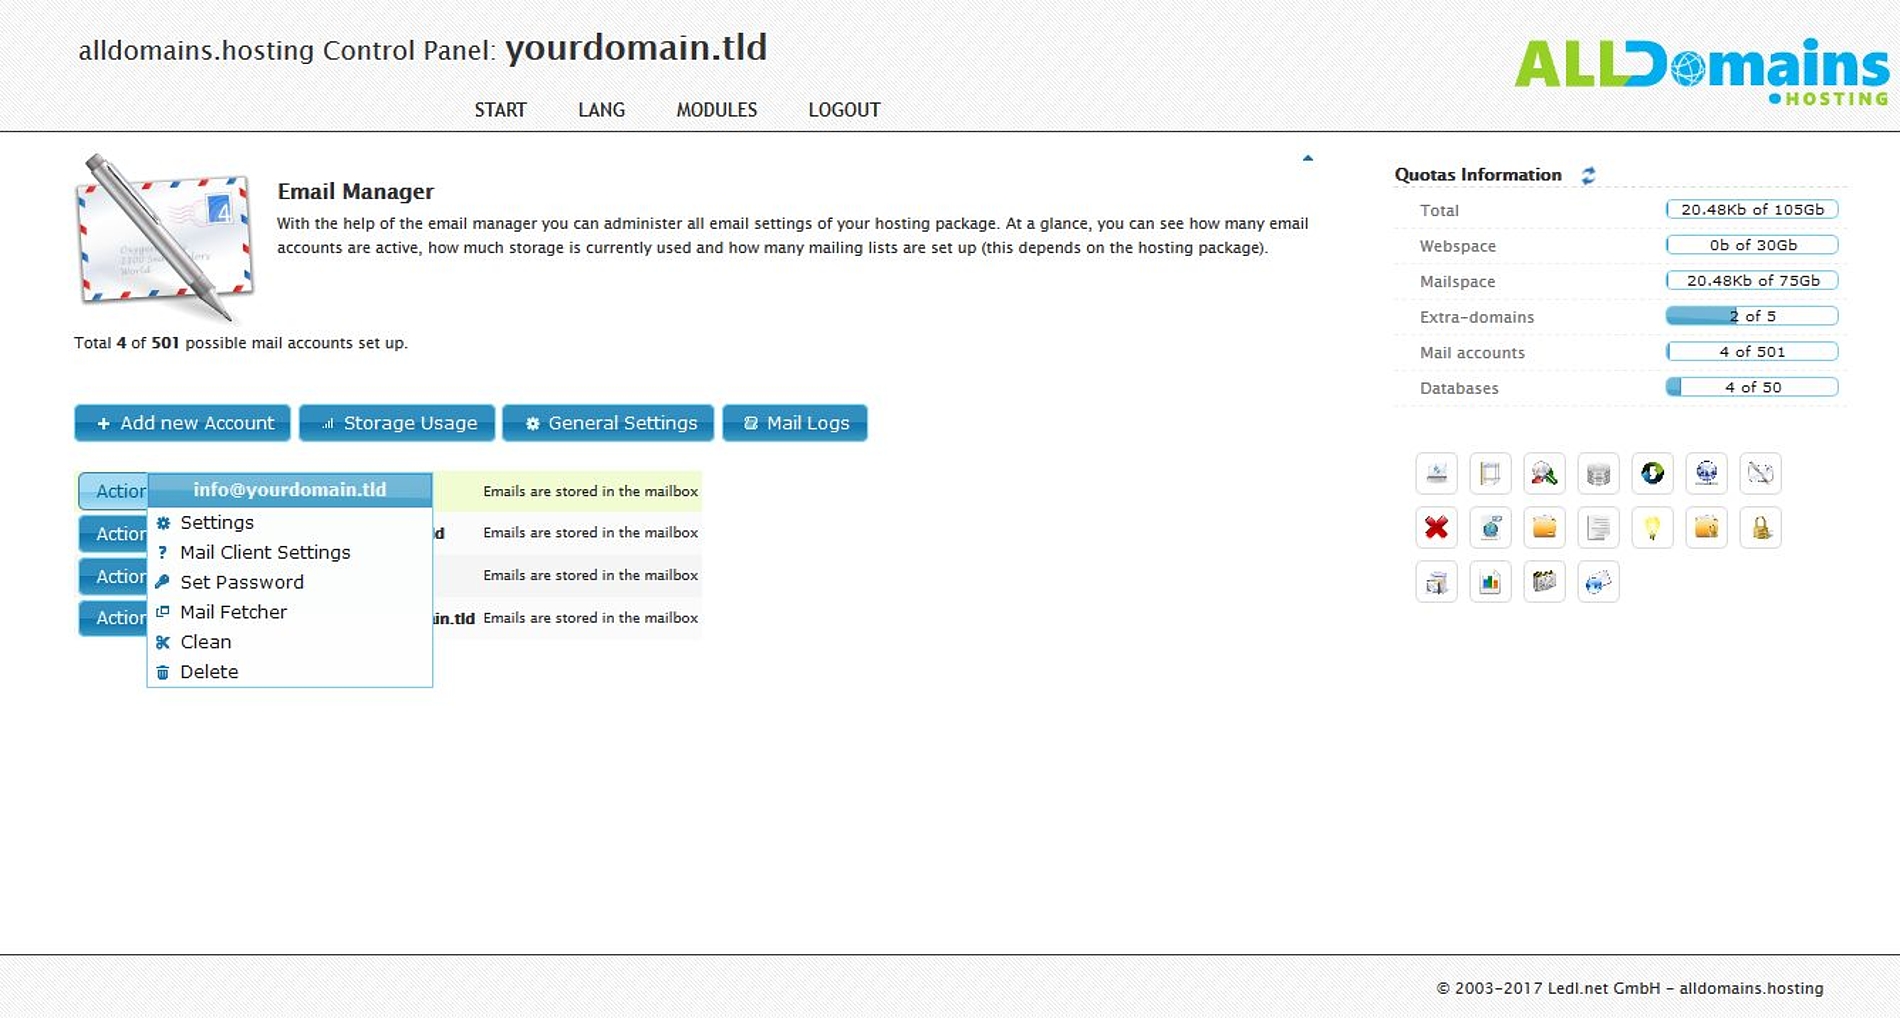
#Mailbox settings
With "Action >" and "Settings" you can open the mailbox settings for the selected e-mail account.
Delivery
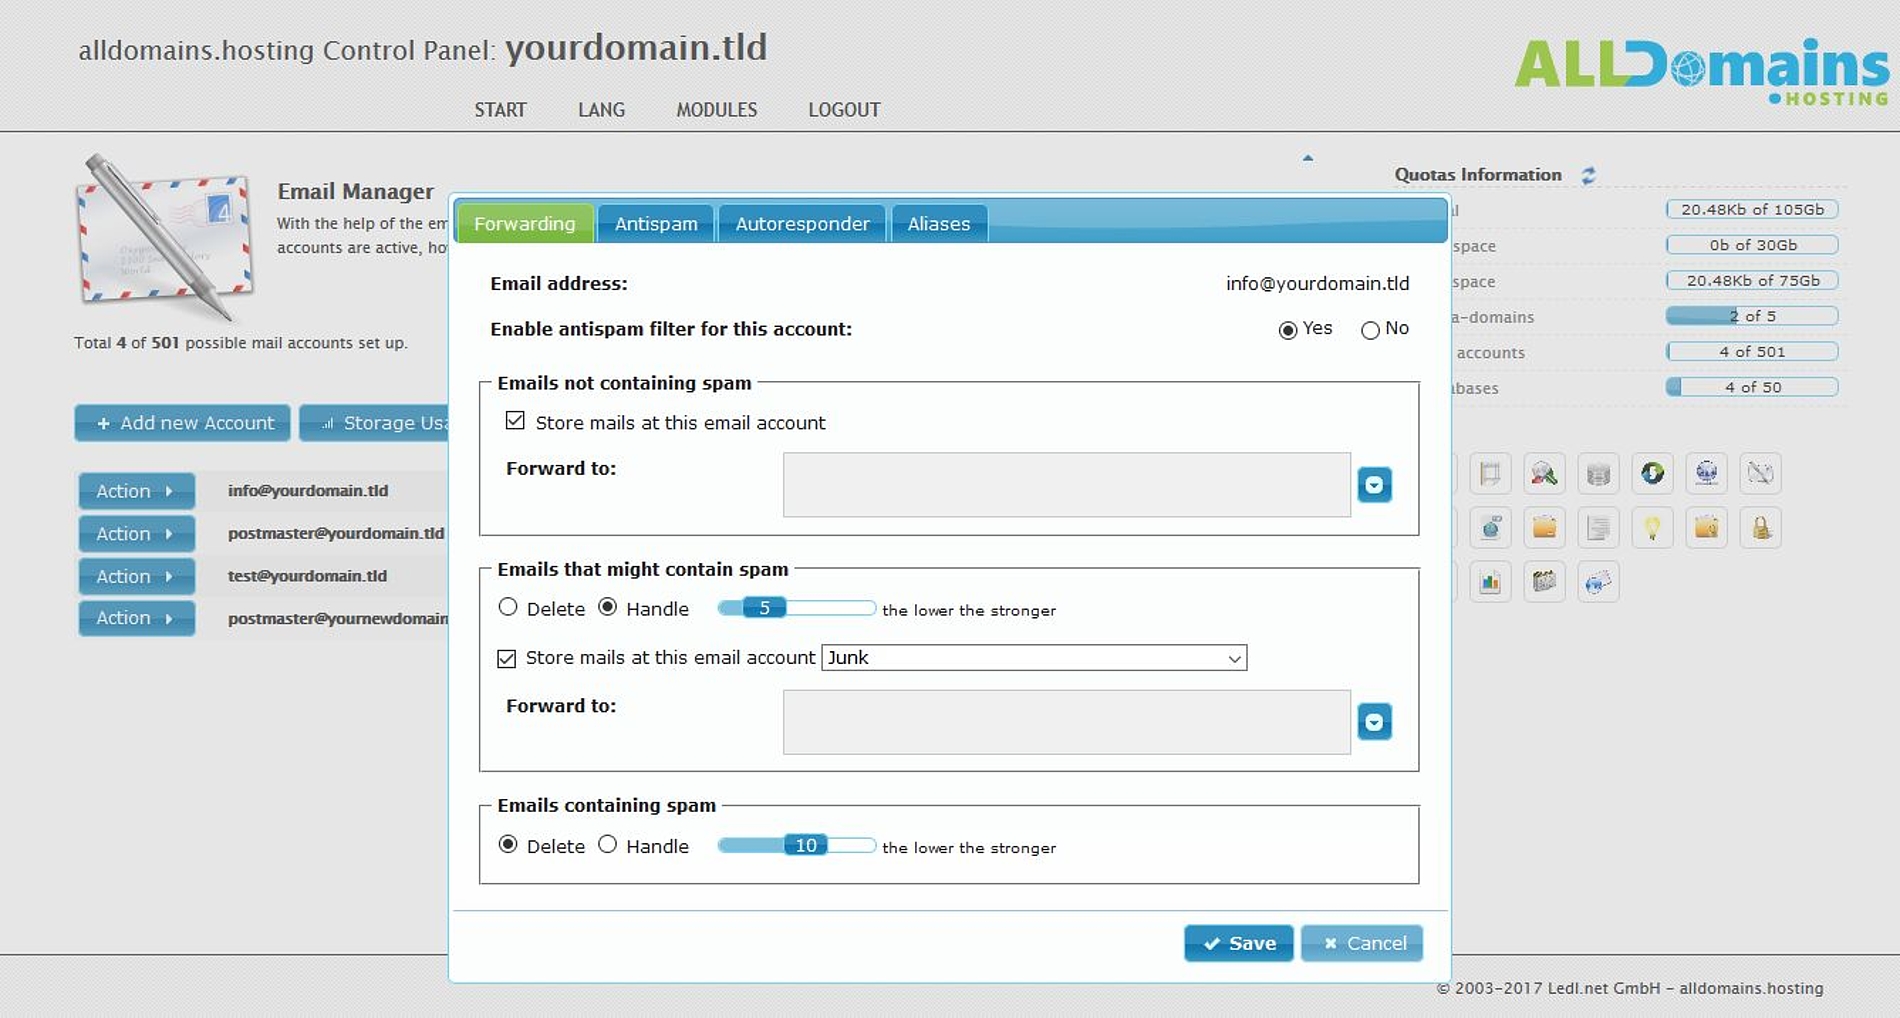
If the Spam filter is not active for your e-mail account you can see a new setting after removing the tick at "Store mails at this email account". You can now select "I understand and confirm that all mails will be deleted" to delete all e-mails instantly. If you select "Yes" (recommended) at "Enable antispam filter for this account" you can decide how to handle messages which "might contain spam" and messages "containing spam". If you select "Handle" you can decide if the messages that might contain spam or messages which contain spam should be saved "at this e-mail account", for that you need to select a directory (mostly "Junk") or you can forward that messages to an internal or external e-mail address.

#Spam filter
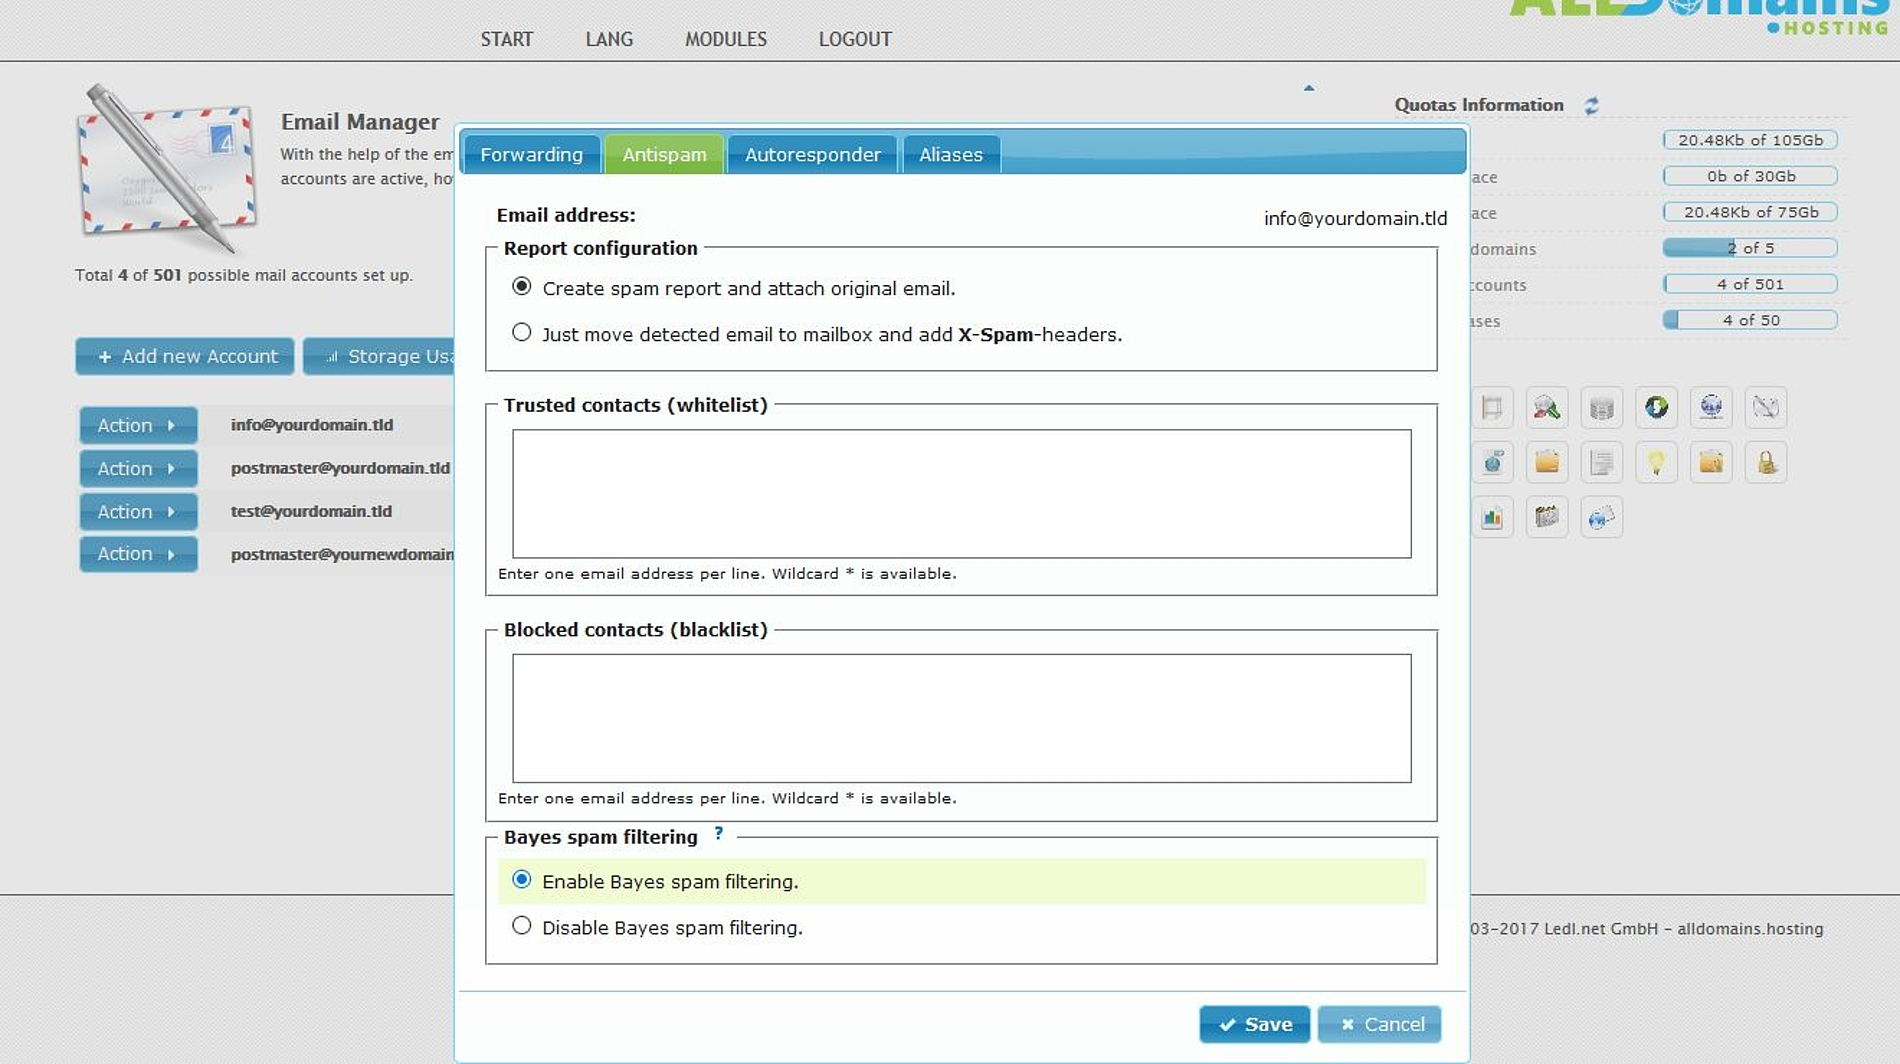
If you enabled the antispam protection in the "Forwarding" tab, you can now use the tab Antispam" to configure the spam filter in detail.
You can create Whitelist- (Trusted contacts) and Blacklist-entries (Blocked contacts). These entries don’t have any effect on the server spam filter.
In addition to the normal spam filter and the server spam filter you can enable the "Bayes Spam Filter".
The Bayes Spam Filter is a self-learning spam filter, which checks the header of incoming e-mails and ranks the spam-possibility. The longer the Bayes Spam Filter is active, the more effective it will get.
Once per day the Bayes Spam Filter checks your messages and handles the messages in your Inbox as wanted messages and the e-mails in your Junk-directory as unwanted. The Bayes Spam Filter learns with each incoming e-mail and can perfectly adjust to your e-mail traffic.
That means if spam messages get delivered to your Inbox and you move them into the Junk-directory these messages get analysed at the next check as spam and will get delivered to the Junk-directory the next time.
The Spam messages should be kept for a minimum of two days in your Junk-directory to guarantee a perfect adjustment of the filter rules.
#Autoresponder & Aliases
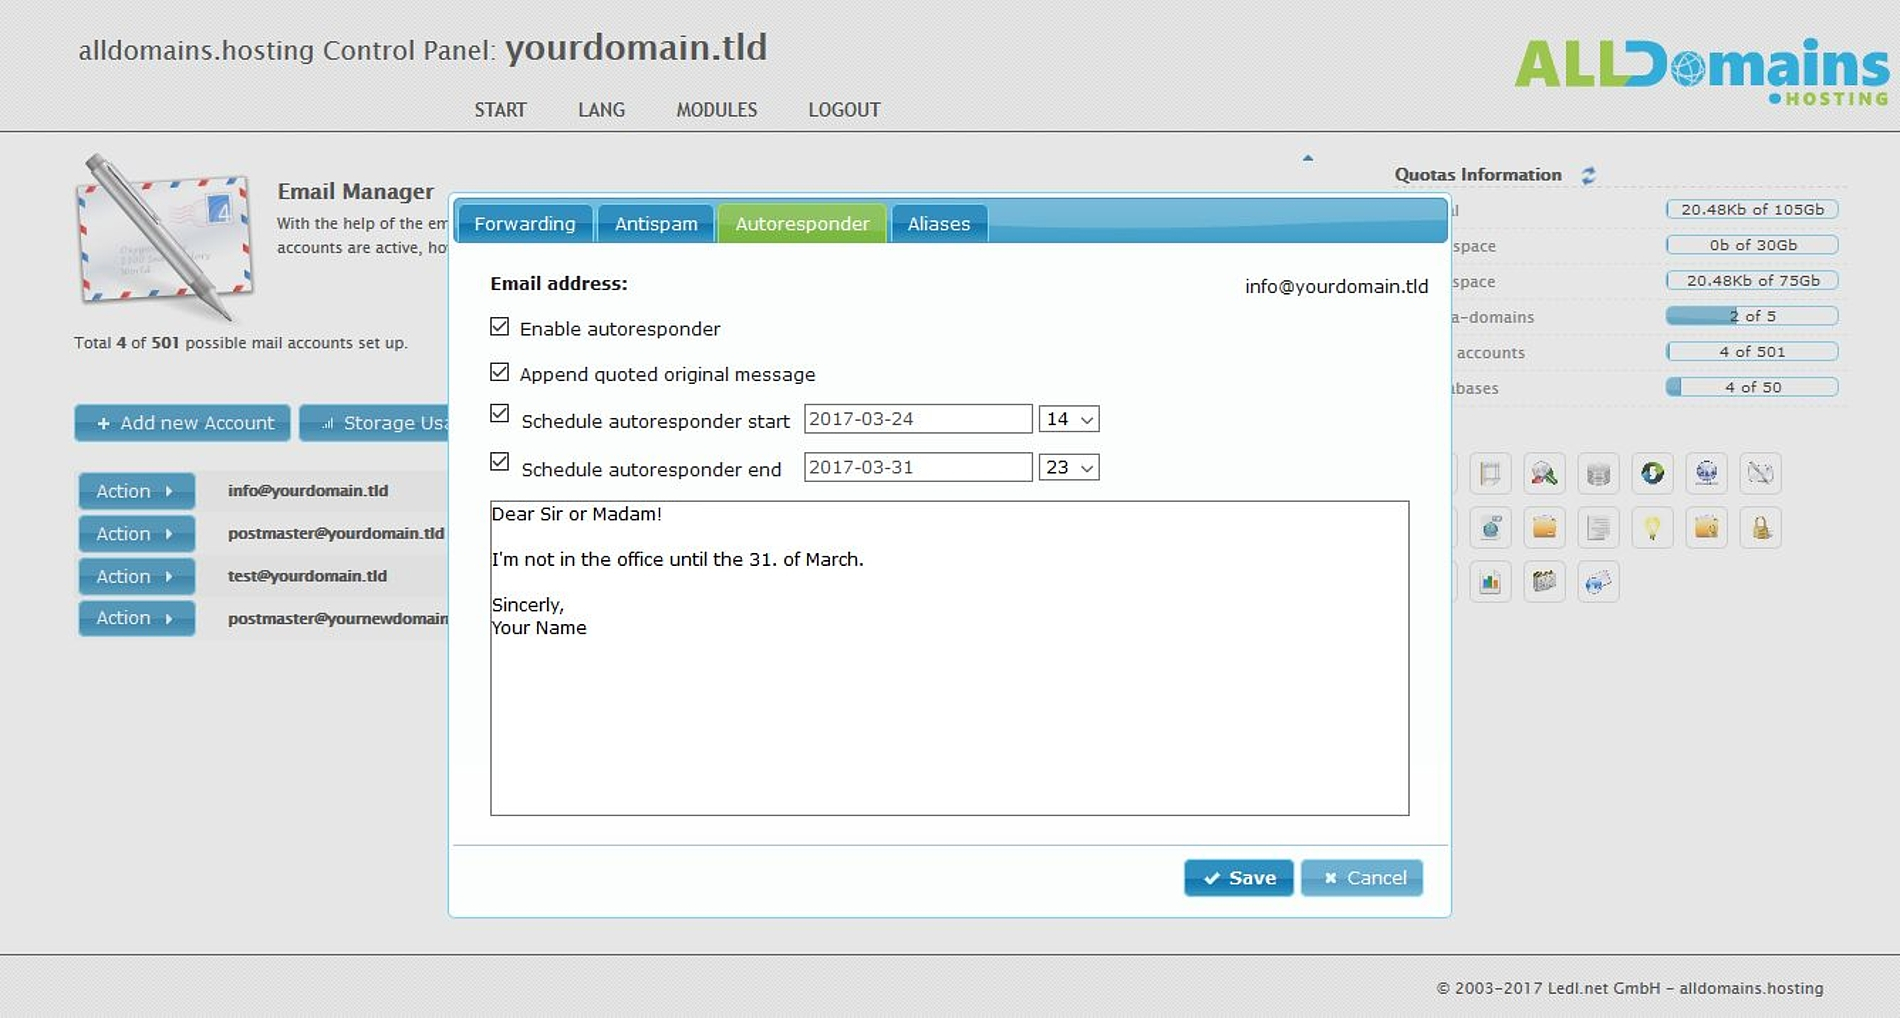
In the Tab "Autoresponder" you can configure a message that will get returned automatically to the sender.
You can define a start and end date and time for the autoresponder and if the original message should be appended to the original message or not.
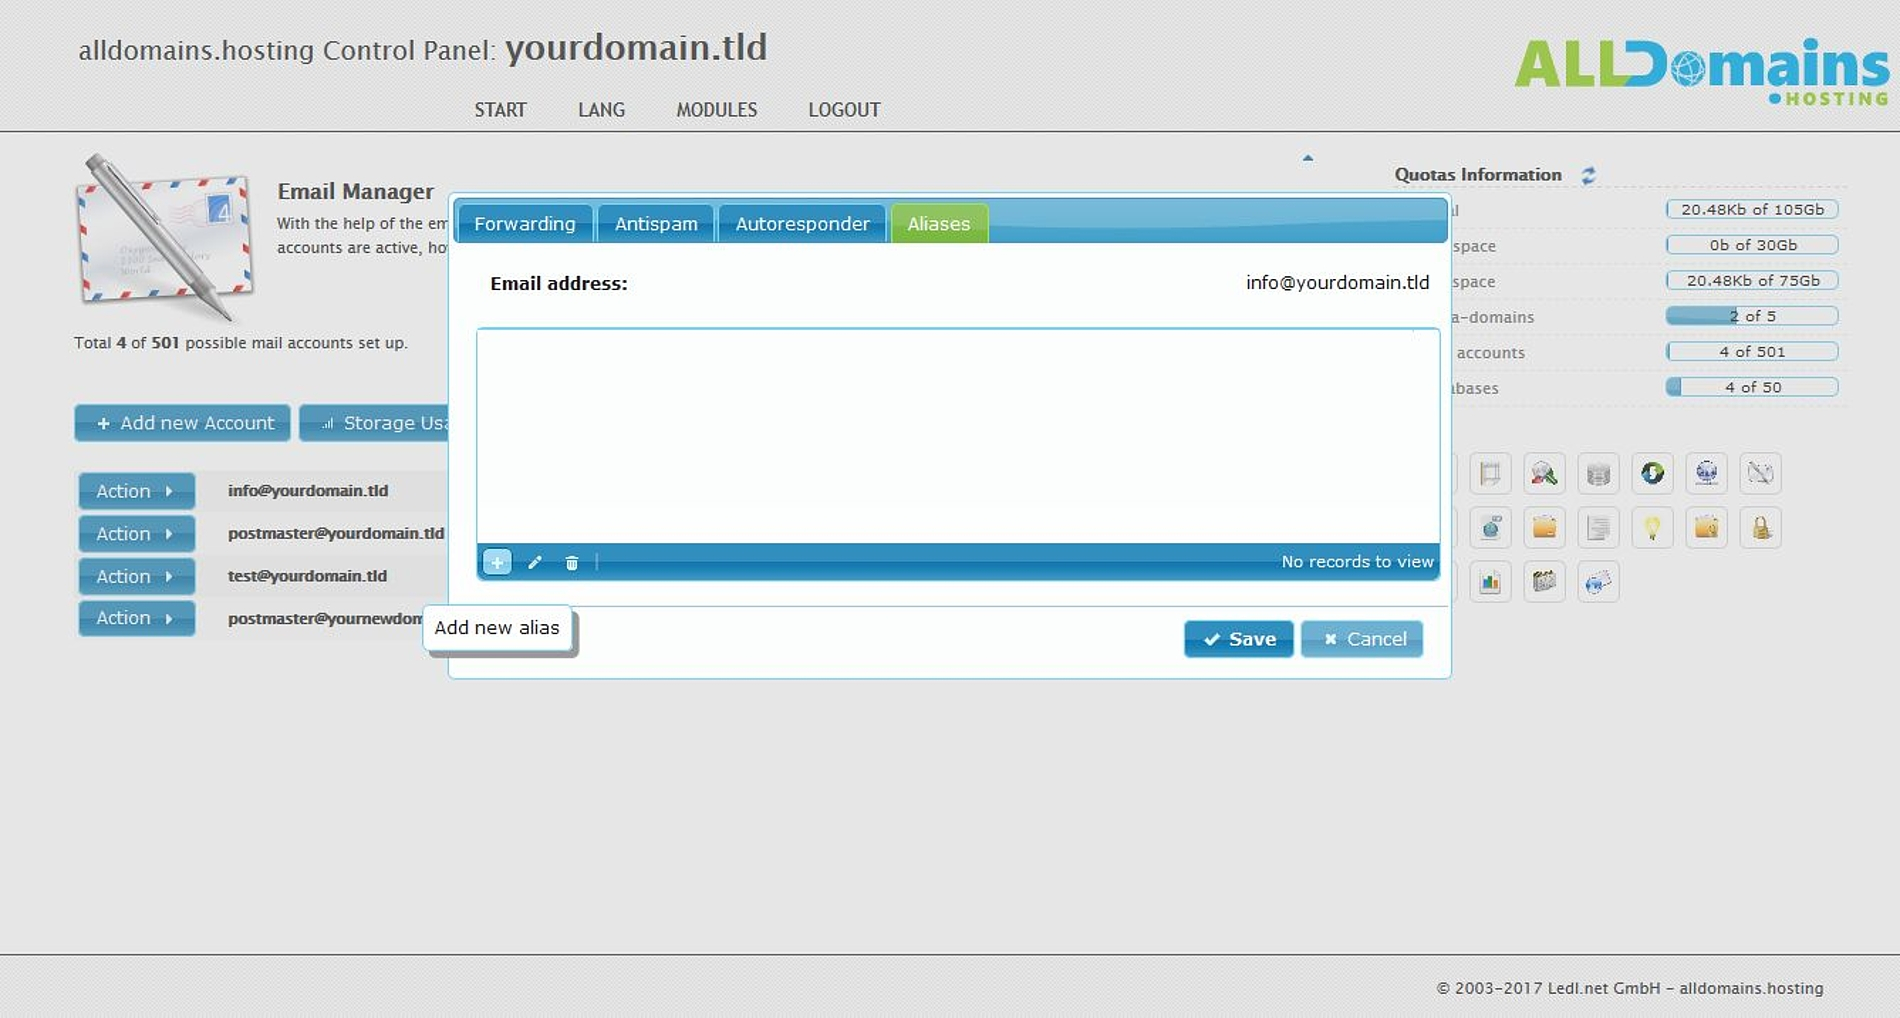
In the tab "Aliases" you can create, change and delete e-mail aliases. An e-mail alias is a pseudonym for your e-mail account, which provides the ability to create different e-mail addresses but you only need one mailbox.
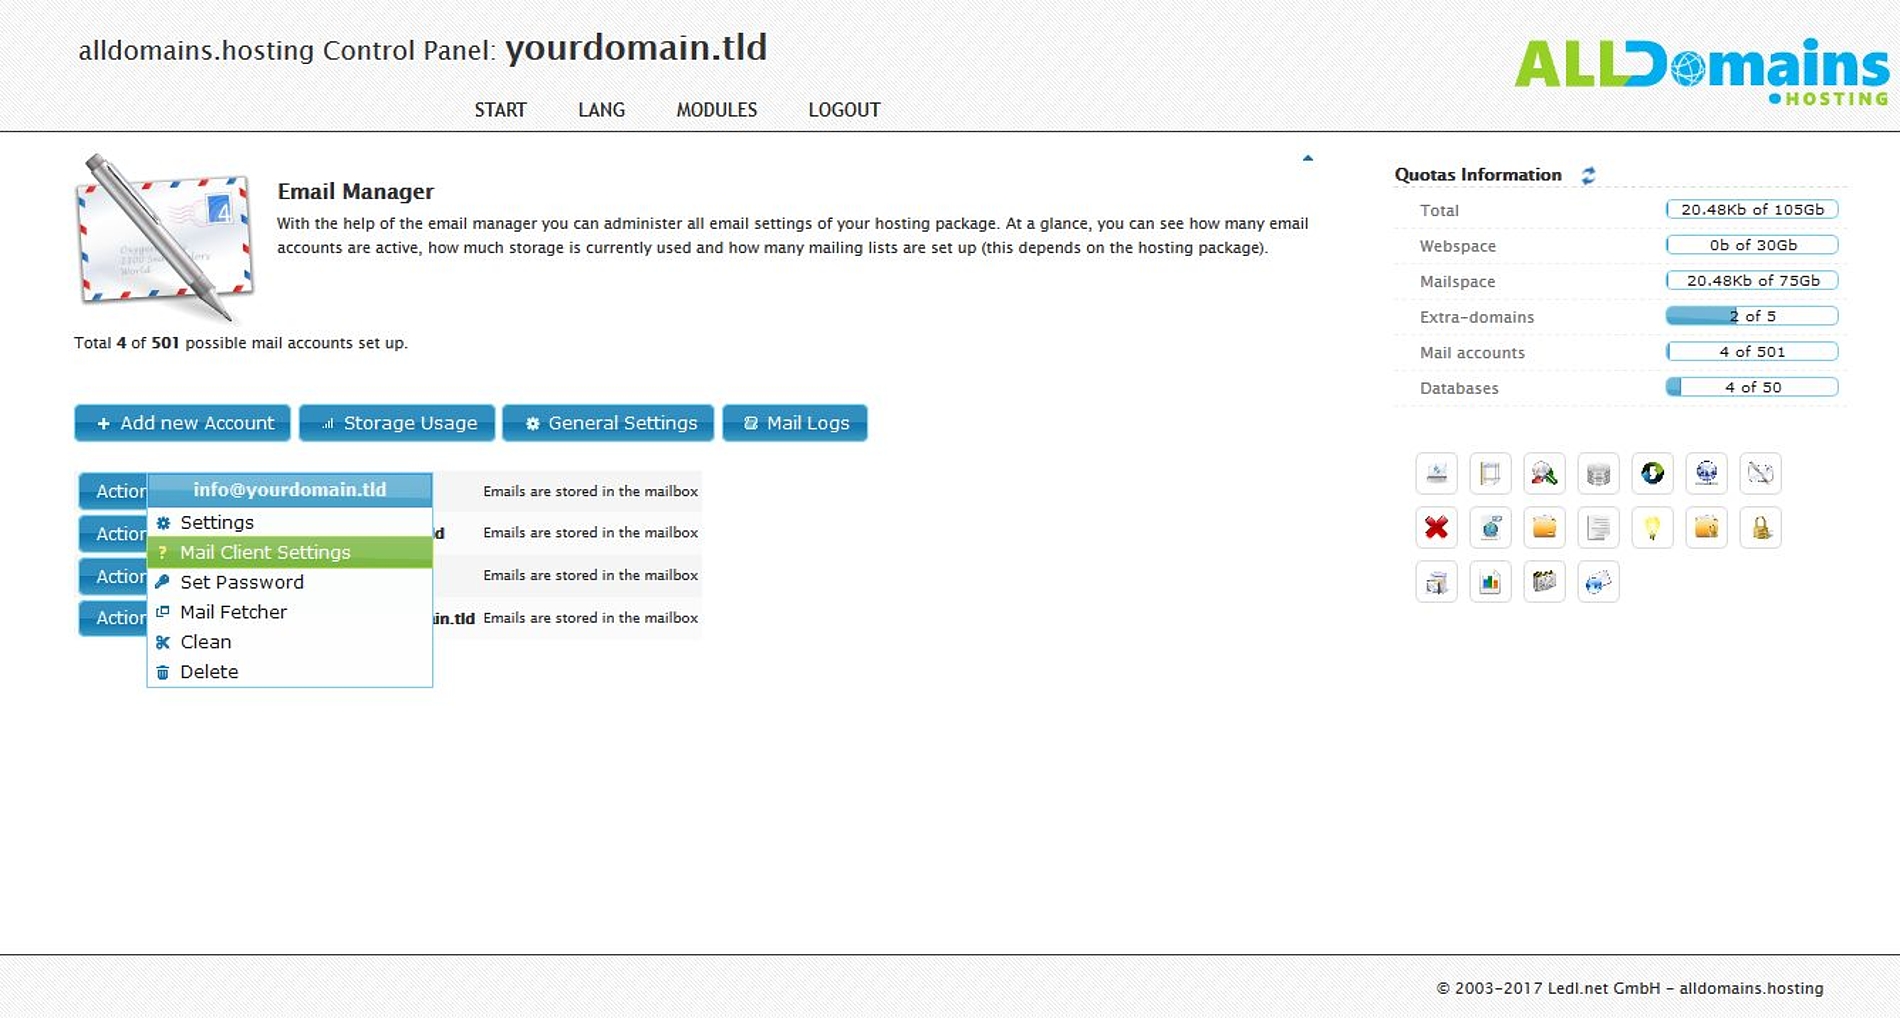
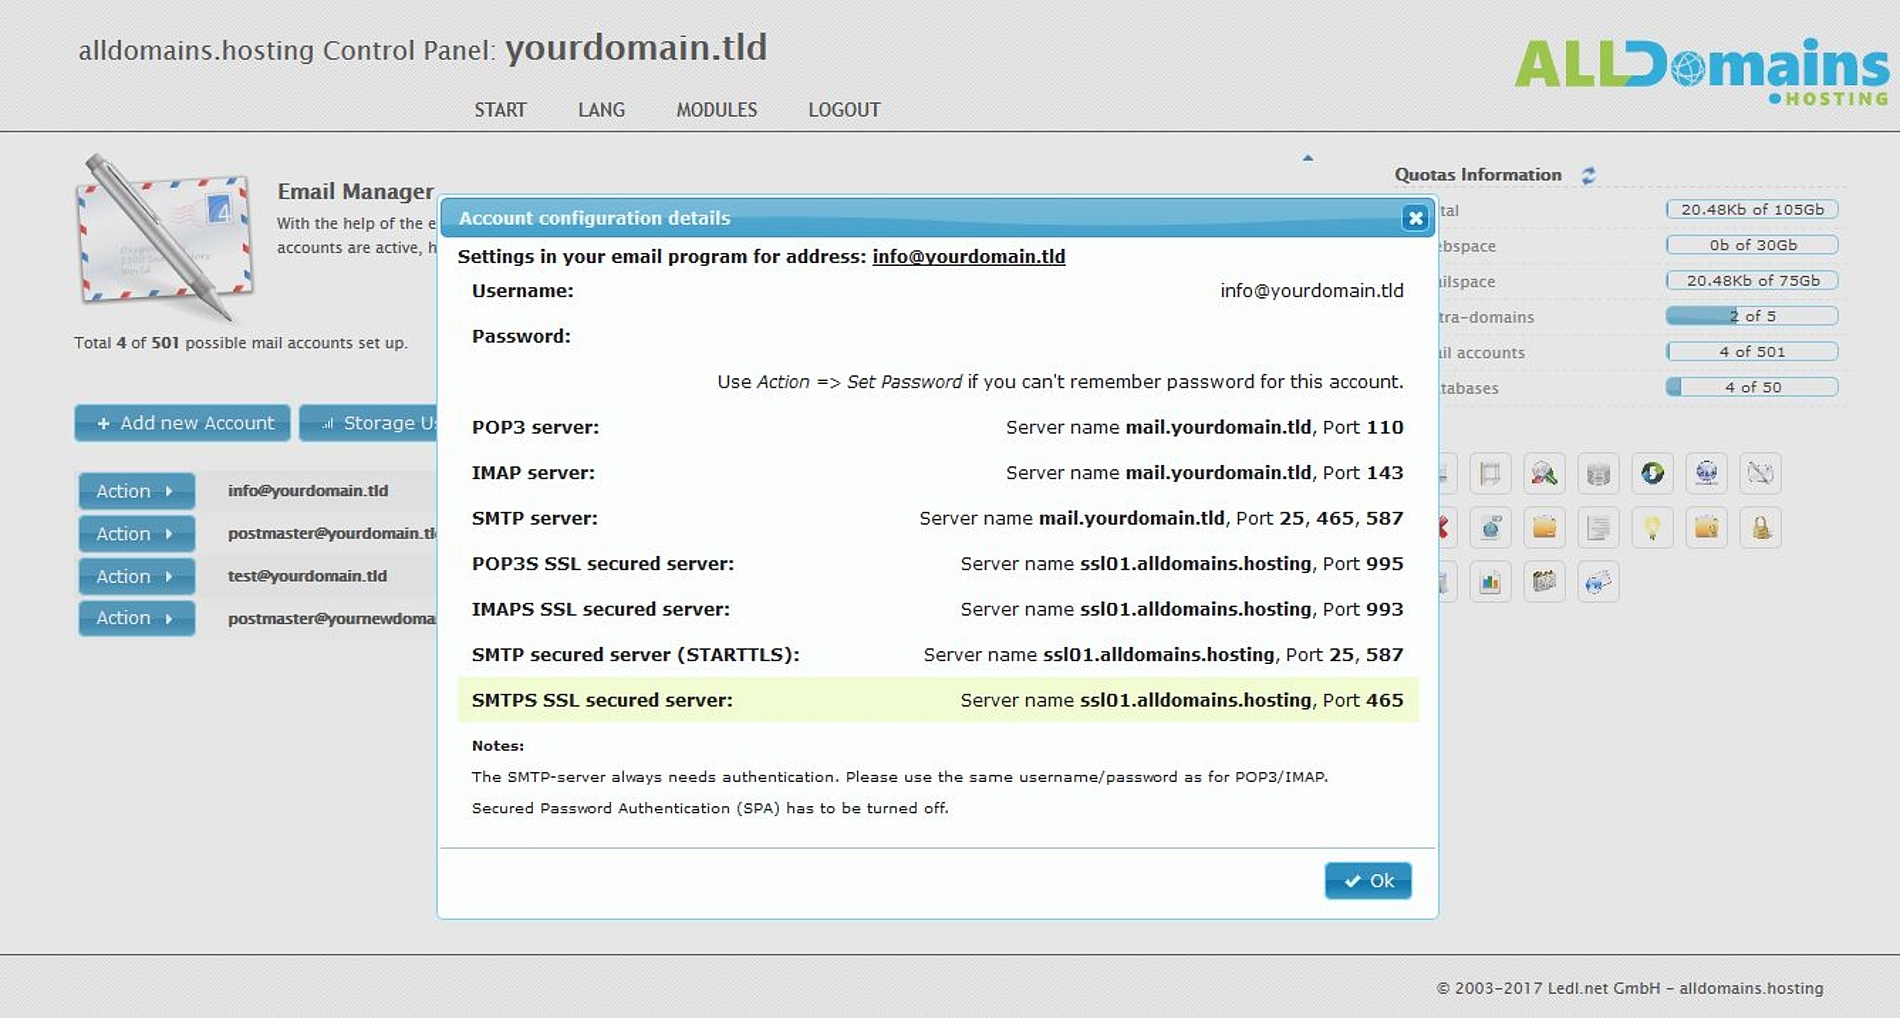
#Mail-Client settings
When you go to "Action >" and select "Mail client settings" you will get an overview with all needed data to setup your e-mail account in your e-mail client (Outlook, Thunderbird, …).
If you need help at the setup of the e-mail client you can take a look at our e-mail client setup manuals.
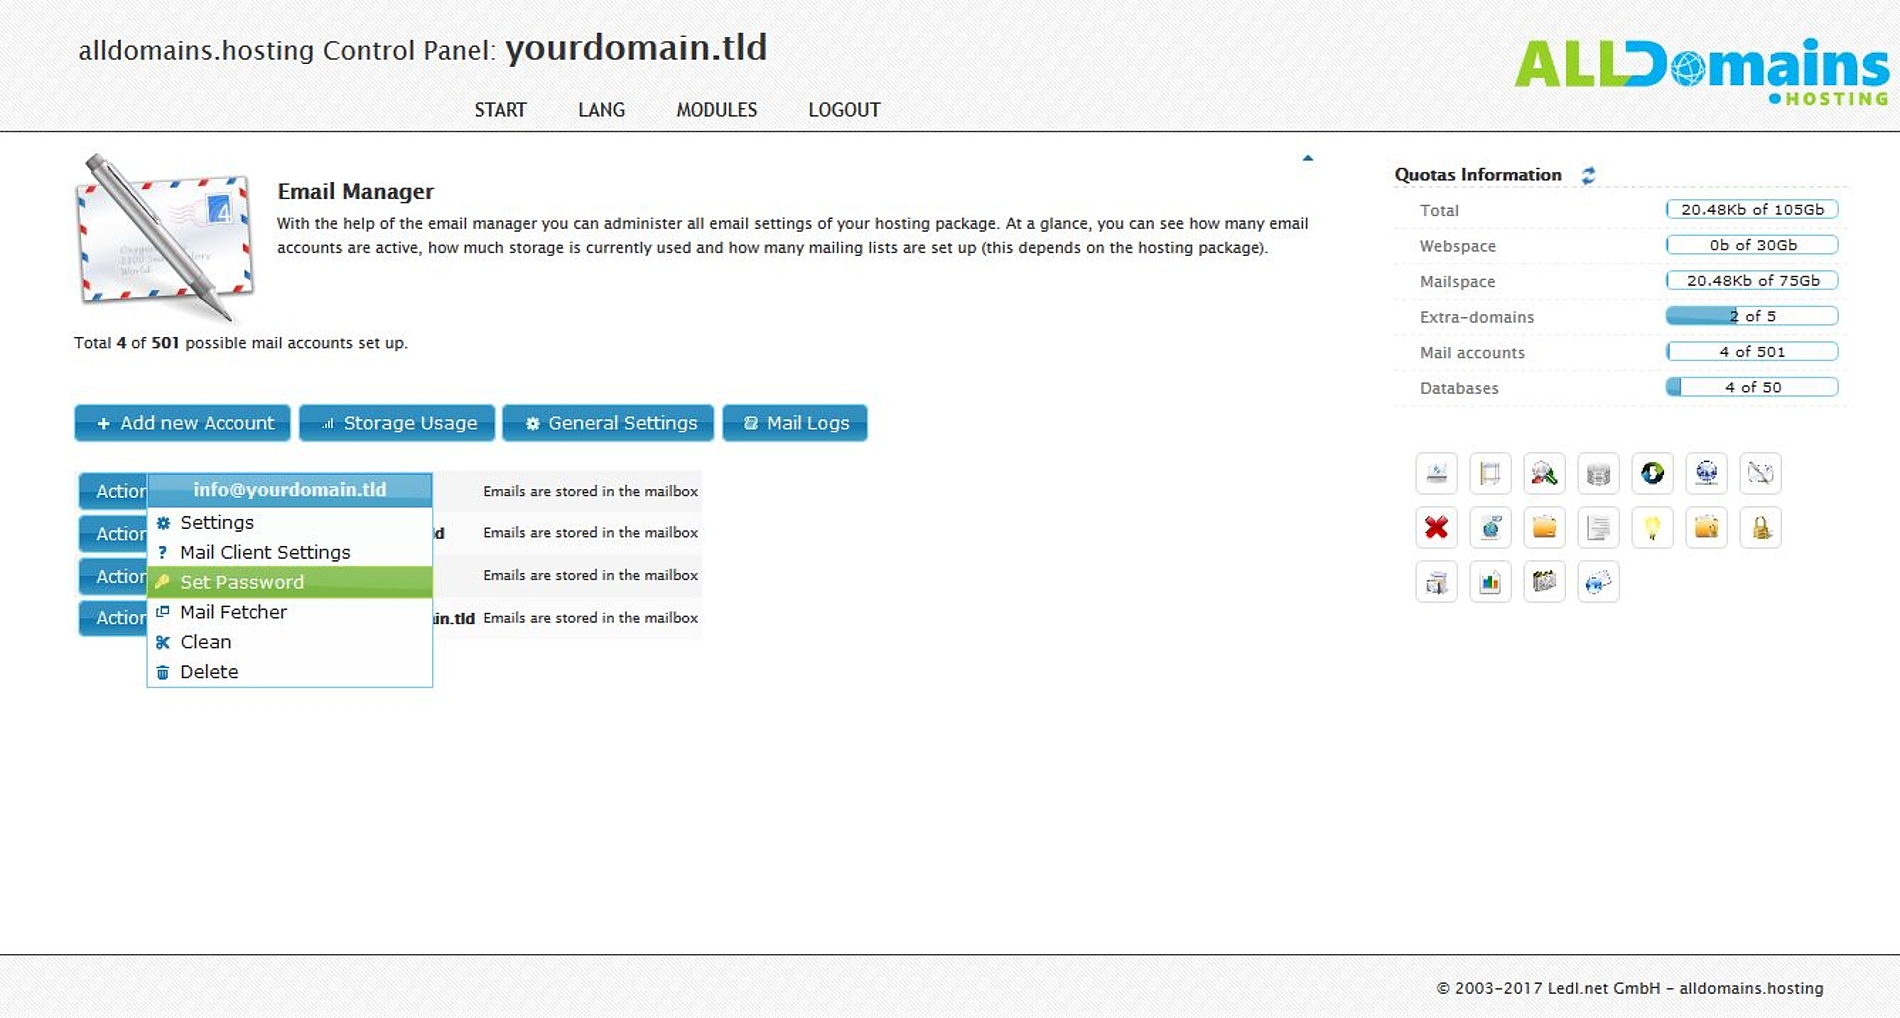
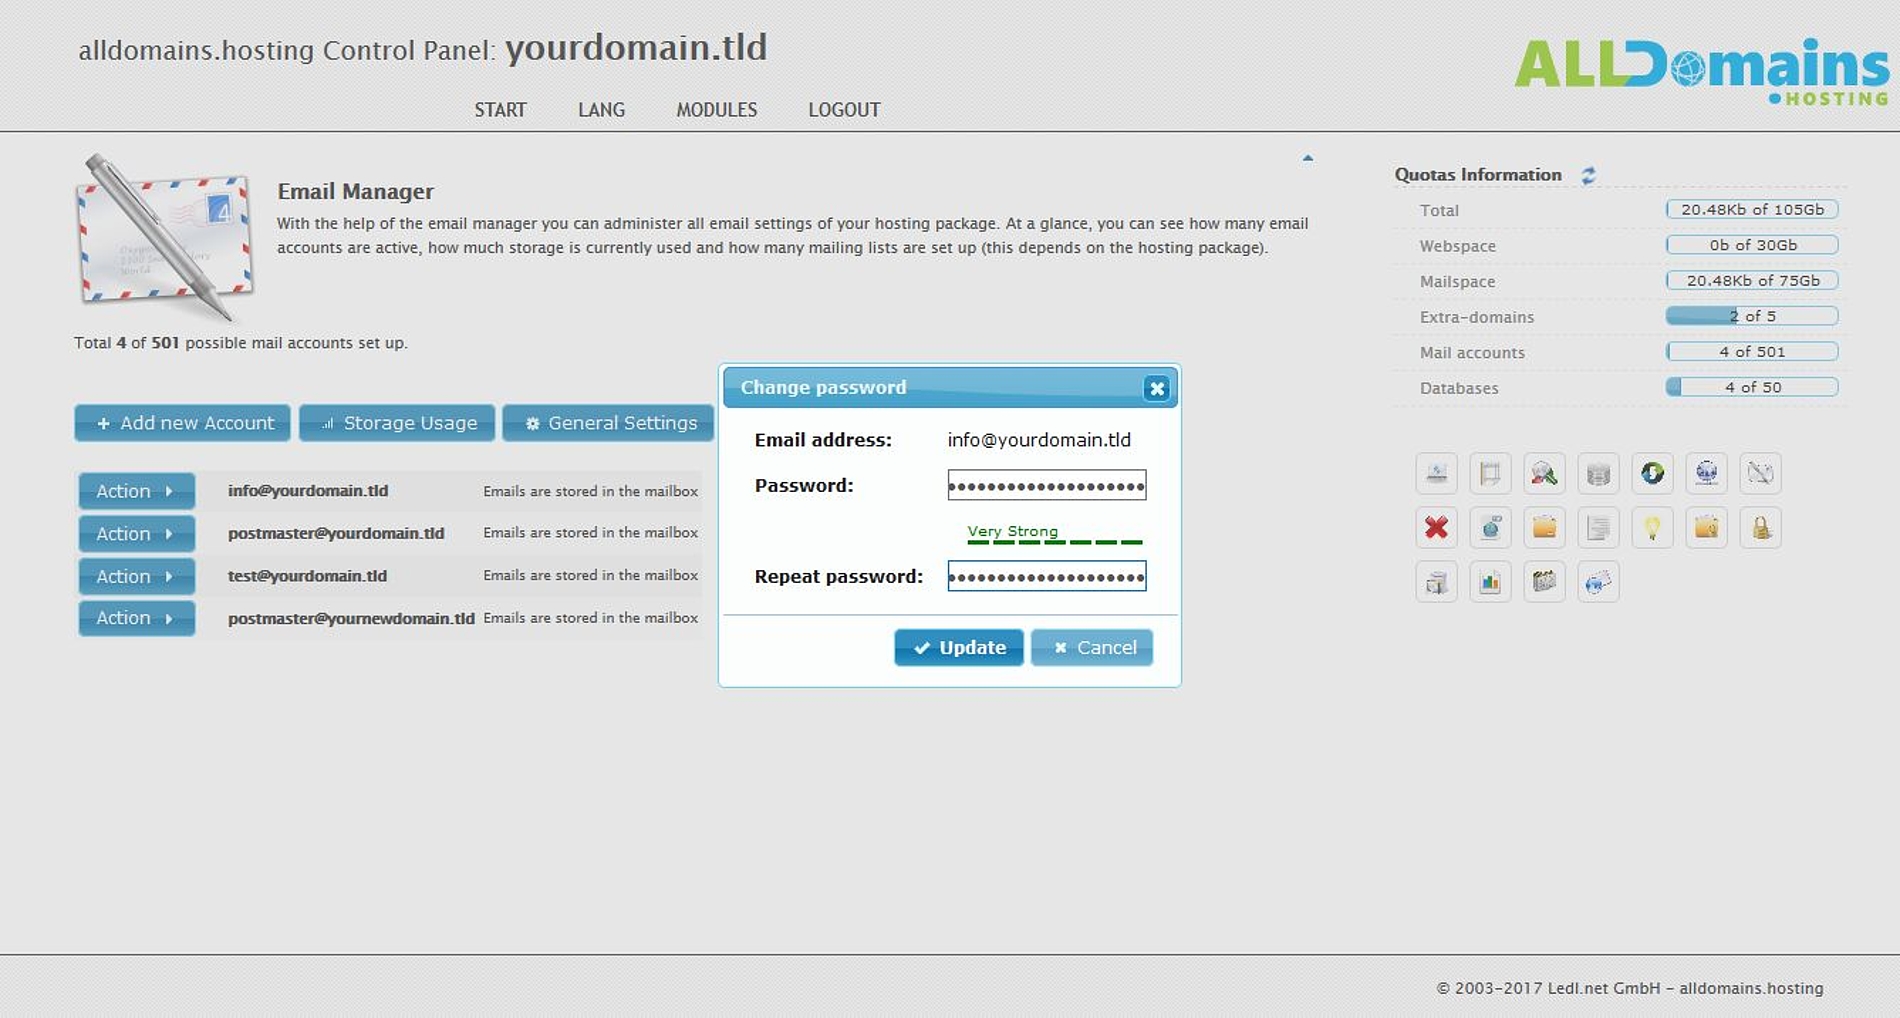
#Change password
With "Action >" and "Set Password" you can define a new password for the selected e-mail account.
Simple type in the new password at "Password" and "Repeat Password" check that the strengh of the new password is at least "Good" and approve with "Update".
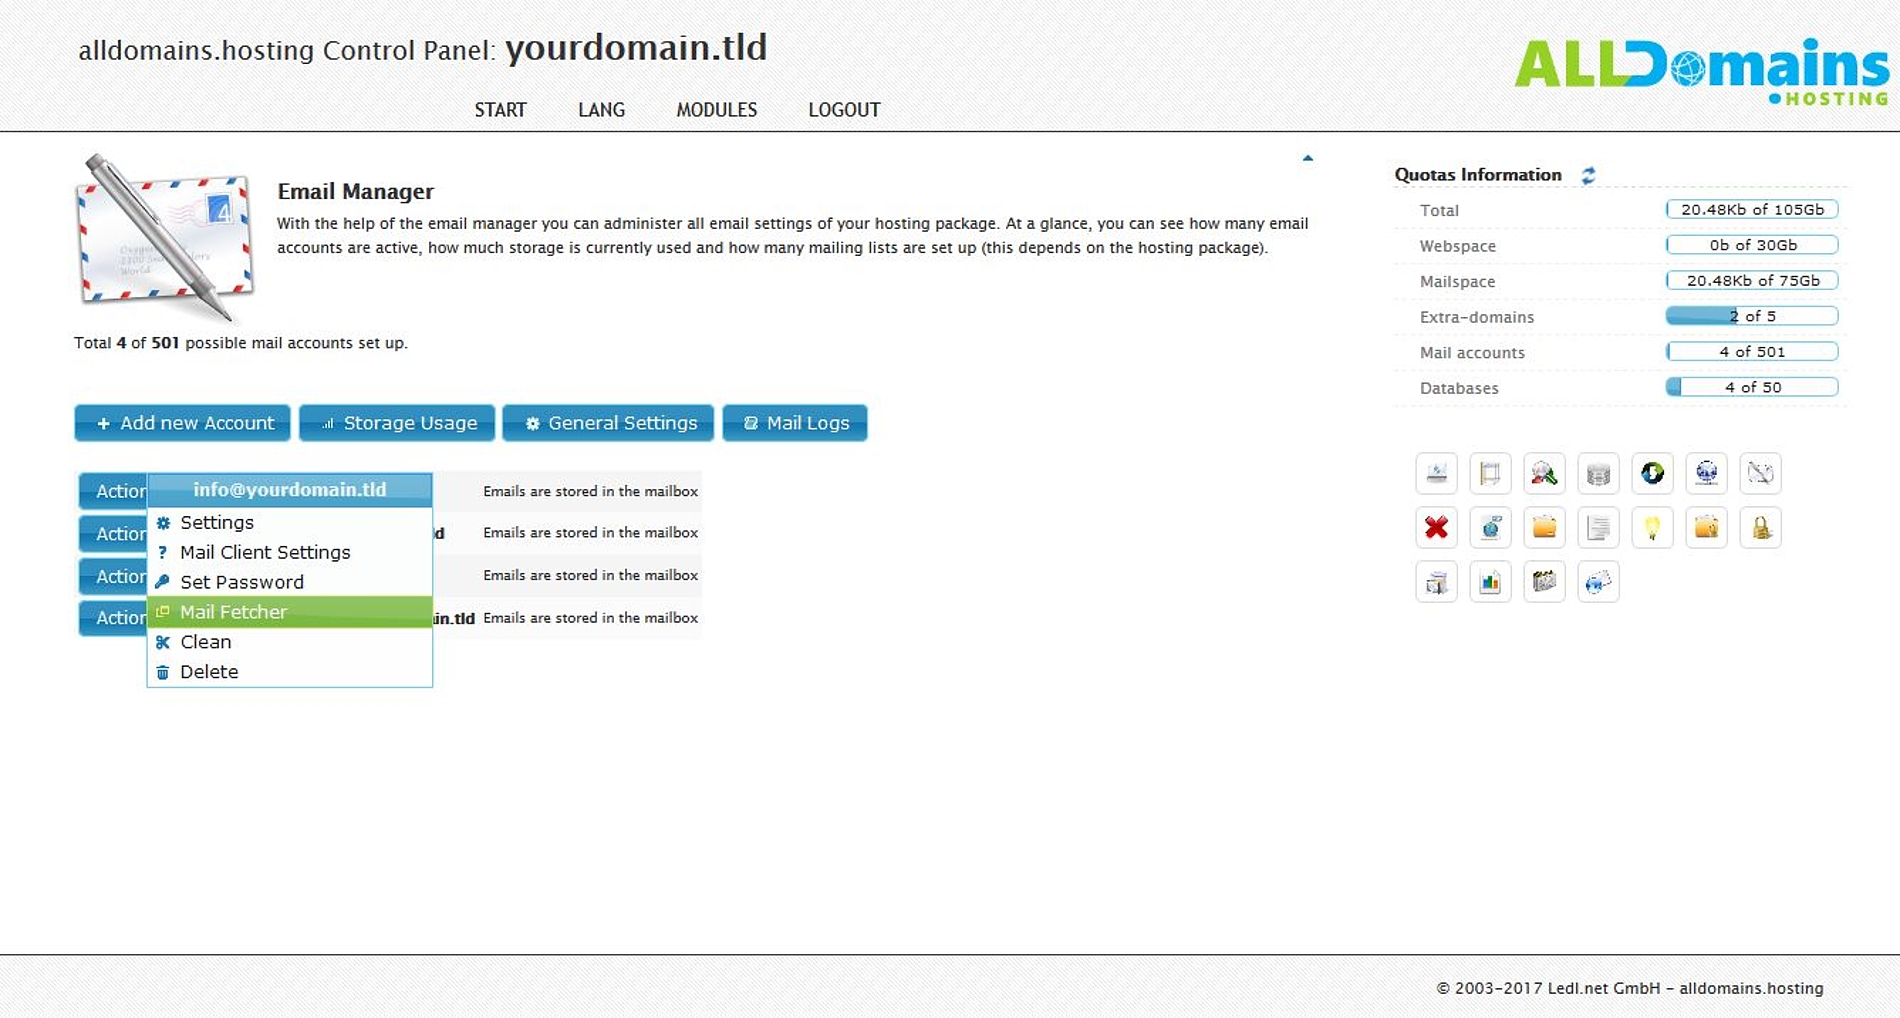
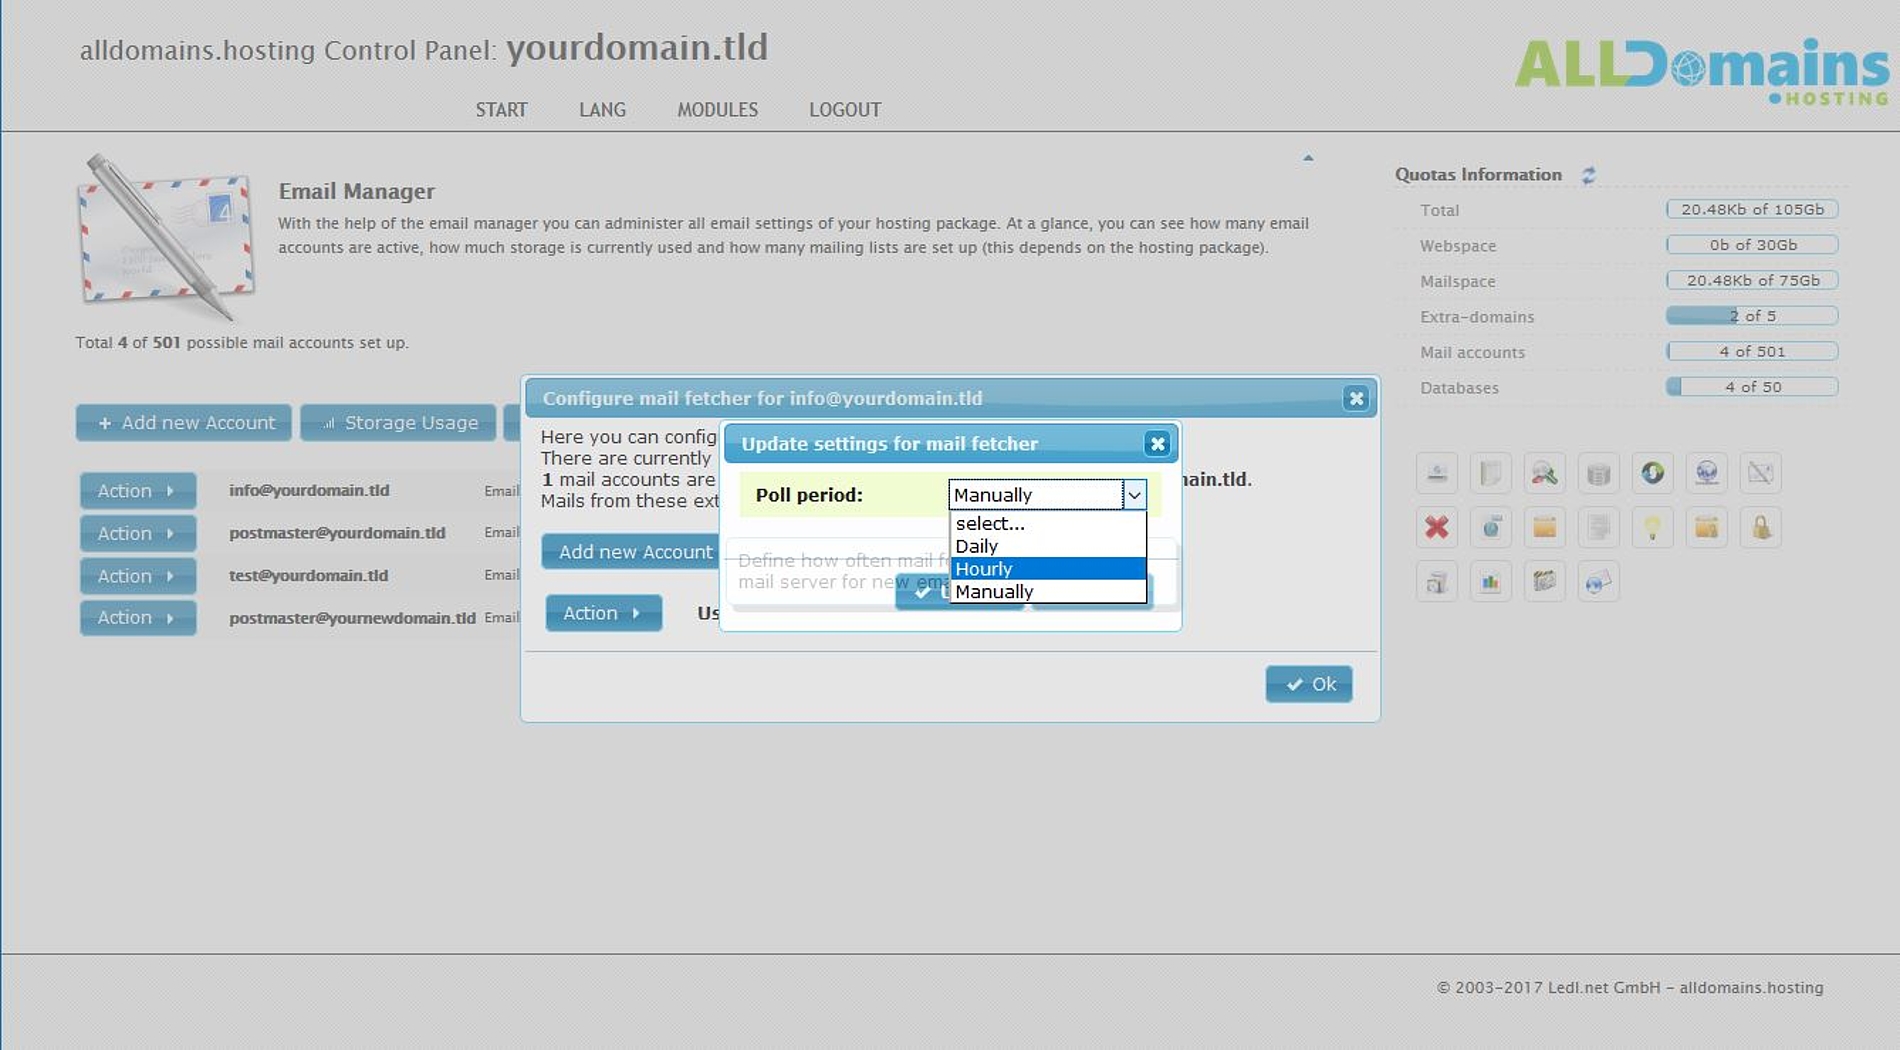
#Fetch mail service
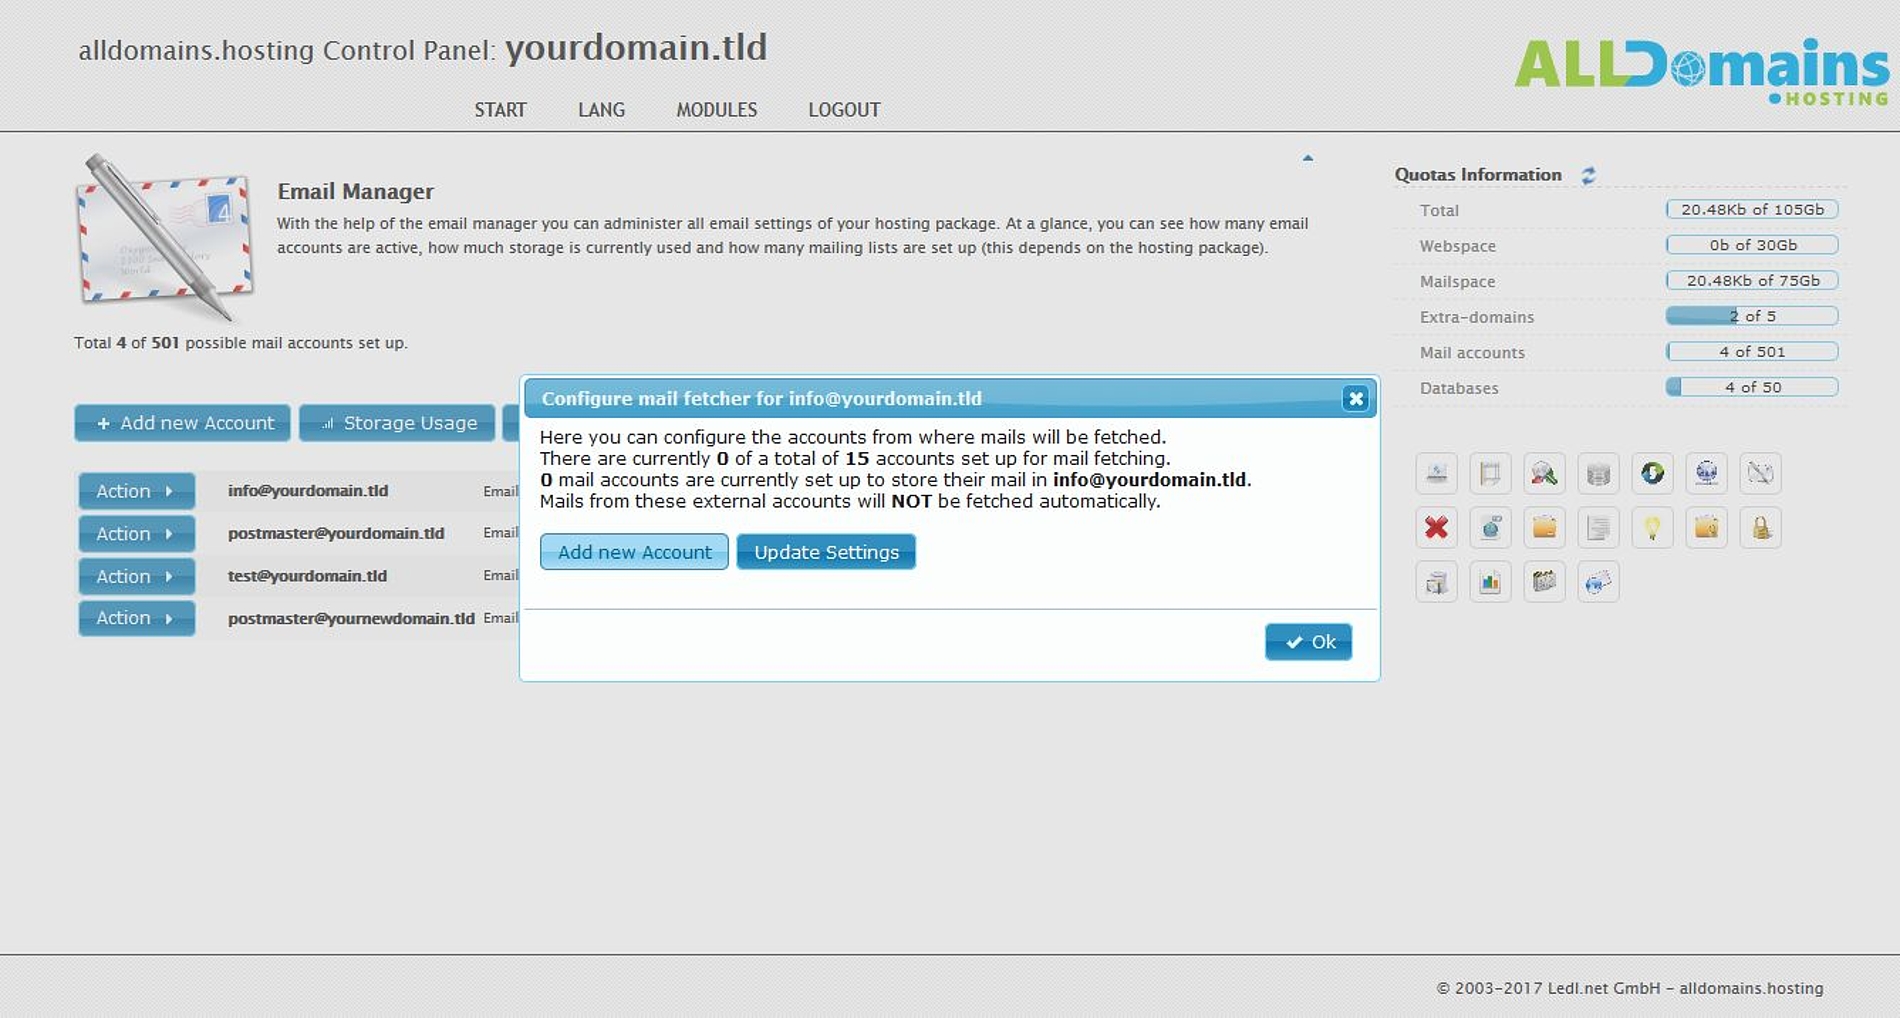
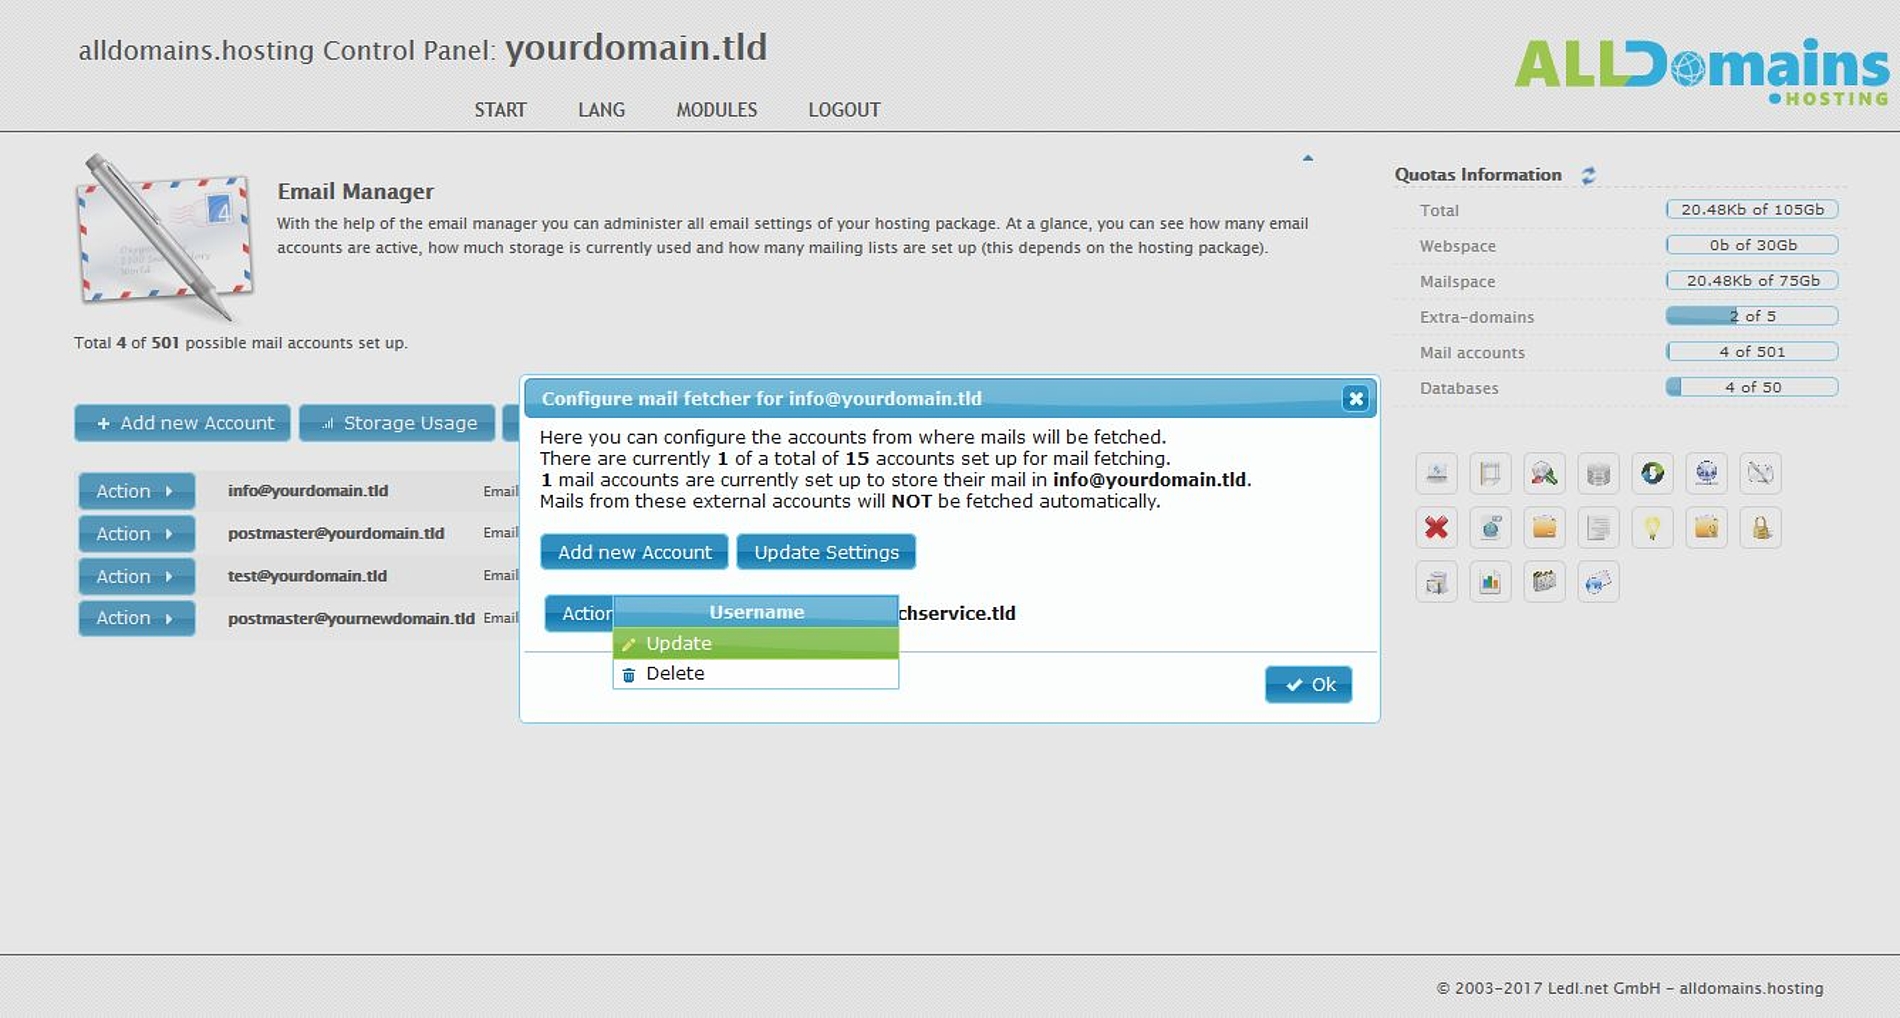
With "Action >" and "Mail Fetcher" you can start the configuration assistant.
An e-mail fetch mail service is used to combine multiple e-mail accounts in one account. For that you can use e-mails of your own account or external e-mail accounts. You can fetch the messages from up to 15 other e-mail accounts.
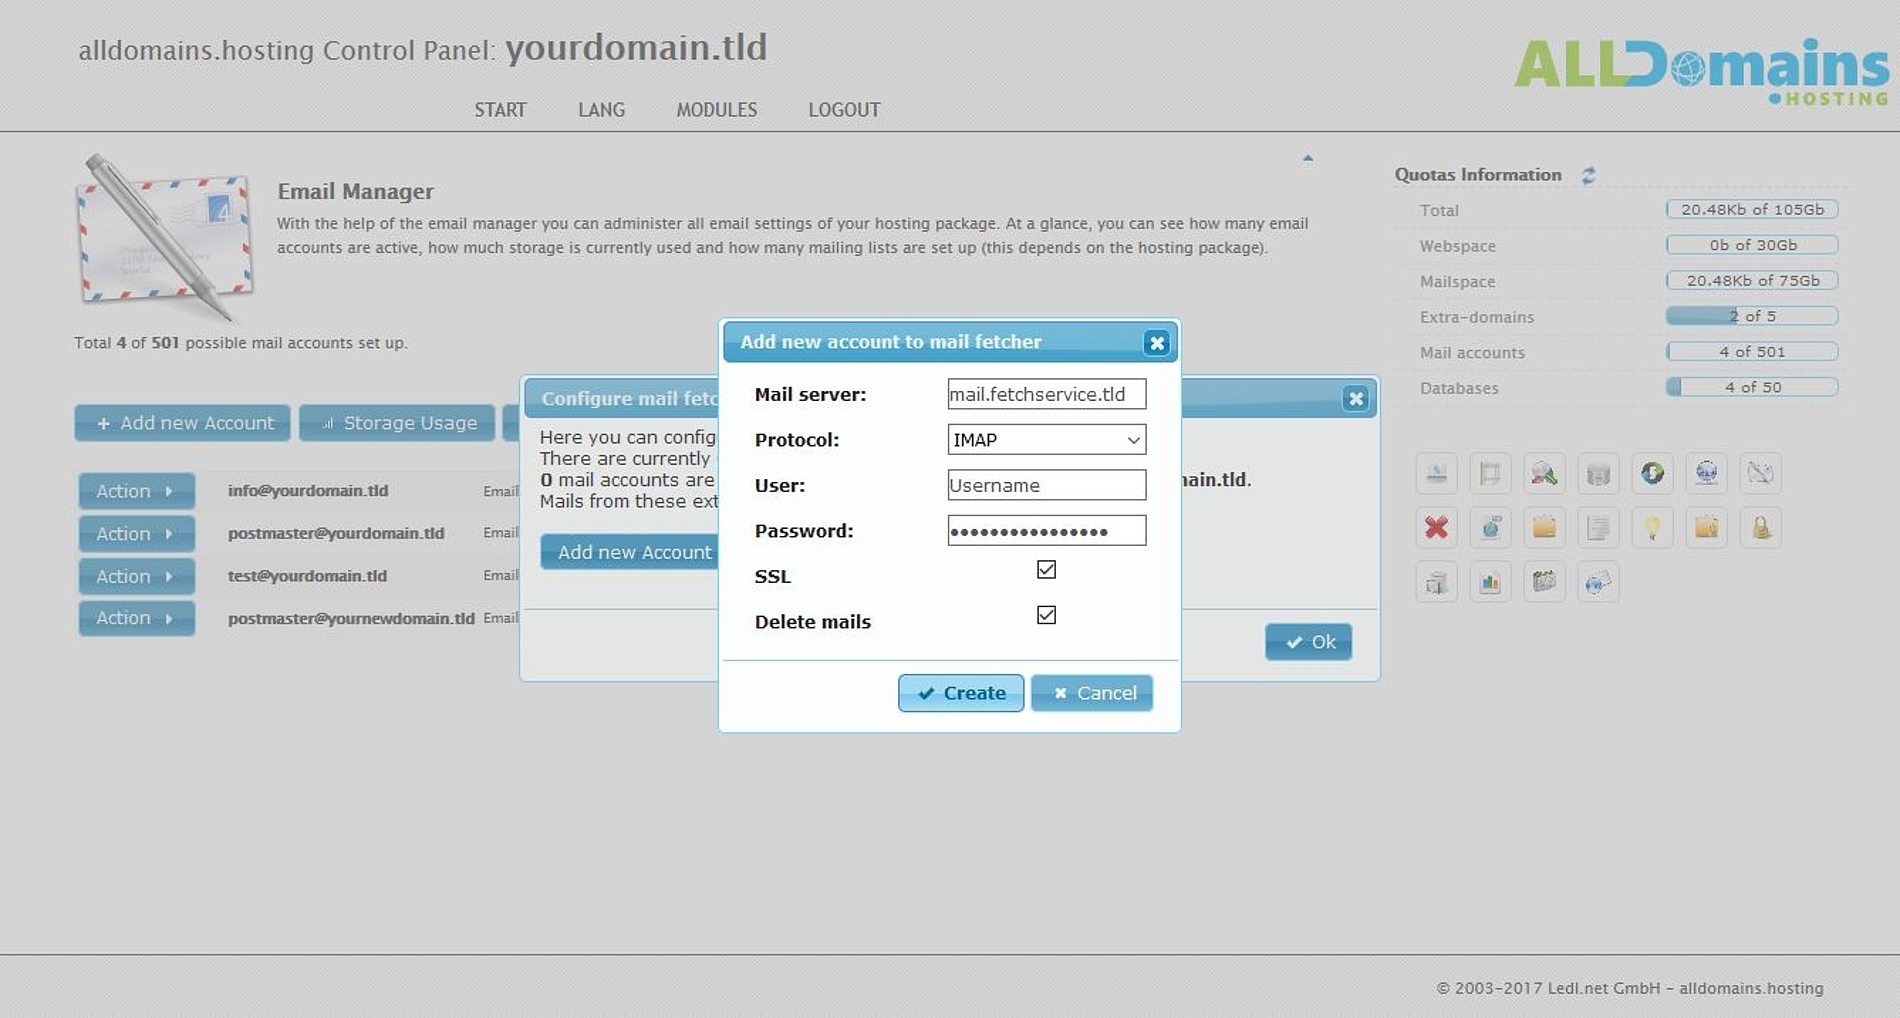
To configure the fetch mail service click on "Add new Account" in the configuration assistant and insert all the required information:
- The mail server
- The protocol (IMAP or POP3)
- Your username
- Your password
- If you want to use SSL encryption
- If the mails should be deleted from the origin account after collecting or not

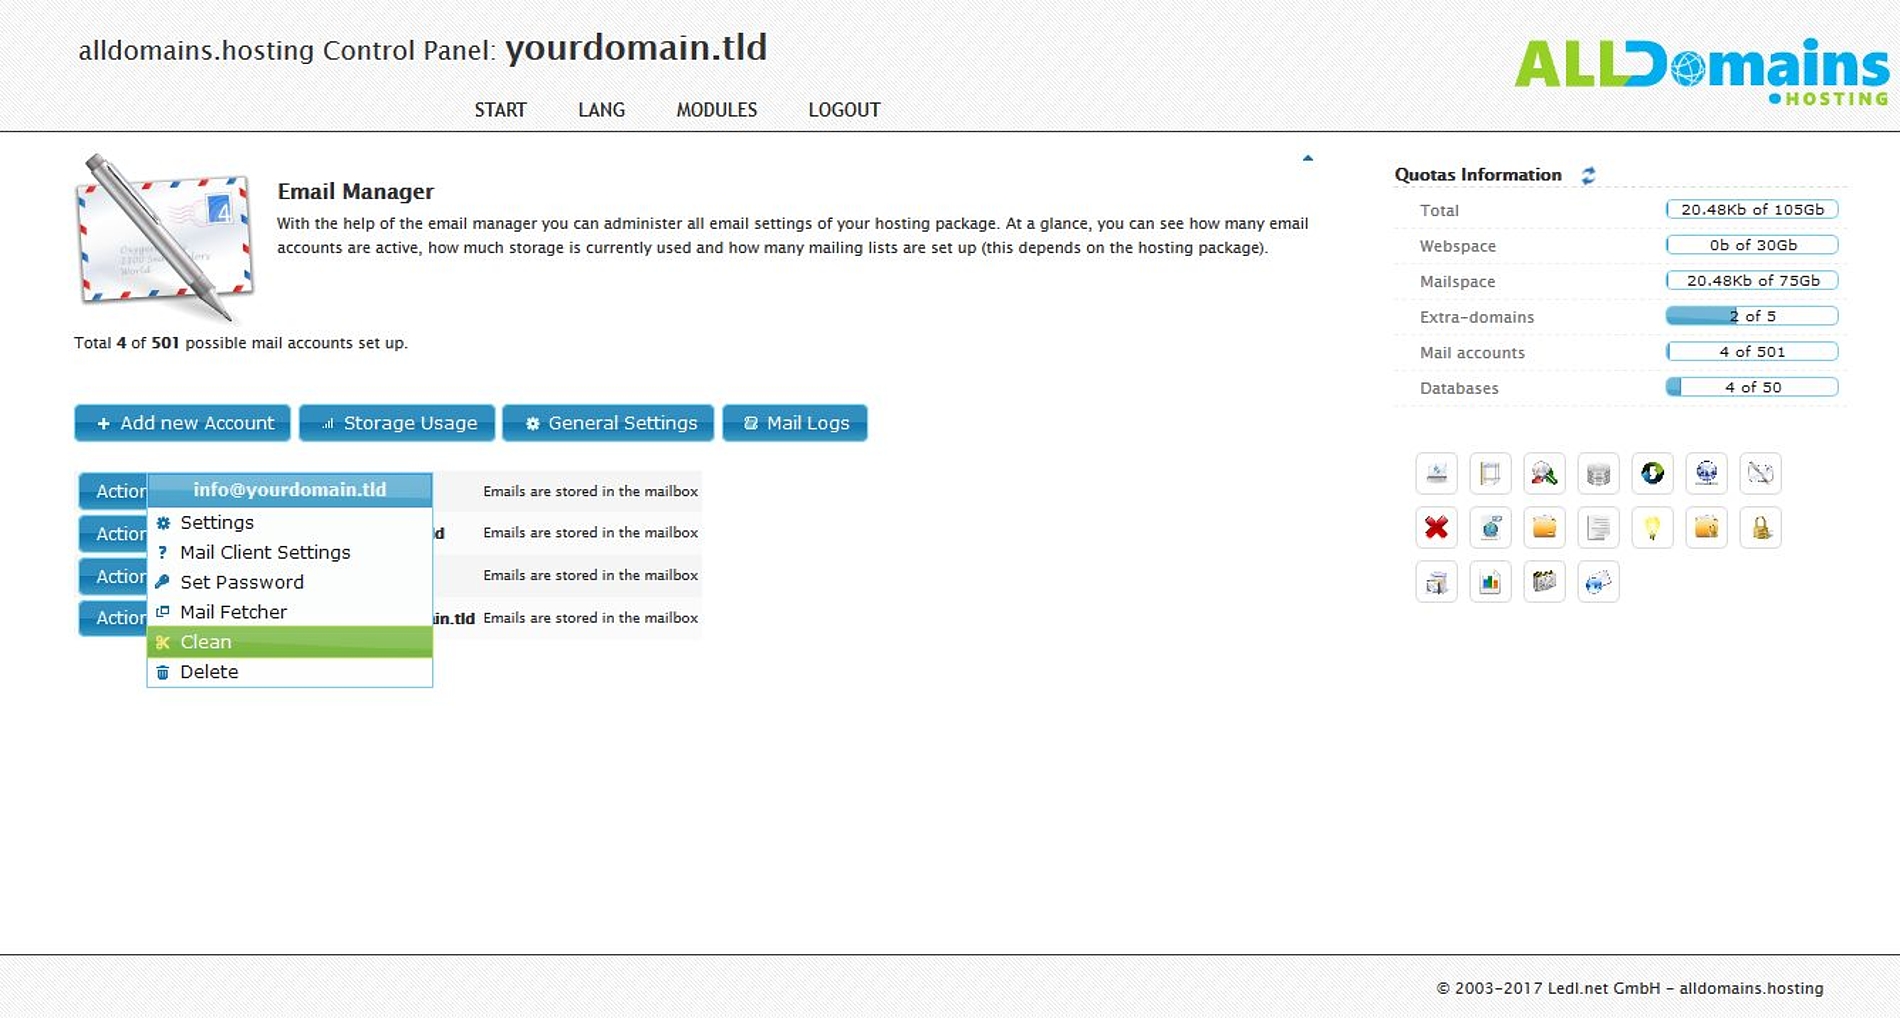
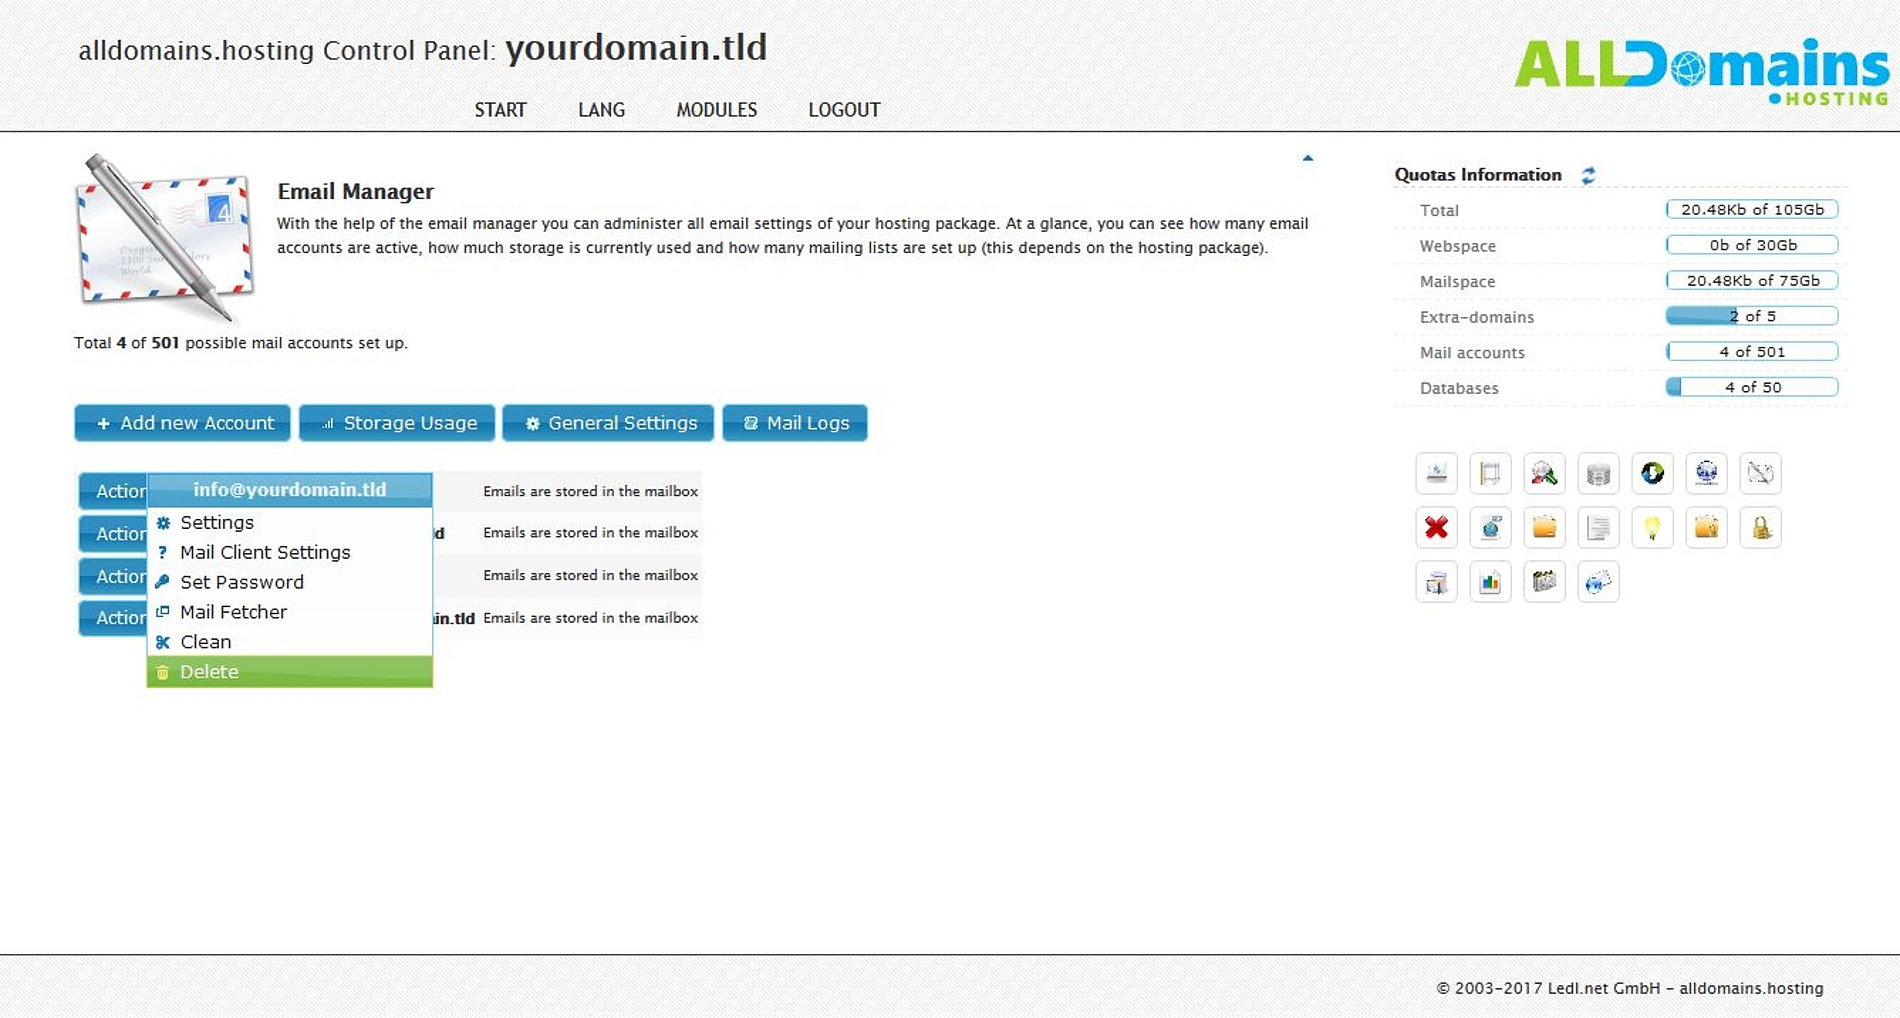
#Clean & Delete
If you want to clear the messages of an e-mail account go to "Action >" and then select "Clean". You can specify which period should be deleted, to finish click on "Clean".
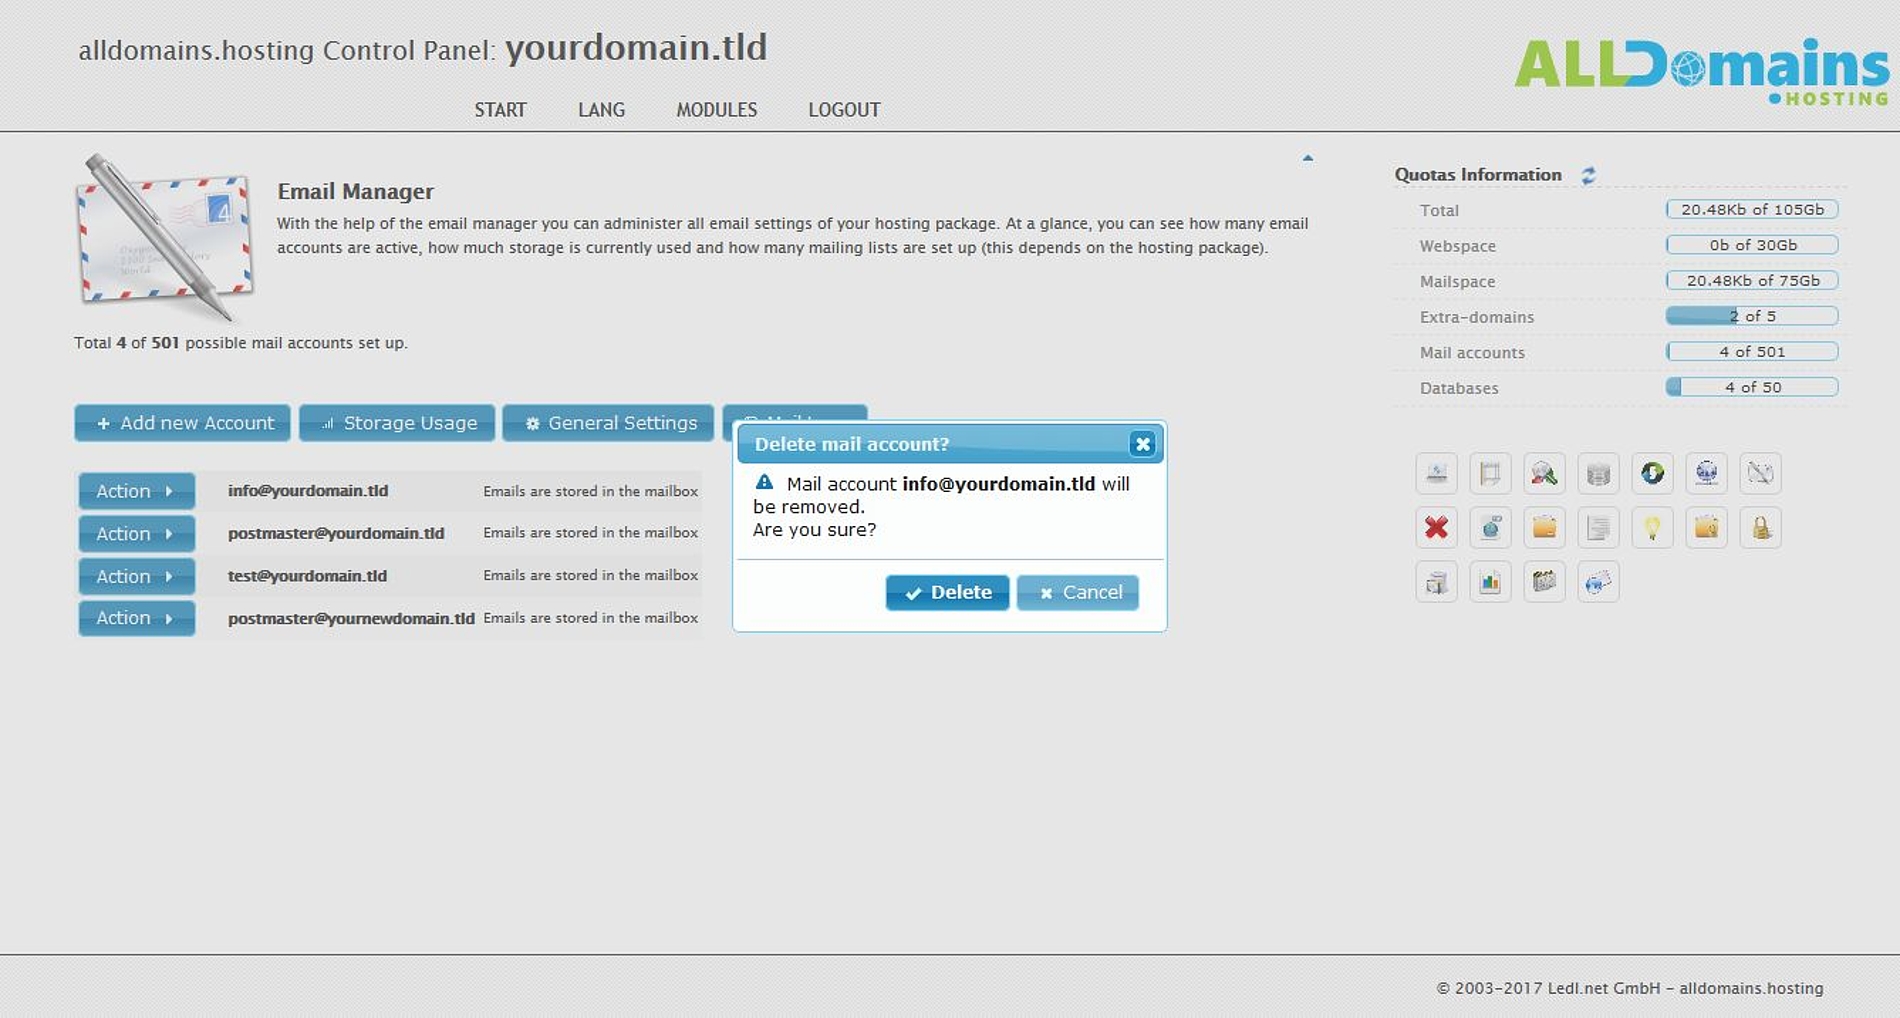
If you want to delete e-mail account go to "Action >" and the select "Delete". To complete remove an e-mail account approve that with a click on "Delete".