Web Development
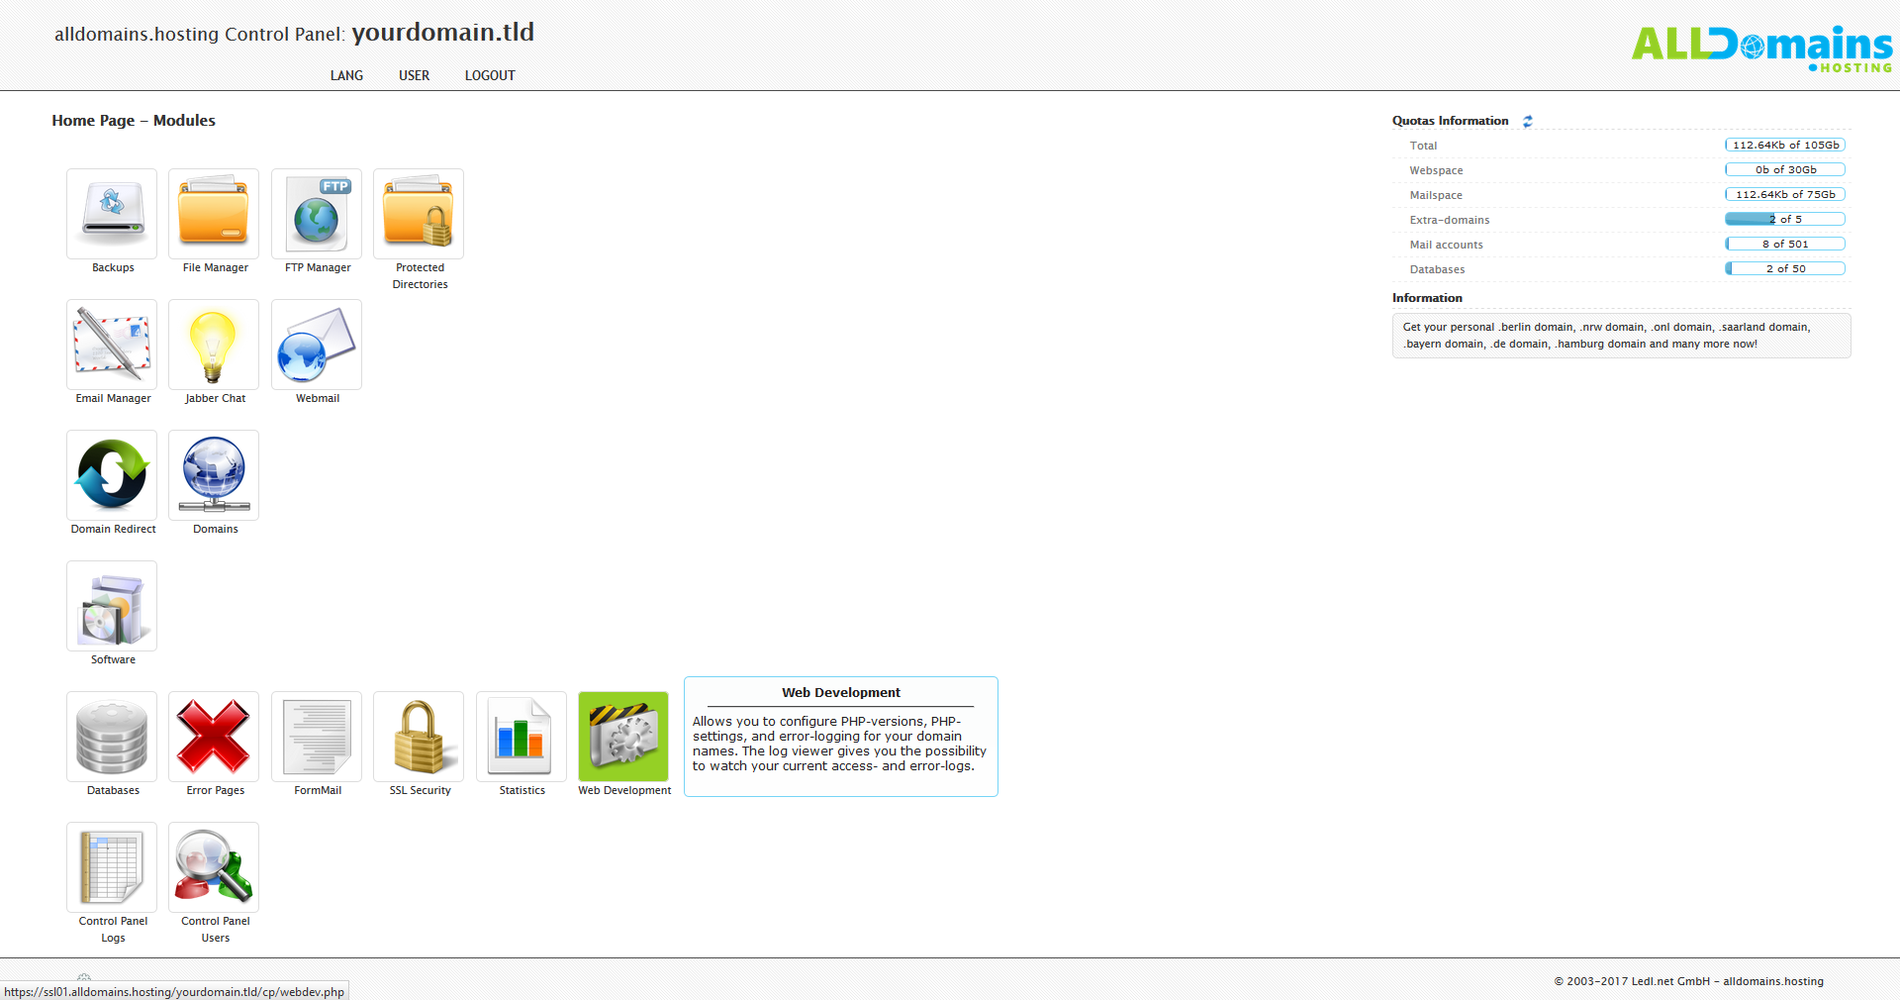
In the Hosting Control Panel module Web Development you can see all with the module Software installed software of your hosting package and your root directory "/" which contains the global settings for your webspace.
With the module Web Development you can manage all your PHP settings at one place. You can change the PHP version and access the "Error Logs" and "Access Logs", to find a mistake on your website faster. In addition to that you are able to manage and create your cronjobs.
Quick access:
Open the module Web Development
At first you need to login to your Hosting Control Panel with one of the following 3 possibilities:
- either you enter "www.yourdomain.tld" (www.yourdomain.tld have to be replaced by your own domain) into the address bar of your browser
- or you use the Control Panel Login at our website
- or you start it directly in your Customer Center
Inside your Customer Center switch to the tab "Purchases" and move your mouse over the hosting package and click on the link "Control Panel" at the side menu that popped up.

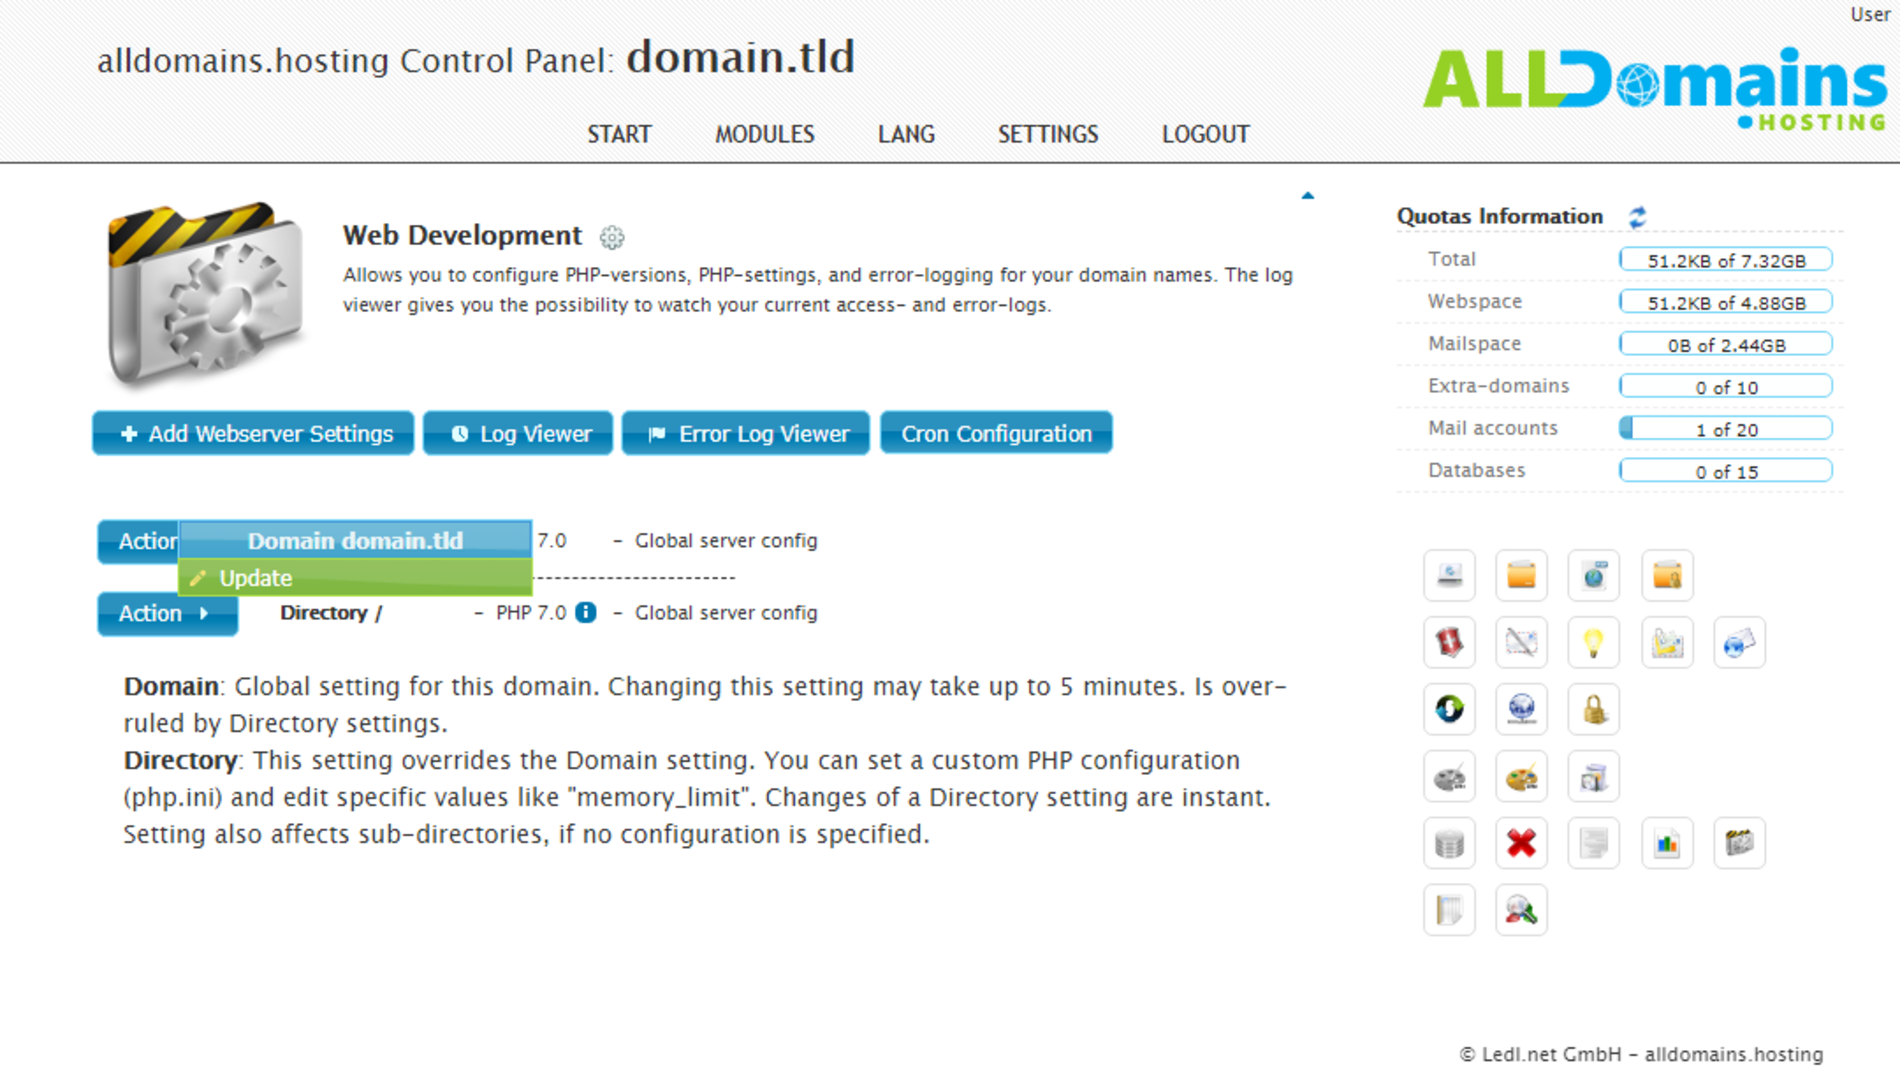
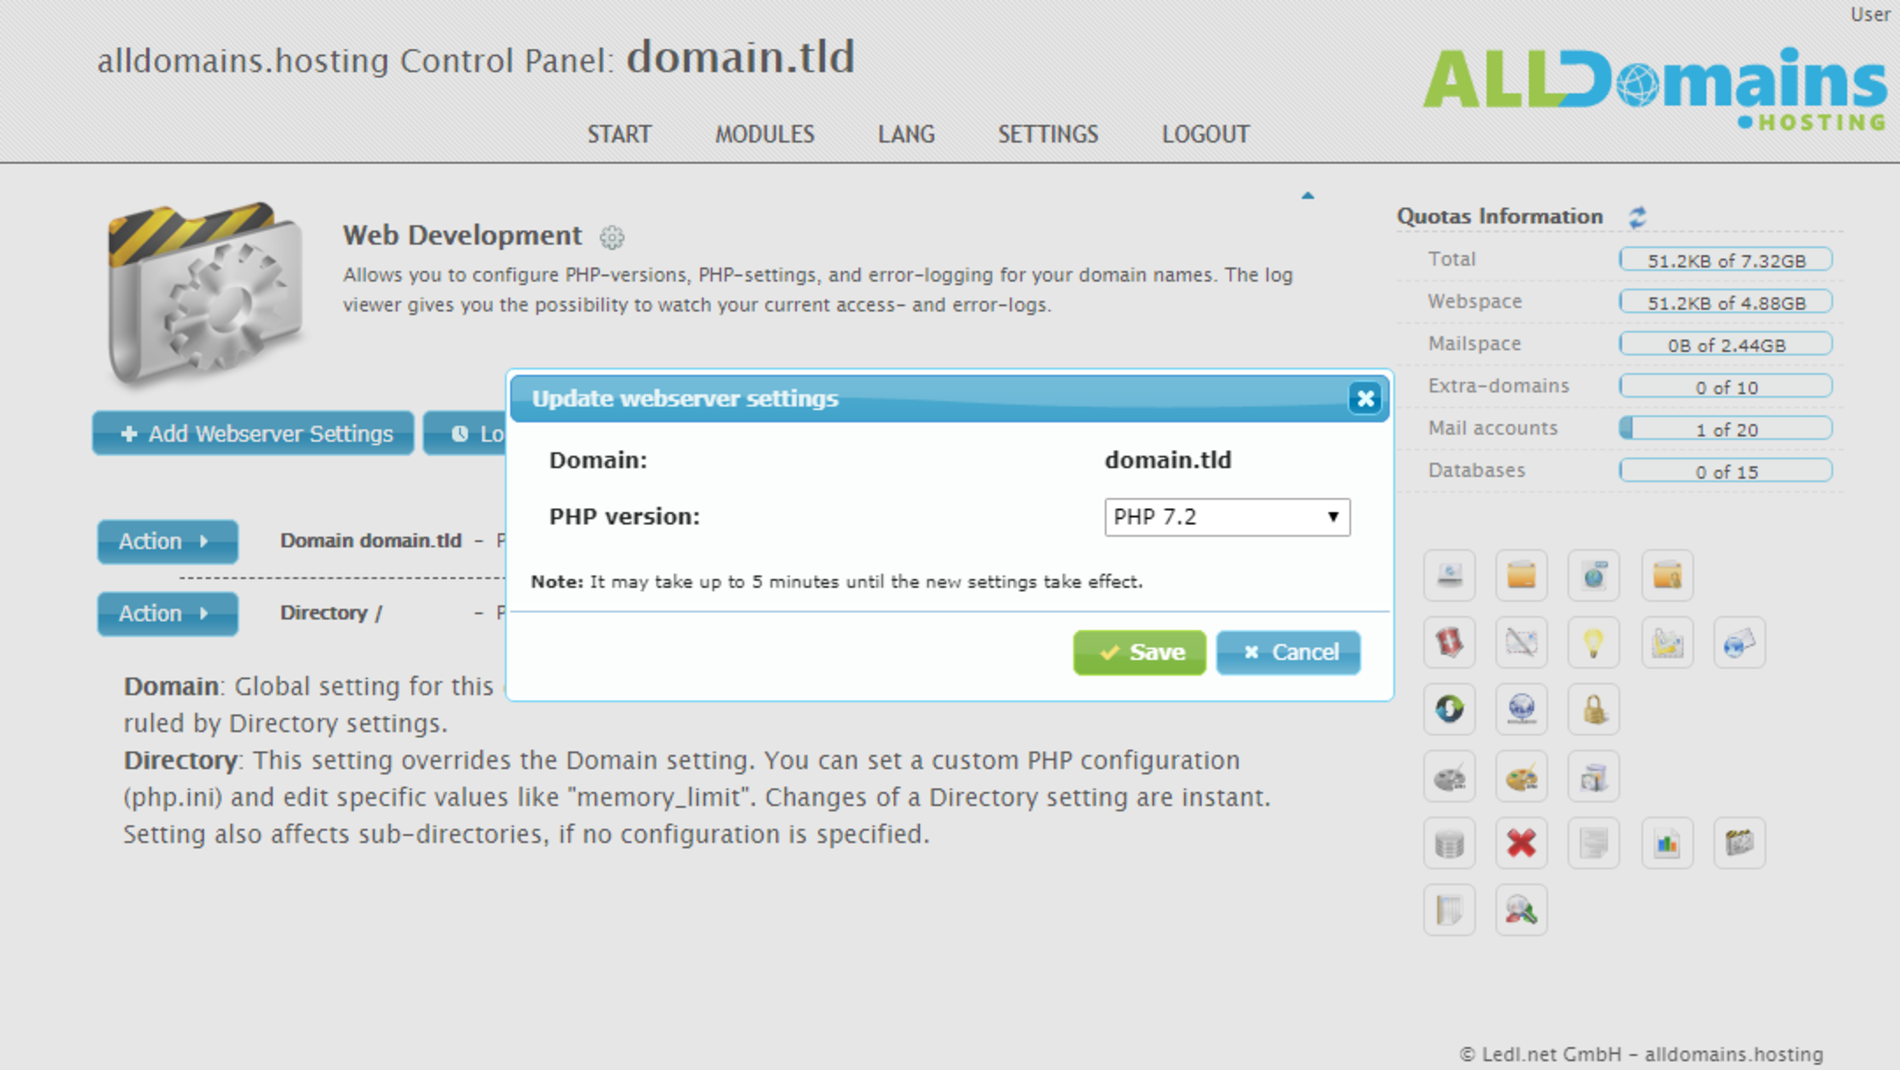
#Change/manage PHP version
To change your current PHP version please go to "Action >" and select "Update". Now you should see an overview of the current settings of the server. After having done the needed changes click on "Save" to save them.
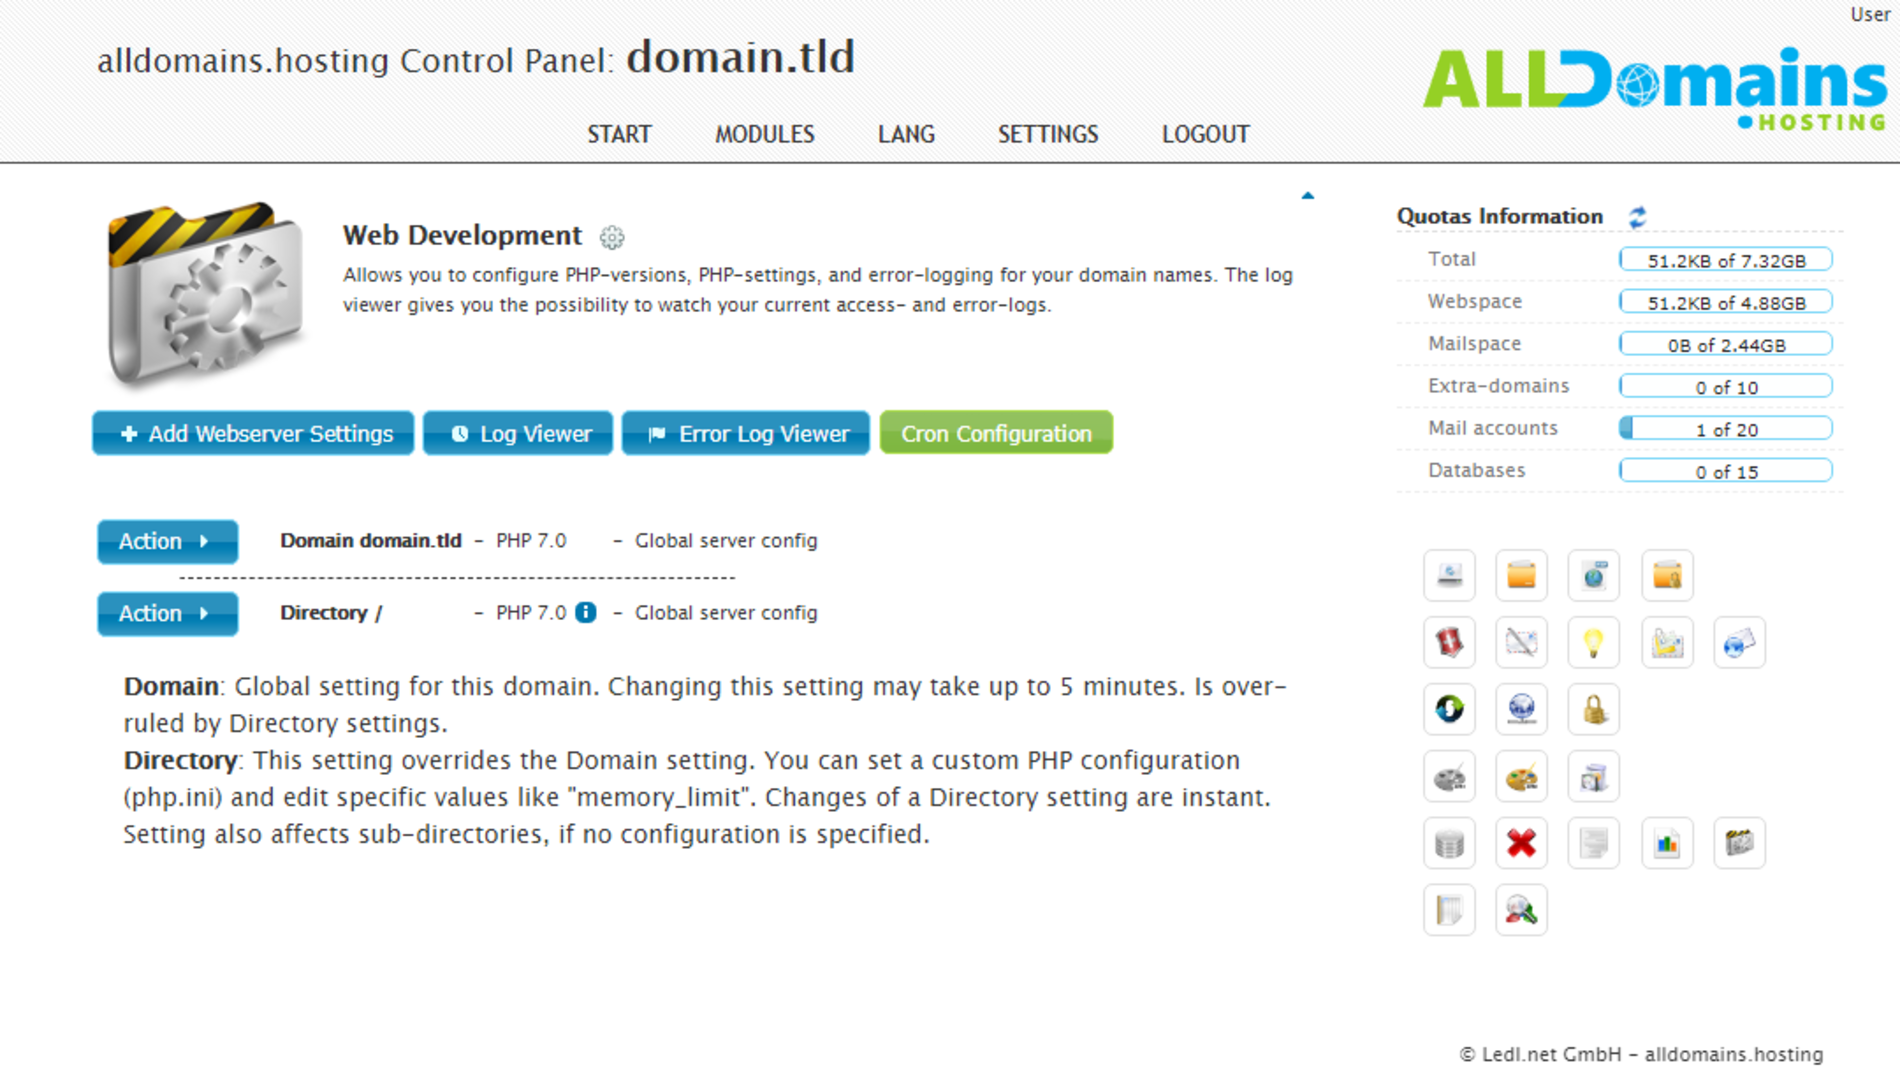
You have the possibility to set up a global configuration for your domain and also for certain directories:
You have the possibility to set up a global configuration for your domain and also for certain directories:
- Domain: Global setting for this domain. Changing this setting may take up to 5 minutes. Is over-ruled by Directory settings.
- Directory: This setting overrides the Domain setting. You can set a custom PHP configuration (php.ini) and edit specific values like "memory_limit". Changes of a Directory setting are instant. Setting also affects sub-directories, if no configuration is specified.
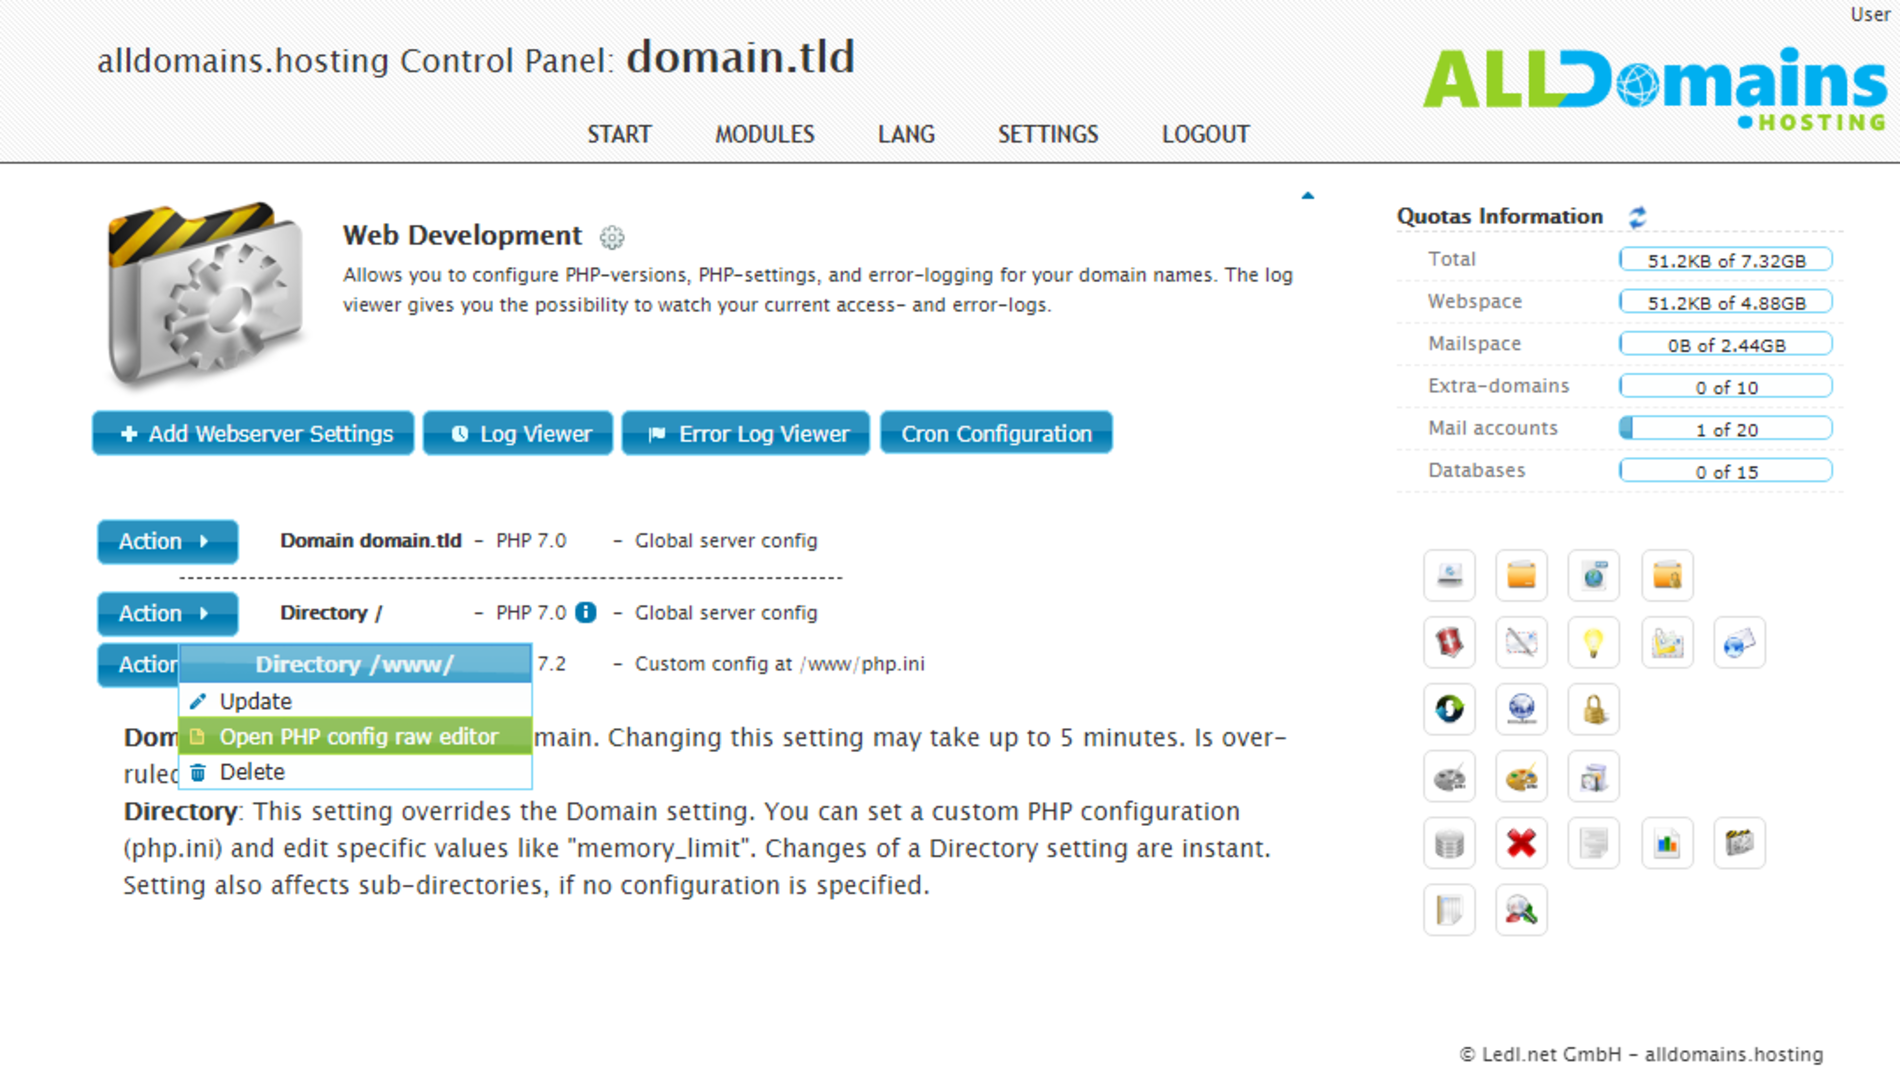
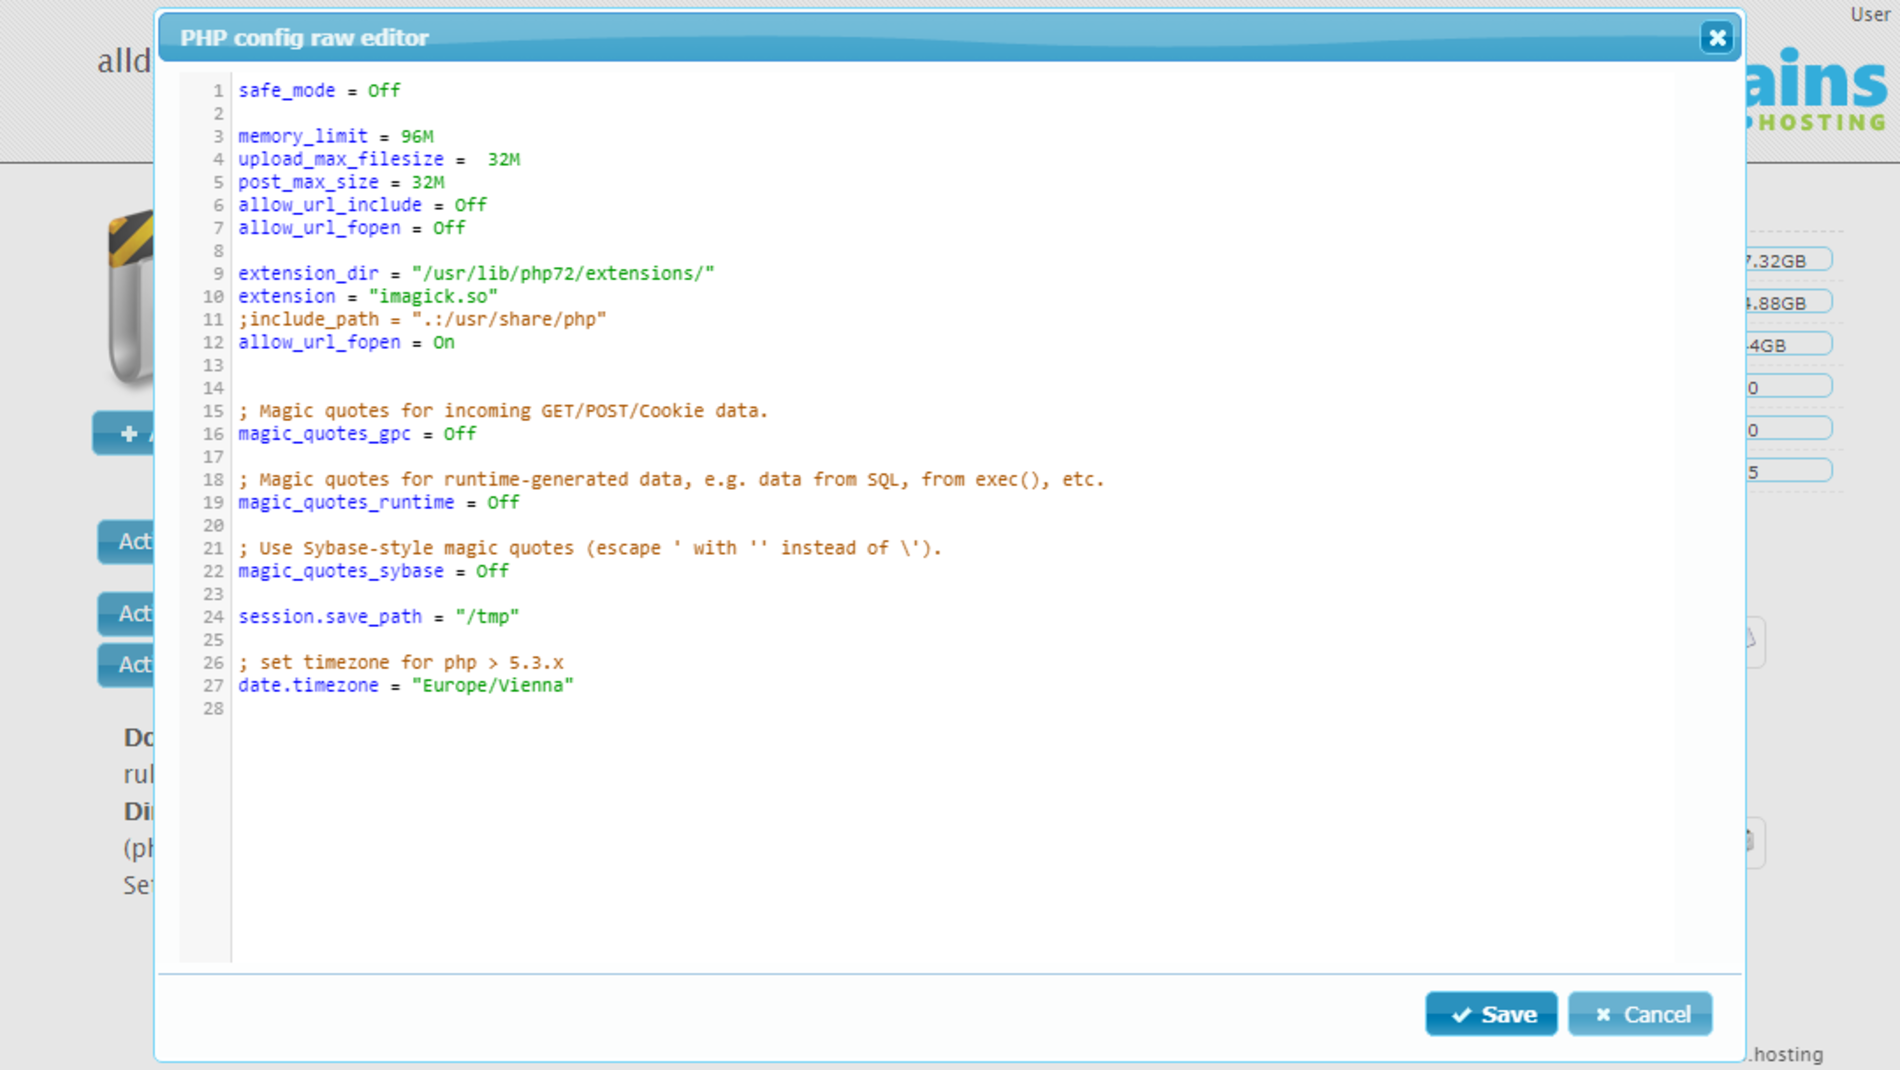
#Modify php.ini-File
If you already have a php.ini file, you can access and edit this file with "Action >" and then select "Open PHP config raw editor".
(!) Caution: Wrong changes on the php.ini file can produce a misoperation of your website.
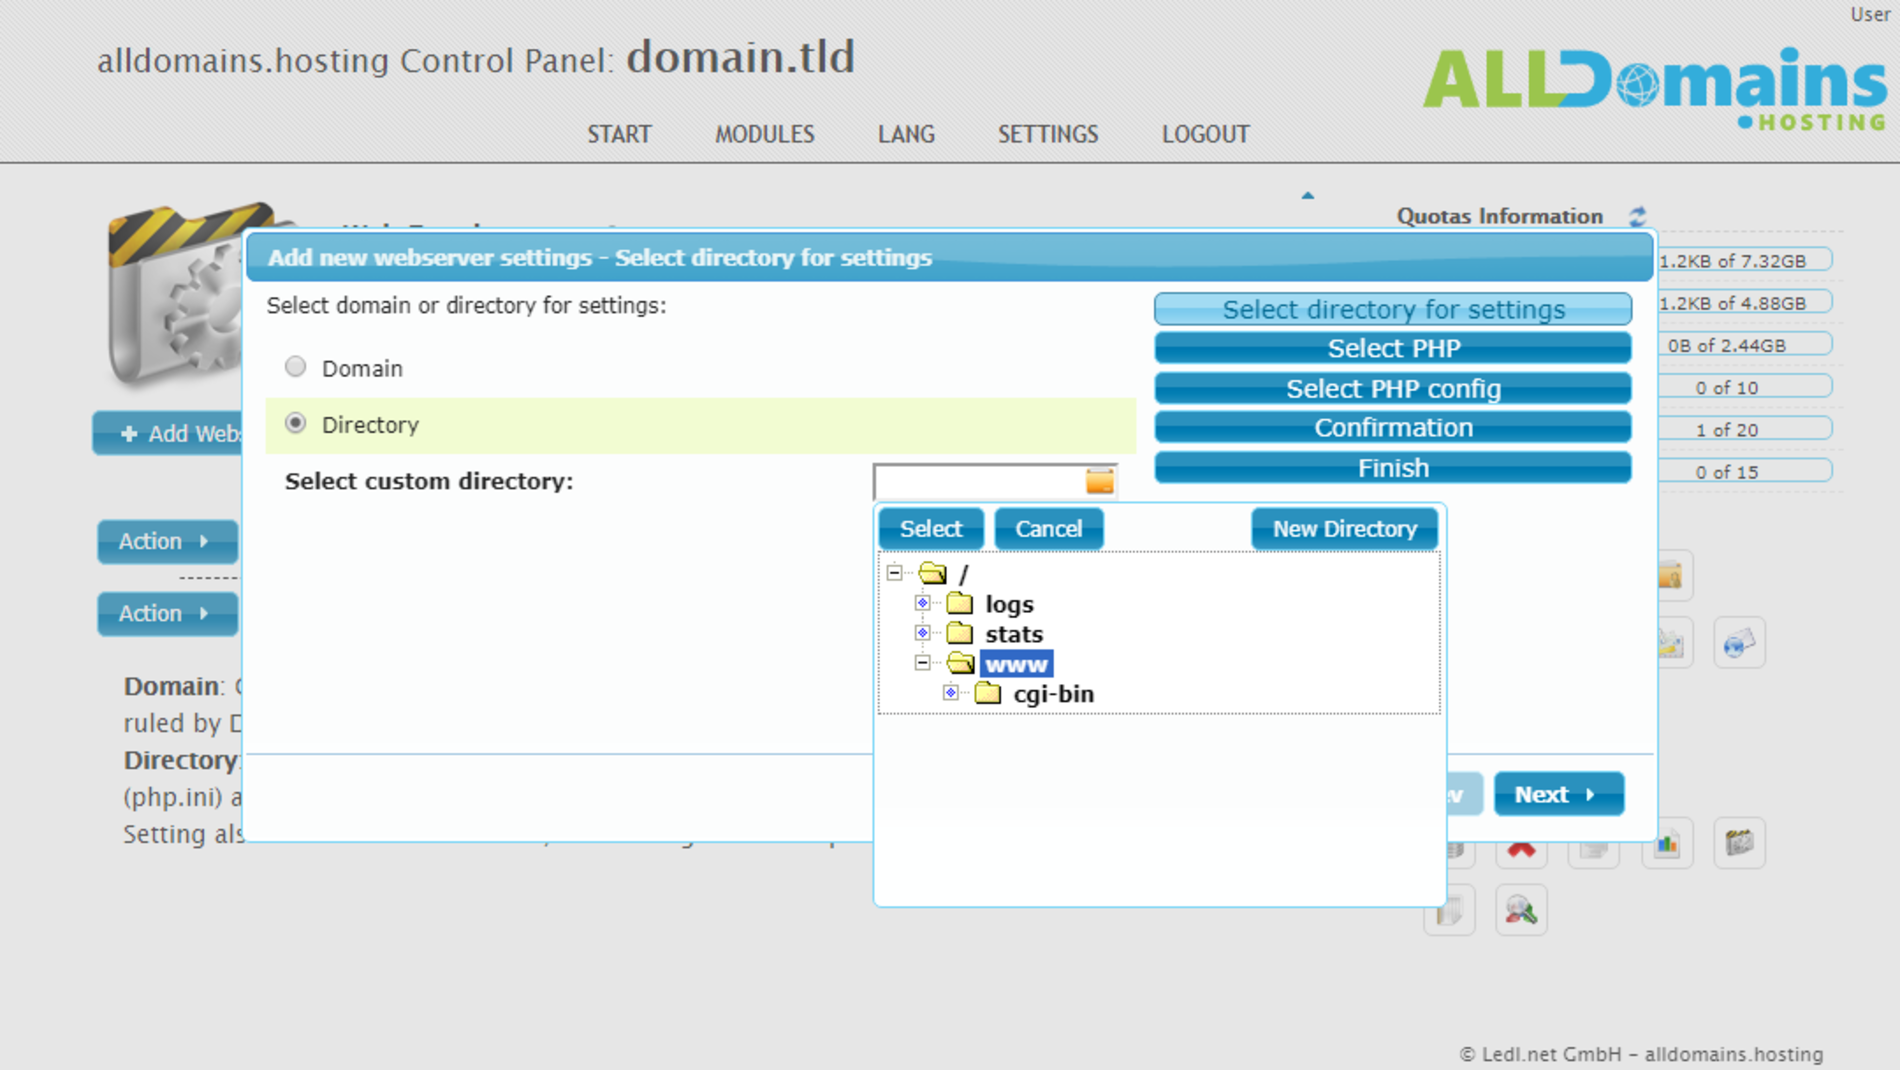
#Add Webserver Settings
With a click on "Add Webserver Settings" you can add new PHP settings.
Select directory for settings
You can select if the new settings should be applied for a certain domain or for a directory.
To continue click on "Next >".
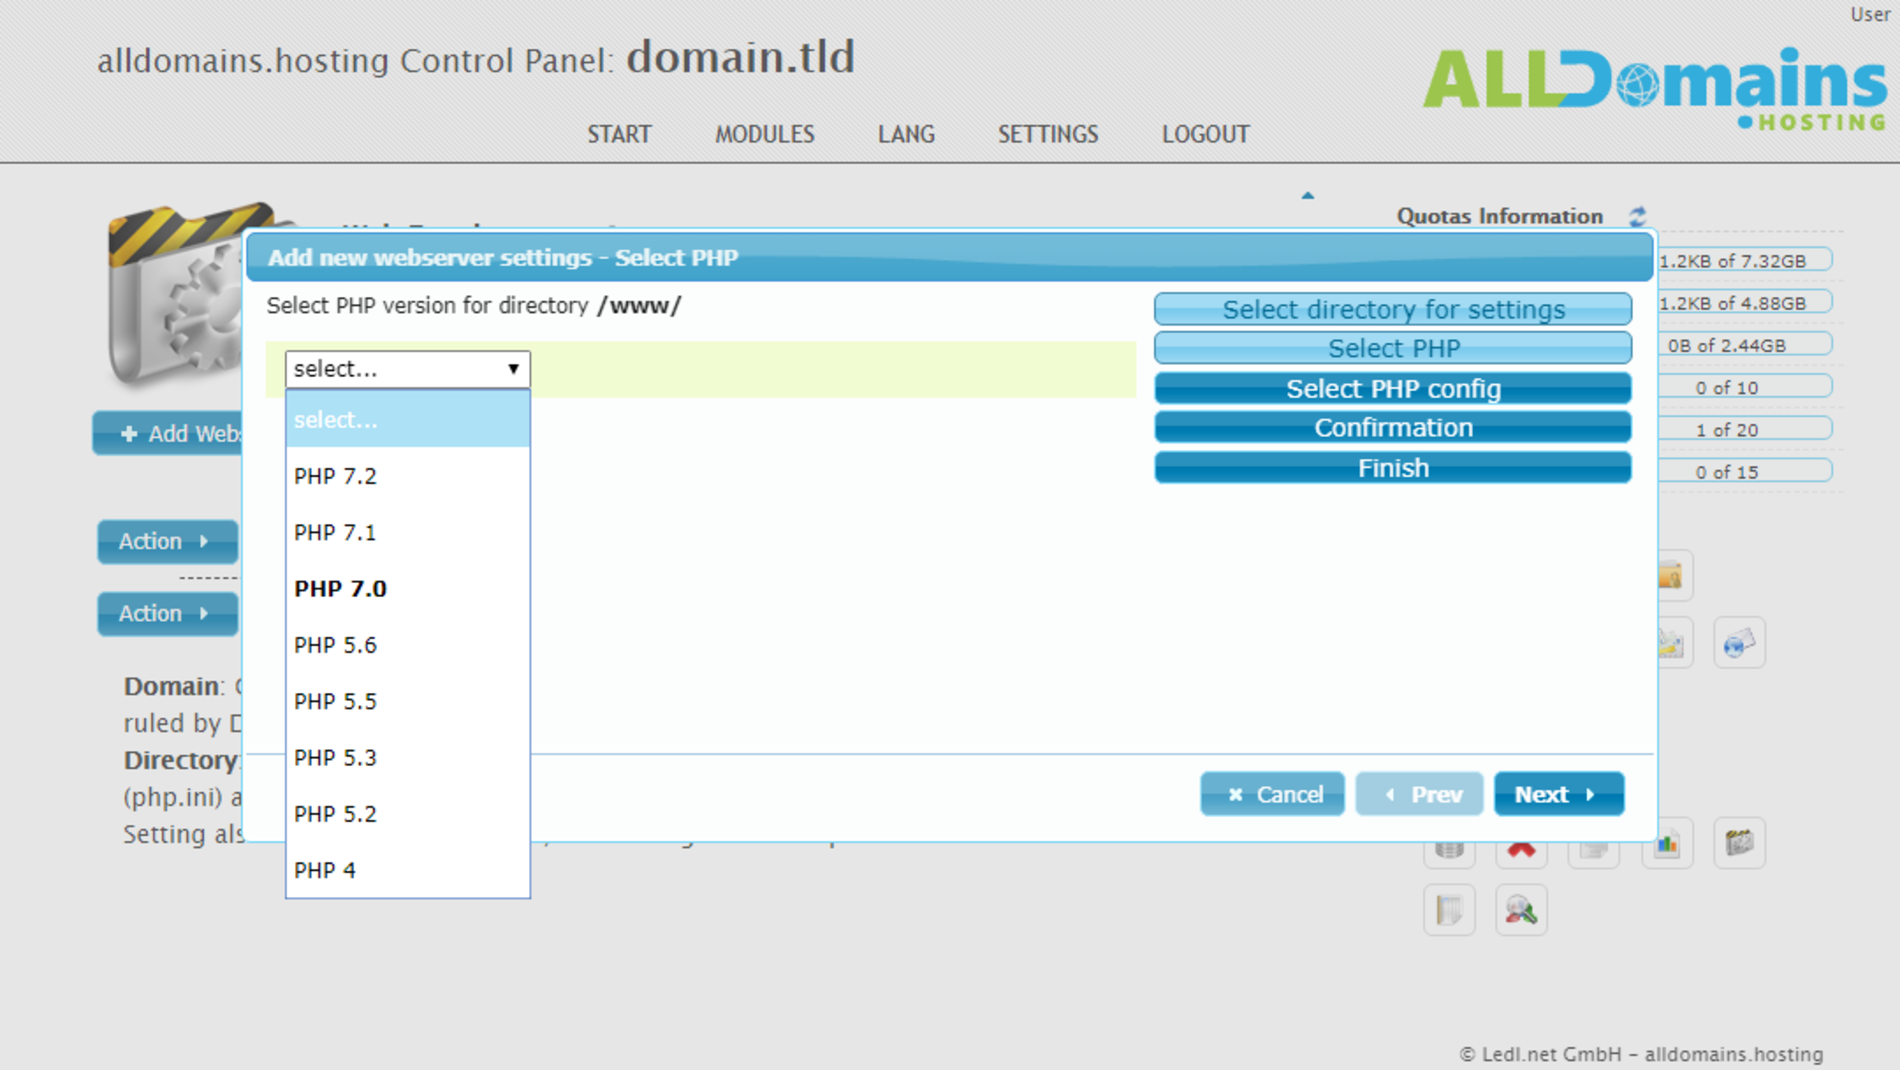
Select PHP
Now you can select the needed PHP version.
After that click on "Next >" to continue.
Select PHP config
Next you can select either if you want to use our "Default" PHP configuration, an "Existing custom configuration" or if you want to create a "New custom configuration".
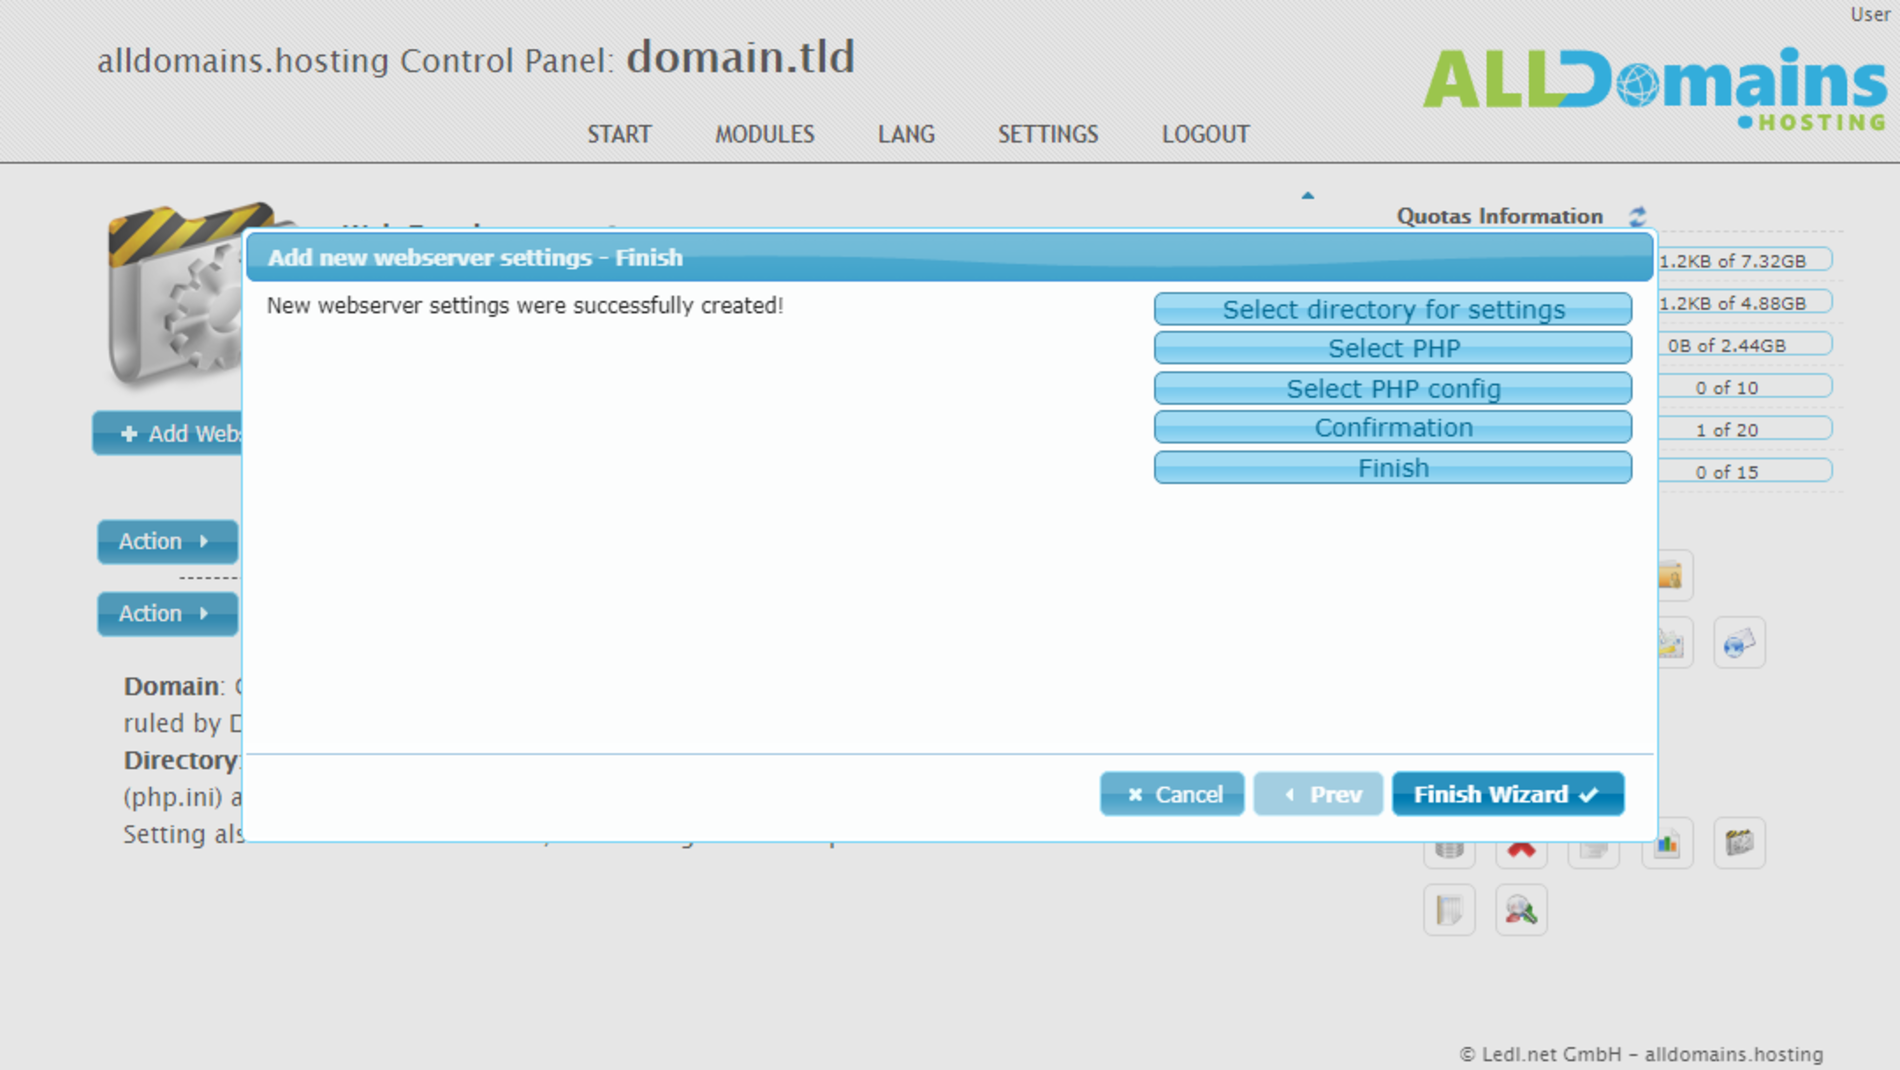
Confirmation & Finish
Check the selected settings and continue with "Next >" and finally click on "Finish Wizard" to apply the configuration.
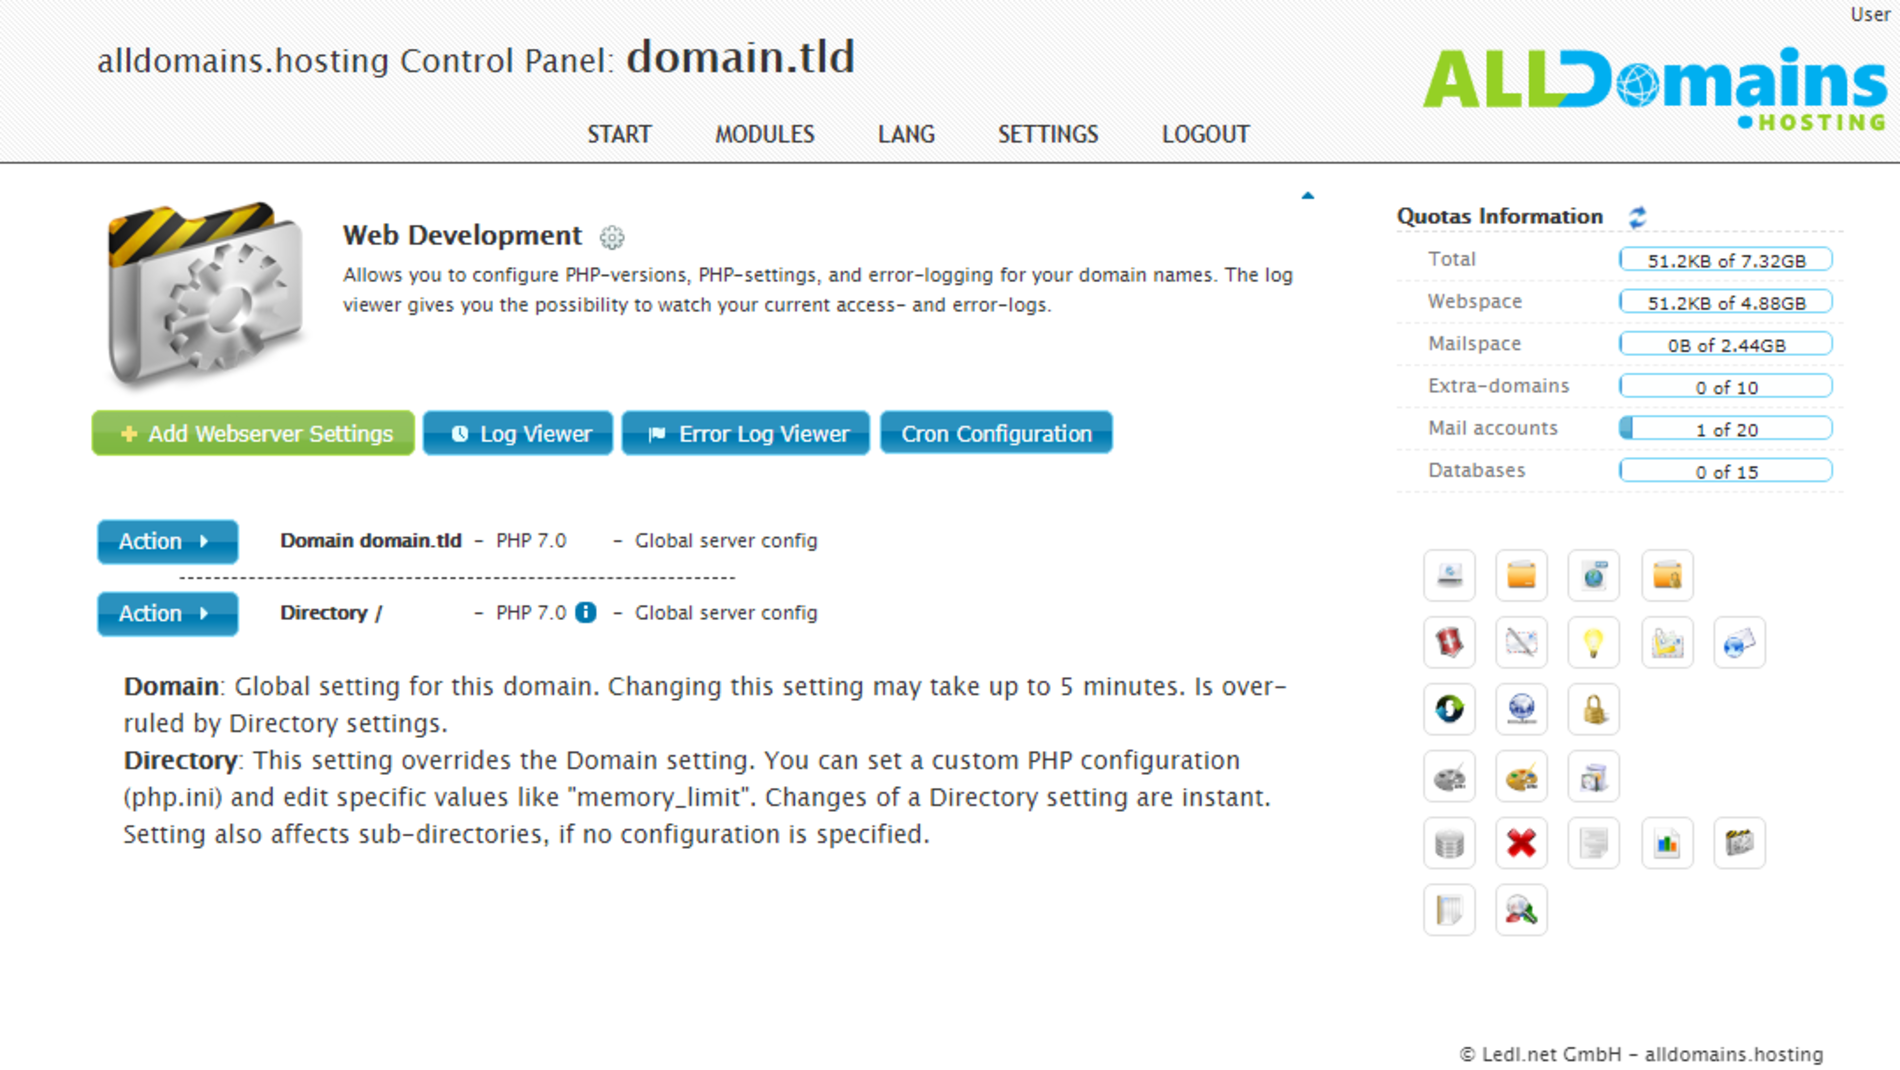


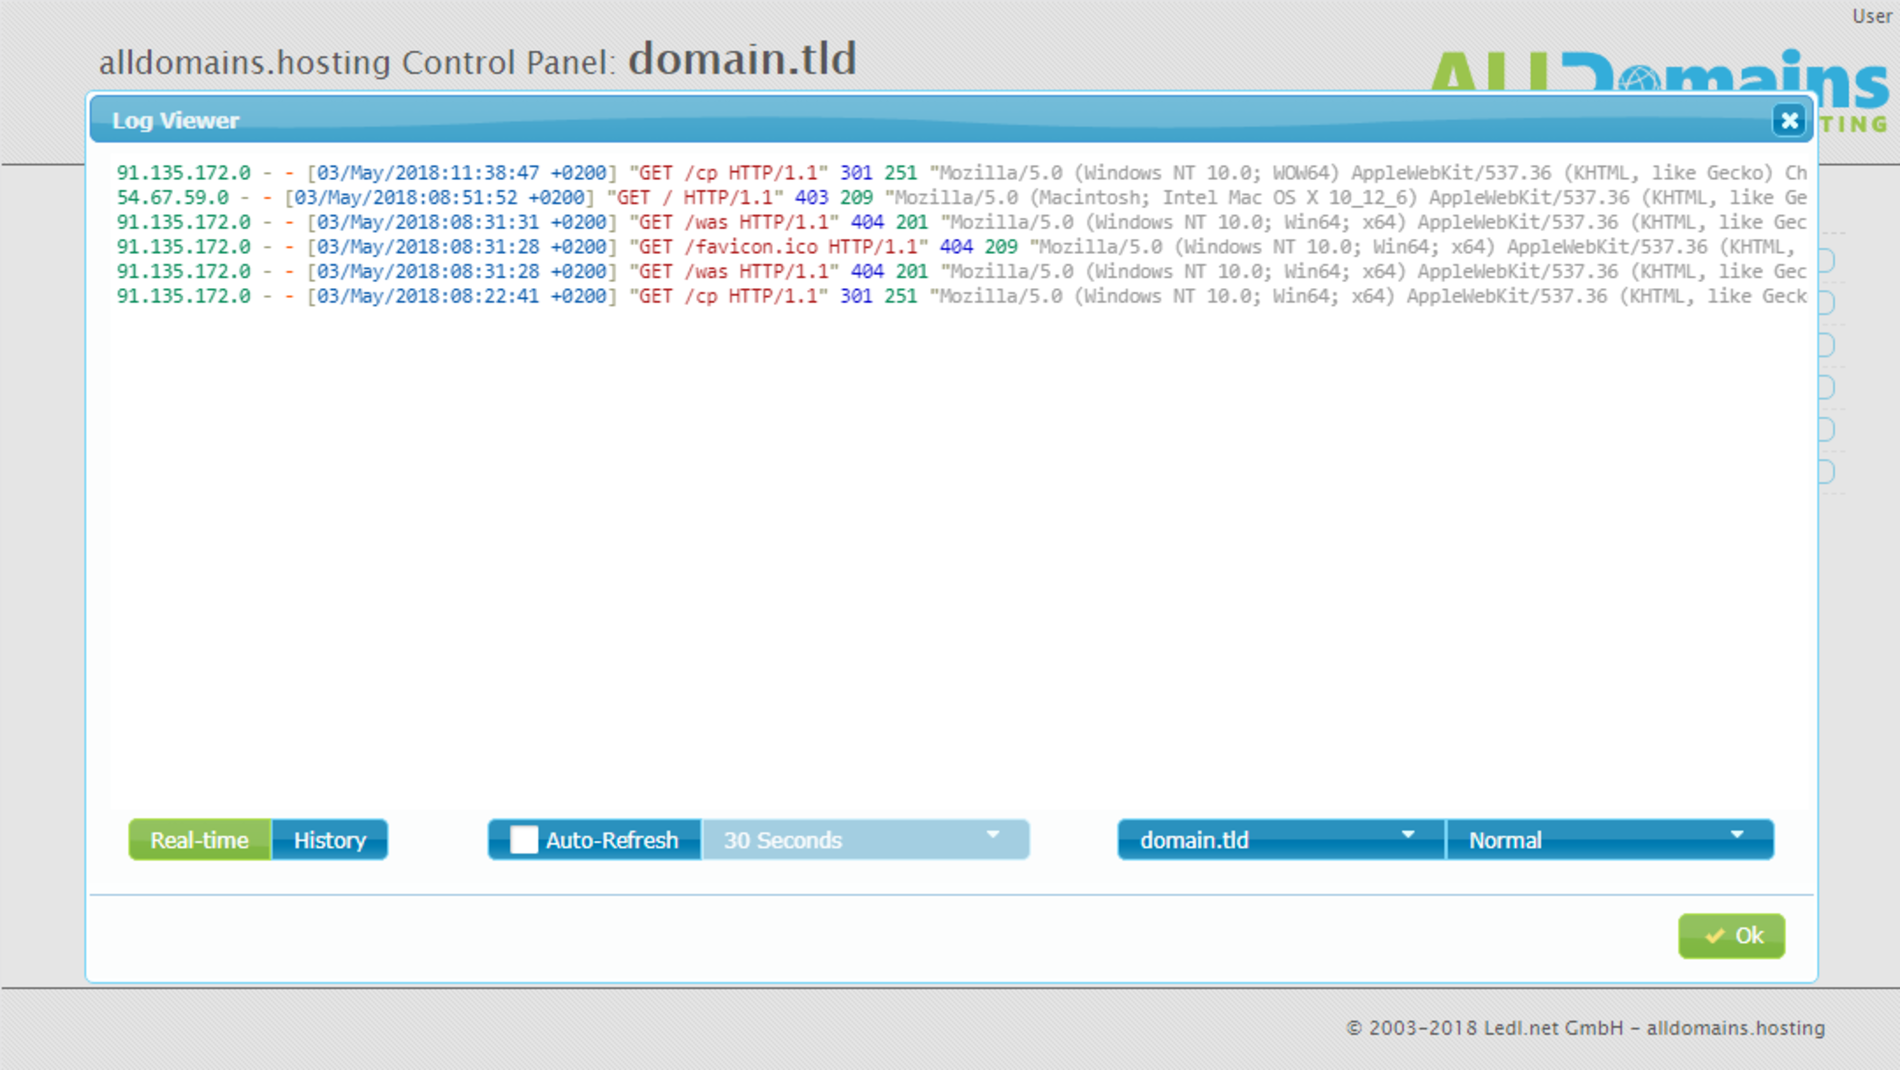
#Log Viewer and Error Log Viewer
With the help of the "Log Viewer" it is possible to view the access log of all your domains managed with this Control Panel. If you have more than one domain in your Control Panel you can select the domain at the bottom of the Log Viewer.
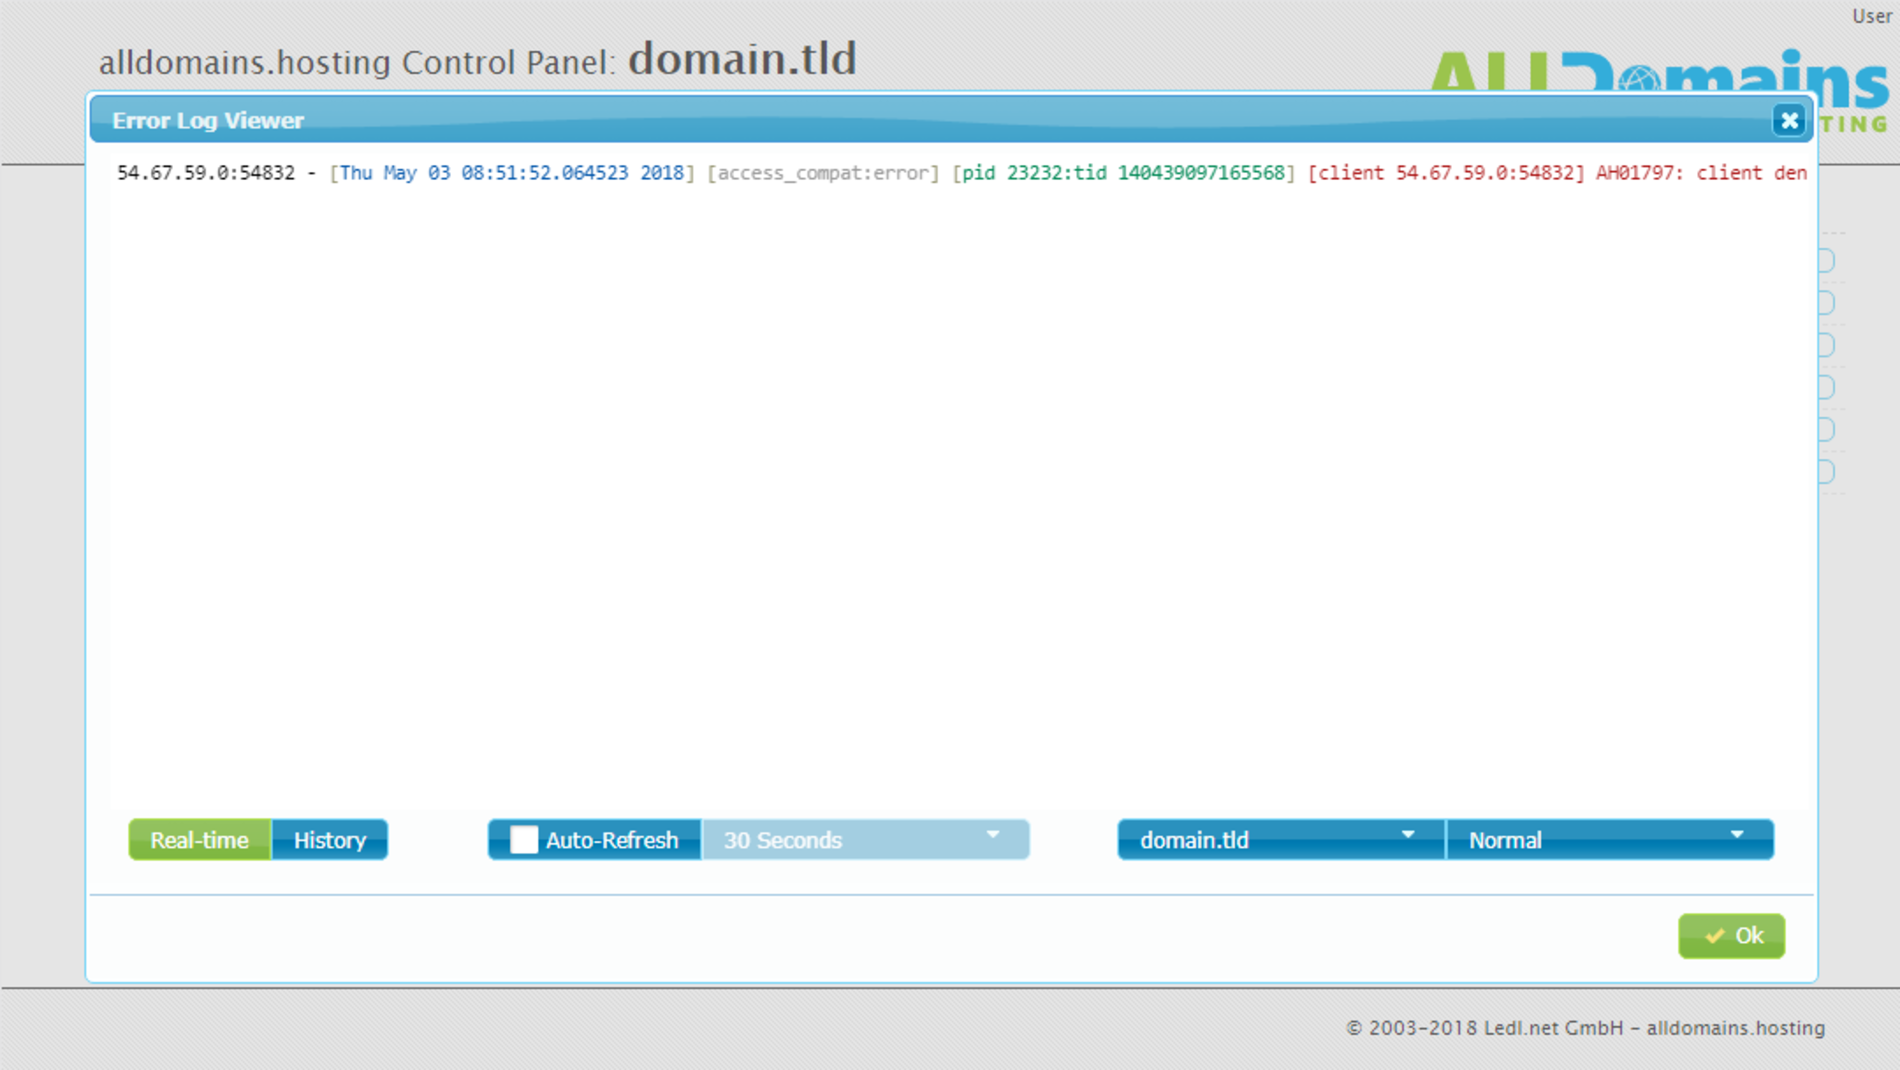
With the help of the "Error Log Viewer" you can view all activated error logs. Again you can select the domain in the bottom right corner.
#Cronjobs
With "Cron configuration" you are able to create and manage your cronjobs. Cronjobs are used to execute scripts automatically.
Note: Many of the offered software packages in the Software module of your Control Panel need cronjobs. If you have installed the software with our Software module, all needed cronjobs are created automatically for you.
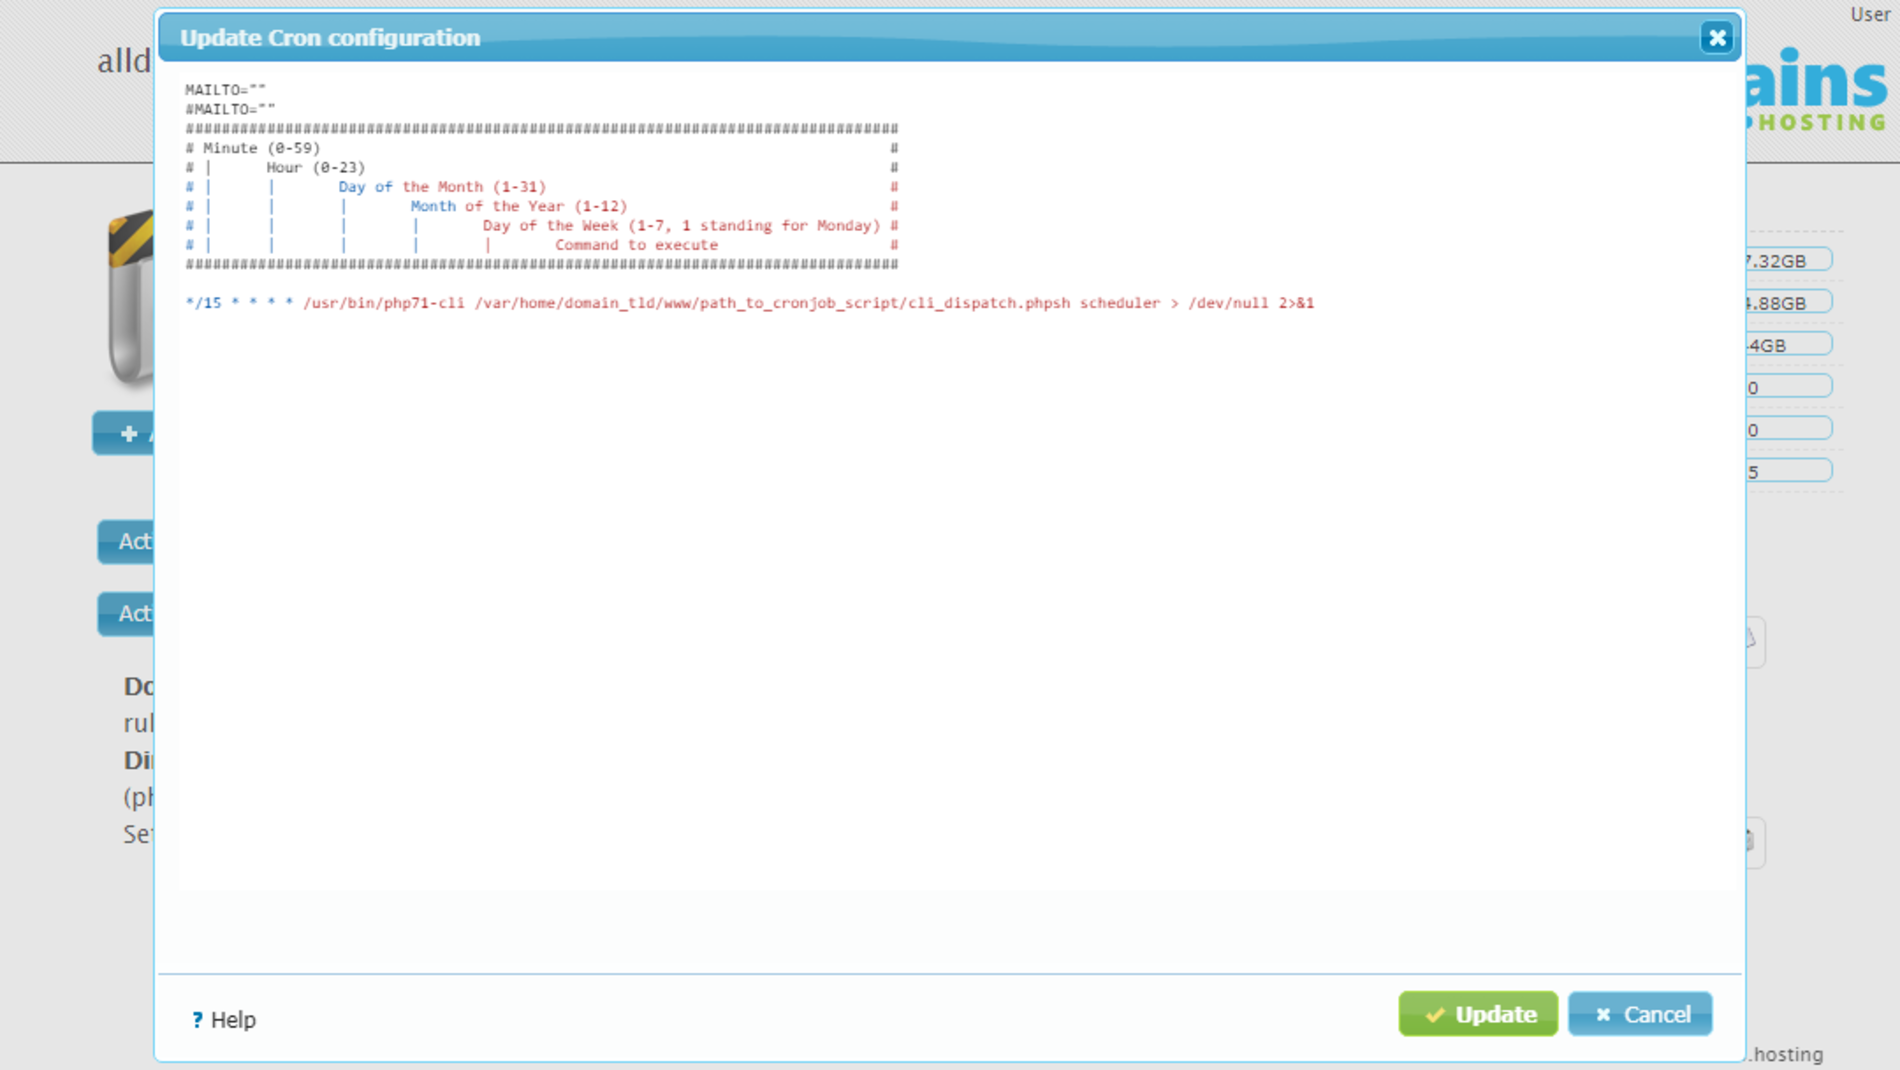
#Create cronjobs
Click on "Cron configuration" to open the crontab editor. Each row is one cronjob. To add a new one simply add one line with the following syntax:
* * * * * Command to execute
| | | | |
| | | | +----- Day of the week (1 – 7, 1 standing for Monday)
| | | +------- Month (1 - 12)
| | +--------- Day (1 - 31)
| +----------- Hour (0 - 23)
+------------- Minute (0 - 59) More useful information about the syntax of the cronjob can be found in the crontab-editor at "Help". Exampels of often used cronjobs: Typo3 Cronjob, all 15 minutes:
*/15 * * * * /usr/bin/php71-cli /var/home/yourdomain.tld/www/path_to_cronjob_script/cli_dispatch.phpsh scheduler > /dev/null 2>&1
OwnCloud/Nextcloud Cronjob with PHP5.6:
*/15 * * * * /usr/bin/php56-cli /var/home/yourdomain.tld/www/path_to_cronjob_script/cron.php > /dev/null 2>&1
OwnCloud/Nextcloud Cronjob with PHP7.1:
*/15 * * * * /usr/bin/php71-cli /var/home/yourdomain.tld/www/path_to_cronjob_script/cron.php > /dev/null 2>&1
Cronjob executed once per month:
@monthly /usr/bin/php70-cli /var/home/yourdomain.tld/www/path_to_cronjob_script.php > /dev/null 2>&1
You are able to use simplifications, a few of them are:
- @hourly - Cronjob will be executed once per hour
- @daily - Cronjob will be executed once per day
- @weekly - Cronjob will be executed once per week
- @monthly - Cronjob will be executed once per month
- @yearly - Cronjob will be executed once per year
#Edit cronjobs
To delete or edit an existing cronjob click on "Cron configuration". To save you changes click on "Update".